Reaction time is a measure of time a person takes to identify a stimulus and produce a response. For example an athlete’s audio reaction time is time elapsed between firing of gun shot (that starts the race) and him or her starting the race. Reaction time plays an important role in situations of immediate response like 100m Olympic race and applying break in speeding car to name a few.
In this miniProject, we create a reaction time meter that lets us measure reaction time for visual, audio and touch stimuli. Let’s get started.
Step 1: Video
Some things are better explained in an article like code and intricate details, while some are better experienced through a video for example in our case sounding of buzzer and changing OLED screen. Take a look at short attached video for complete experience.
P.S. As this article was written after preparing video, I will fill in missing details if any here.
Step 2: Parts and Tools
Following is the list of required electronics components (#count) needed for this miniProject.
- I2C OLED display (#1),
- Arduino nano (#1),
- Buzzer (#1),
- Relay (#1),
- SPDT slide switch (#1),
- Push button (#2) preferably one green and one red,
- 100 nf capacitor (#1) and
- 9V battery + connector, jumper wires and plastic box (10cm x 6cm x 3cm).
Take a look at attached image to get an idea for look of a component. (Don’t worry about the mesh of wire, we will cover it in later steps)
Following is the list of tools.
Now, we will go through visual, audio and touch reaction time measurement one by one and building circuit as we go through.
Step 3: Visual Reaction Time Measurement
Visual reaction time is the amount of time we take to respond to a visual stimulus, for example you suddenly see a glass drooping off the table and you respond to catch it.
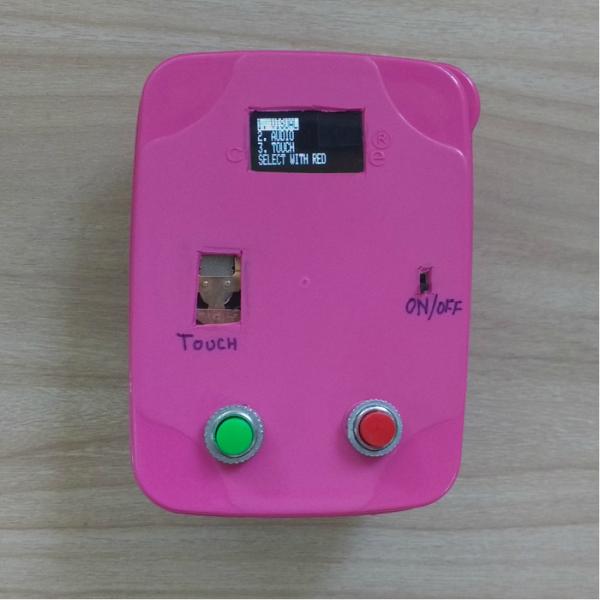
For visual reaction time measurement, we will put a white circle on I2C OLED after a random delay, person under test shall press red push button as fast he/she can on seeing this white circle.
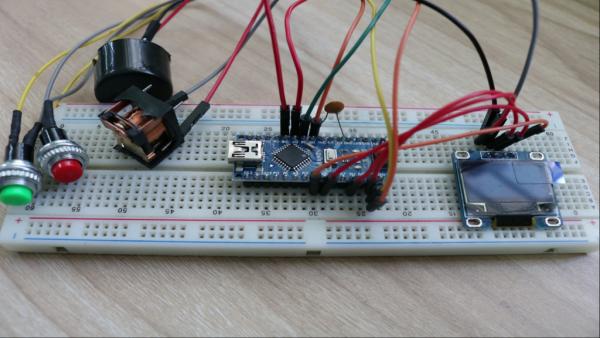
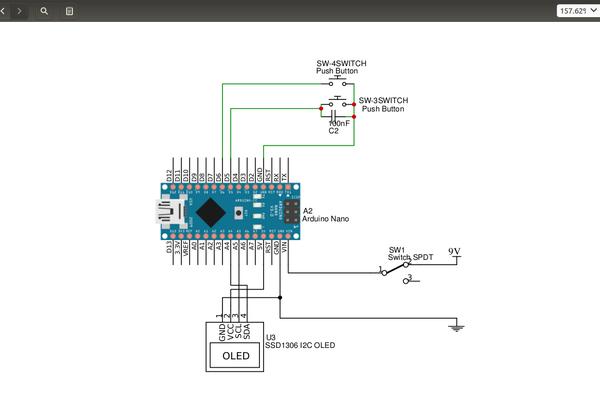
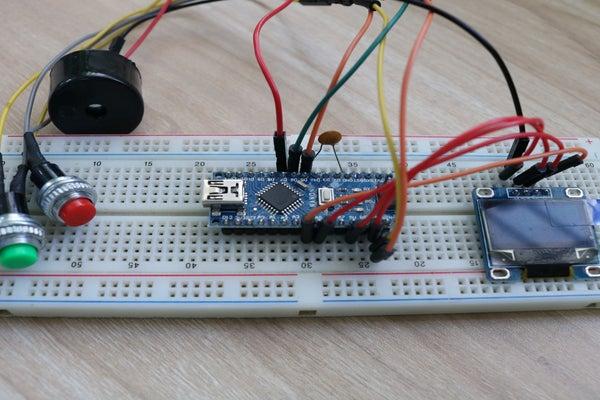
I connected I2C OLED display, arduino nano and two push buttons on a bread board using bunch of jumper wires according to attached schematic.
Green push button is used to toggle among the type of reaction time measurements we have in this meter.
Step 4: Audio Reaction Time Measurement
Audio reaction time is the amount of time we take to respond to audio stimulus, for example athlete’s reaction to referee starting the race.
For audio reaction time measurement, I added a buzzer to D7 pin of arduino nano, buzzer goes off randomly upon which user is supposed to press red push button as soon as possible.
Step 5: Touch Reaction Time Measurement
Touch reaction time is the amount of time we take to respond to touch stimulus, for example touching a hot surface and removing your hand from it.
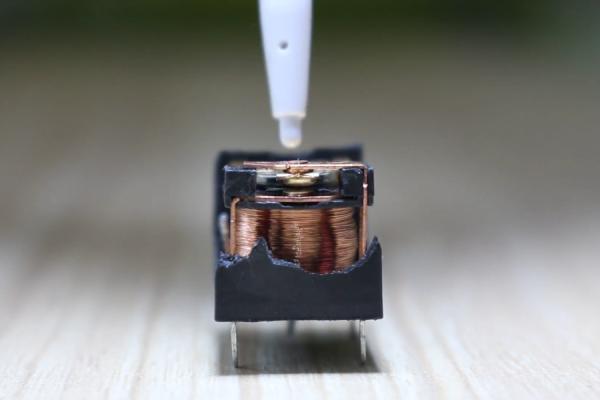
For touch reaction time measurement I am using a teared down relay with movable contact exposed. Movement of contact acts as touch stimuli i.e. when we apply 5V to the coil of relay, electromagnet gets activated pulling contact downwards (Movement is very small as seen in attached image but enough to feel). I connected coil of relay between ground and D8 pin of arduino nano.
Just for info I teared down relay with the help of pliers and hot blade. Please practice caution doing it.
Step 6: Complete Circuit
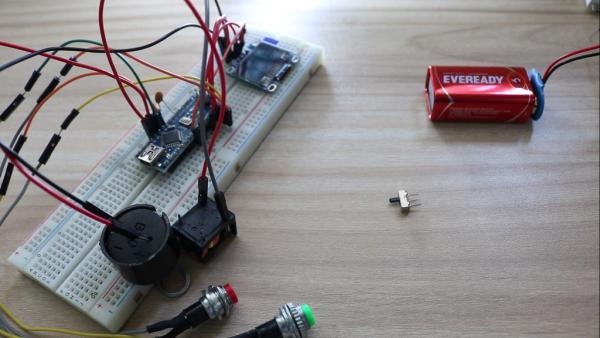
I am using a compact 9V battery to power this circuit and adding an ON/OFF switch completes the electronic hardware part of this meter.
Let’s look at the arduino code.
Step 7: Arduino Code
Let’s walk through main part of code. It would help if you download code and take a look at it in parallel.
I am using adafruit GFX and SSD1306 library to drive OLED.
Arduino code contains two build-in main function called setup() and loop(), former executes once on power up and rest of the time micro-controller executes loop().
Before setup(), I initialize all required variables and in setup() I initialize OLED following which information regarding what button to use for scrolling through menu is shown on OLED. I kept it in setup as we need to run it only once.
In loop() green push button is polled to select menu item and screen is updated using updateMenu() function. Once reaction time test is selected loadTest() function updates screen accordingly. Please go through this function on your own and let me know if you face any issue. These functions have repeating pattern of showing test relevant info on OLED, taking user input and displaying reaction time.
I didn’t copy paste code in text as it would have made this step very large and probably hard to follow. Nevertheless please don’t feel bad to ask me even a simplest doubt if you have any.
Source: Reaction Time Meter (Visual, Audio and Touch)