Lab Experiments involving the Heat Equation are usually one-dimensional exercises involving a copper pipe and a half-dozen thermocouples. But with DS18B20 “One-Wire” thermometer chips and an Arduino, it’s possible to measure hundreds of temperature values simultaneously. Here’s what my students Daniel Lund and Lawrence Lechuga and I came up with for 2-D temperature measurements.
We began by laying out a 10×10 grid of sensor locations on a 30cm-square plate of 5mm-thick aluminum. We laid Kapton tape in strips under where the sensor leads would be located, to prevent the leads from shorting against the aluminum plate; then we glued each sensor to the plate using thermal epoxy.
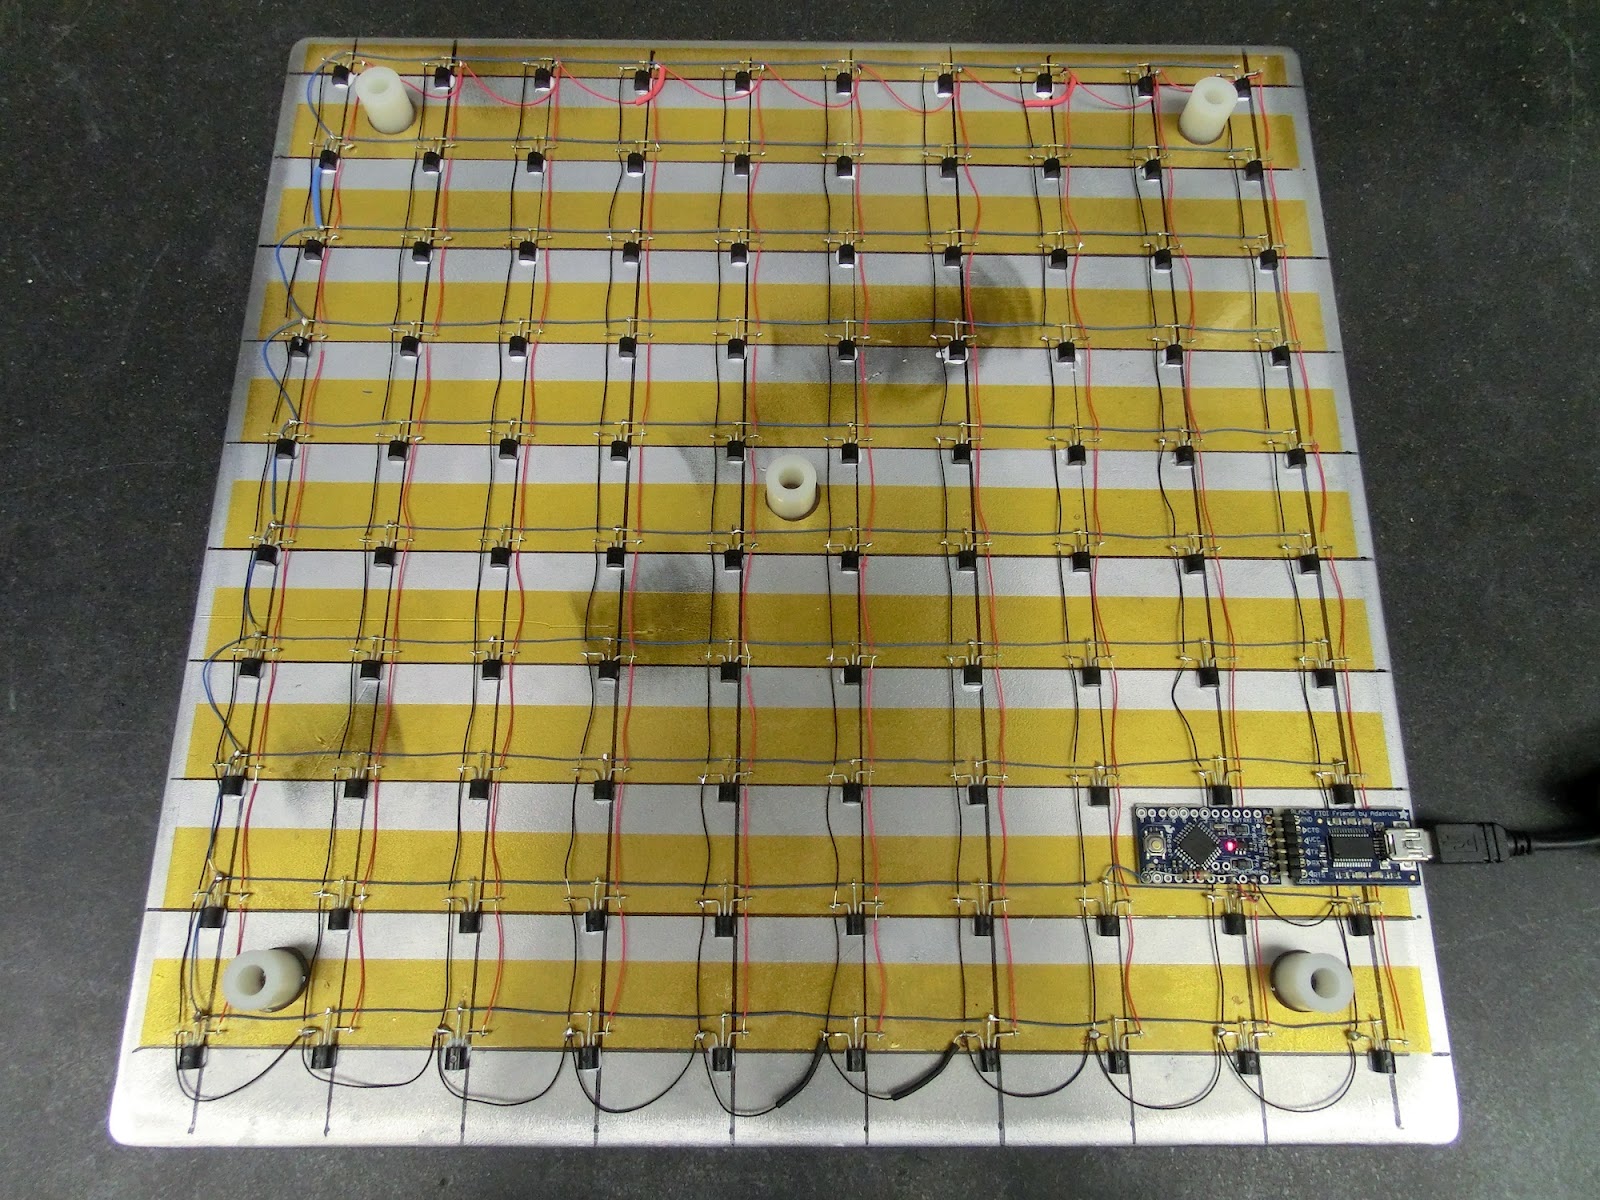
Next, we temporarily attached each sensor to an Arduino microcontroller running FindAddress.ino. This program first determines how many devices are on One-Wire bus; then for each device, it sends the address of that device to the Arduino serial port. A terminal emulator on the attached computer displays those addresses. By running this program with the sensors attached individually, we could then determine the hard-coded addresses of each sensor. One hundred tests later, we had a complete list of sensor addresses, ordered by their physical position on the grid.
Once we knew the individual addresses and corresponding locations of the sensors, we permanently wired all the sensors to the Arduino. Power and ground are provided by the USB connection to the computer, and the data pins for each sensor are all connected via a single wire to one input pin of the Arduino. The data bus is also connected to power via a 1k pull-up resistor. (Note: the datasheet for the DS18B20 calls for a 4.7k pull-up resistor, but we found that with 100 sensors on a single bus a 1k pull-up resistor provided more reliable operation.) The Arduino itself is connected to the computer via a “FTDI Friend” USB-serial converter board.
The completed hardware (bottom side) can be seen below. The plastic stand-offs allow it to be placed flat on a table with the bare top side up.
The final step in construction is to program the Arduino to measure the temperatures and send those temperatures (in order of grid position) to the computer. With this many sensors we found that we were straining the capacity of the microcontroller: although the ATmega328 chip on the Arduino board has 32k of program space, it has only 2k of RAM. This RAM is used by the serial and One-Wire communications libraries as well as by our program, and when the RAM is full the Arduino behaves erratically. Our solution was to store the array of sensor addresses in the 1k array of EEPROM on the microcontroller. This required a second Arduino program (address_storage.ino) which was run once to store the sensor address array in EEPROM. Once that program did its job, we uploaded our final program, ThermoPlate.ino.
The ThermoPlate.ino program operates in two steps after the initialization procedures: first, it sends out a “broadcast” message on the One-Wire bus telling all sensors to record the current temperature. Next, it goes through all the sensor addresses stored in EEPROM. For each address it sends a temperature inquiry to that address, converts the sensor response to °C, and sends the temperature as text down the serial line to the computer. When the Arduino has gotten the temperature from each sensor it sends an EOL character to the serial port, then repeats the process. That’s the final output of the device: line after line of serial data, each line containing 100 temperatures in left-to-right, top-to-bottom order. With our 16-MHz Arduino, it takes just under 2 seconds to measure all points, with the limiting factor being the speed of the One-Wire bus itself.
Read more: Quantitative Two-Dimensional Temperature Measurements