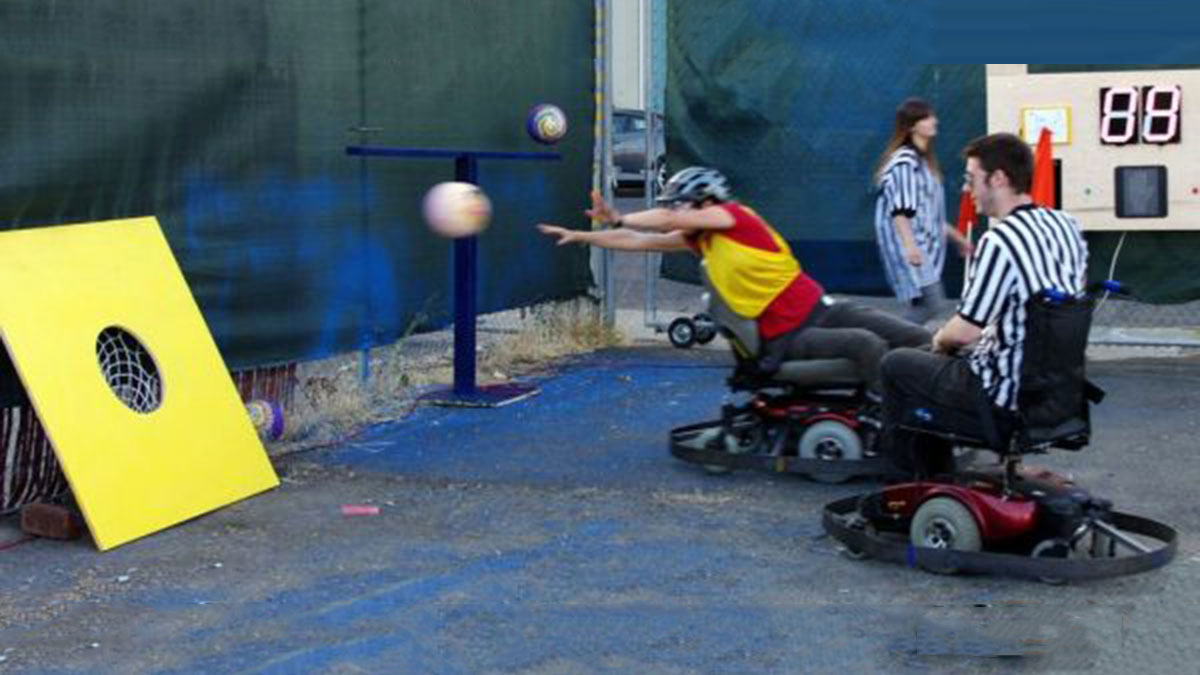
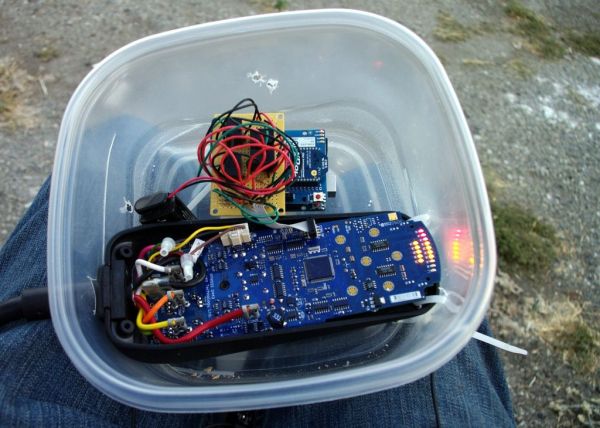
Psycho Scooter Scramble is a blind-driving electric wheelchair game. It consists of two riders, strapped into electric wheelchairs, and two blindfolded pilots, who remotely control the wheelchairs from the sidelines based on information given over headset by their driver.
The basic mechanic is simple: players must drive across the court to get a ball from a stand, then drive back across to put the ball in a
hoop. This action is repeated until all four balls have been scored or the timer runs out.

Since there is an inevitable disconnect between the pilots’ steering and their teammates’ intentions, wheelchairs zigzag across the court at high speeds, colliding with each other, ball stands, the scoreboard, and most everything else; all the while, taking full advantage of the custom steel bumpers.
Psycho Scooter Scramble was created for the Creation Challenge. Team Instructables includes Amanda Ghassaei, Audrey Love, Eric Wilhelm, Gabriella Levine, Greg Johnson, Jake Rogers, Jessy Ellenberger, Matthew Dalton, Noah Weinstein, and Randy Sarafan.
Step 1: Go get stuff
You will need:
per cart**:
(x2) electric wheelchair
(x1) 1″x1″x10′ square steel stock
(x1) 2.5″x.175″x20′ steel flat bars
(x1) Arduino
(x1) Wireless SD Shield
(x1) Xbee S1
(x1) PC Board
(X12) male header pins
(x4) relays
(x4) 2K resistors
(x4) 1K resistors
(x4) 5.1K resistors
(x1) 9V battery connector
(x1) 9V battery
(x1) 22 AWG stranded wire
(x1) wireless headset
(x1) Large-ish sealable plastic food container
(x1) assorted zip ties
control pedestals:
(x1) Arduino
(x1) Wireless SD Shield
(x1) Xbee
(x1) 9V battery connector
(x1) 9V battery
(x1) 4′ x 8′ sheet 3/4″wood
(x2) floor flanges
(x2) 1/2″ threaded metal pipe
(x2) 24″ x 24″ acrylic sheet
scoreboard:
(x1) 4′ x 8′ x 3/4″ plywood sheet
(x4) flanges
(x2) 48″ threaded pipe
(x2) threaded nipples
(x2) elbow joints
(x2) small whiteboards
(x4) 36 x 24″ 1/8″ black acrylic sheet
(x2) 36″ x 24″ x 1/8″ orange acrylic sheet (for lettering)
(x2) 12″ 7-segment display
(x1) Arduino
(x1) Annoying buzzer
(x1) Light-up stop hand
(x1) Red arcade button
(x1) green arcade button
(x1) PC Board
(x1) 5V relay
(x1) 5V / 120V 10A solid state relay
(x2) giant 7 seg display
(x2 darlington uln2803
goal:
(x1) 8′ x 4′ x 3/4″ plywood board
(x2) Basketball nets
(x1) Staple gun
ball holders:
(x8) Kick balls
(x2) 4′ x 8′ plywood sheet
(x2) 4×4 wood beam
(x4) 2×4 across
(x1) 20′ thin metal rod
miscellaneous:
(x2) referee shirts
(x2) whistles
(x1) 1 yard of bright orange fabric
(x1) 3′ dowel rods
**Cart materials are for ideal conditions. Parts may vary depending on the electric wheelchair you are confronted with.
Step 2: About electric wheelchairs
You will need to get an electric wheelchair. While you may be tempted to get a mobility scooter, you should resist this urge because mobility scooters are manually steered and you will need something that can be put into full autopilot.
You can get working electric wheelchairs on Craigslist for much cheaper than you may ever think possible. We got ours for about $150 each. We heard one of the ones we bought typically retails for about $11,000. That is pretty hefty savings.
Some of the wheelchairs that we bought were sold as-is. They did not turn on. We later learned that “as-is” is typically code for “needs new batteries.” We solved this by purchasing some 12V deep-cycle forklift batteries for $30 a piece. These turned out to be gel cell batteries that could be positioned on any side. They worked like a charm.
Once we had all 4 electric wheelchairs up and running, much silliness ensued. After we got that out of our system, we then proceeded to fully mod them.
Step 3: Fit new batteries
If you end up replacing the batteries in your wheelchair, chances are that you will need to mod the battery compartments to accommodate. The gel cells that we got were great because we could position them in any orientation we wished. This gave us a lot of flexibility to make them fit.
When necessary we cut away non-structural bits to give the batteries more room and/or build new platforms or enclosures to hold the batteries in place. When necessary, we also needed to extend the battery wires to reach the battery terminals.
While this was happening, we were also charging all of the batteries.
Step 4: Build armor frames
In order to maintain safety on the court, we built reinforced steel bumpers around each of the wheelchairs at a fixed height. In this way, the wheelchairs would collide bumper-to-bumper when they would eventually collide.

Tools needed for this step:
Angle Grinder with metal sanding disc
Grinder and Cut-off wheel
MIG welder
For all four chairs, we used two 1″x1″x20′ steel square stock to build out the frames. We decided that five support struts would be sufficient to weld continuous steel flat bar to. Each chair was a little different, and needed to be modified differently. Once the main frame supports were welded to the frame, we could weld the flat bar to the supports. This part was a bit tricky, and took a bit of teamwork.
Each bumper was designed to float 3 inches from the ground, and we created a wood jig to guide the flat bar around the steel struts as they were welded and bent in to place. We worked as a team, because the flat bar is long and wobbly. We used one 2.5″x.175″x20′ per cart – tacking on the edge of the flat bar as it hovered on a 3″ jig from the ground, and then bent and tacked around the frame.
(x1) 1″x1″x10′ square steel stock
(x1) 2.5″x.175″x20′ steel flat bars
(x1) Arduino
(x1) Wireless SD Shield
(x1) Xbee S1
(x1) PC Board
(X12) male header pins
(x4) relays
(x4) 2K resistors
(x4) 1K resistors
(x4) 5.1K resistors
(x1) 9V battery connector
(x1) 9V battery
(x1) 22 AWG stranded wire
(x1) wireless headset
(x1) Large-ish sealable plastic food container
(x1) assorted zip ties
For more detail: Psycho Scooter Scramble using an Arduino
