
I call it the C041D-2020
I made this during the second COVID lockdown in UK, from ideas borrowed from about 5 other projects I found here on Instructables and also on Youtube. As you can see from the video it makes acidy noises by covering the photo resistors, or adding lighter to the photo resistors. The Arduino code is also borrowed from other projects here in Instructables.
The noises are produced by the software (Ableton Live/ Lite), using a Plugin called TAL-NoiseMaker, the potentiometers are MIDI-mapped to effects.
Supplies
PARTS
1) Just about any Arduino board, I used an ‘Uno’
2) Some Photoresistors, I used 4, it also worked with just one
3) Some potentiometers, I used 5 potentiometers and a slider, – IMPORTANT – they need to be 10k (linear), they are called ‘B10K’
4) A resistor, I used 300ohm, I have seen instructions to use a 10k
5) Make some kind of box or enclosure with a top panel or 3D print one
6) Some knobs for the potentiometers
SOFTWARE
1) Hairless MIDI to Serial Bridge
https://projectgus.github.io/hairless-midiserial/
2) Ableton Live or Lite (you can get a free version here)
https://splice.com/daws/38929163-live-10-lite-vst-…
3) TAL-NoiseMaker (free VST Plugin)
https://tal-software.com/products/tal-noisemaker
4) Arduino IDE
https://www.arduino.cc/en/software
Step 1: Make Some Kind of Box
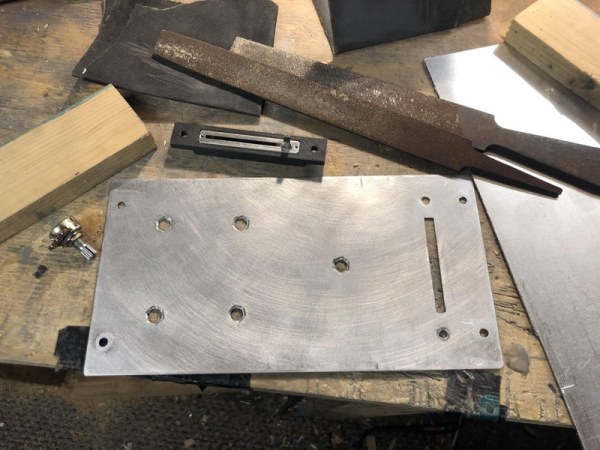
Make some kind of box or enclosure with a top panel, or 3D print one. I used some scrap wood, and 1mm aluminum sheet, drilled hols for the potentiometers, and photoresistors. My dad milled a slot for the slider. I used duct tape to cover the sides of the box, made some rubber feet from an old car tyre innertube. Decorated the box (see pdf logo), and used clear Gorilla tape to stick on the cutout paper. Add knobs to your potentiometers. I designed and 3D printed some stuff for this project, they may work with yours, you can download
Step 2: Wire Up the Device!
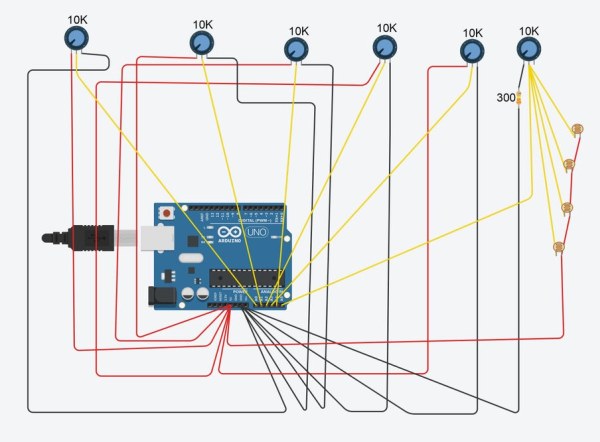
Just use the guide in the image gallery, to join all the parts together – I’m pretty sure this is correct (I drew up the schematic diagram from memory, a few days after I finished the project and closed up the box).
When I first made this, I didn’t use the photoresistors, it was just controlled by the knobs, then added the photoresistors later.
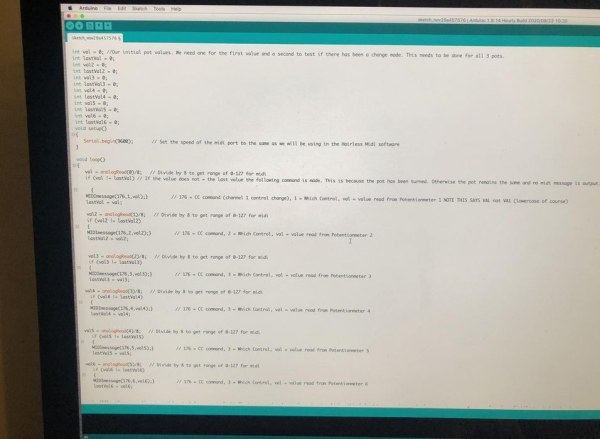
Step 3: Add the Code to Your Arduino
If this is your first time using Arduino, have a search on google or youtube for a guide on how to setup your board for the first time using Arduino IDE
Then add the code to your board:
int val = 0; //Our initial pot values. We need one for the first value and a second to test if there has been a change made. This needs to be done for all 3 pots.
int lastVal = 0;
int val2 = 0; int lastVal2 = 0;
int val3 = 0; int lastVal3 = 0;
int val4 = 0; int lastVal4 = 0;
int val5 = 0; int lastVal5 = 0;
int val6 = 0; int lastVal6 = 0;
void setup() { Serial.begin(9600); // Set the speed of the midi port to the same as we will be using in the Hairless Midi software }
void loop() { val = analogRead(0)/8; // Divide by 8 to get range of 0-127 for midi if (val != lastVal) // If the value does not = the last value the following command is made. This is because the pot has been turned. Otherwise the pot remains the same and no midi message is output. { MIDImessage(176,1,val);} // 176 = CC command (channel 1 control change), 1 = Which Control, val = value read from Potentionmeter 1 NOTE THIS SAYS VAL not VA1 (lowercase of course) lastVal = val;
val2 = analogRead(1)/8; // Divide by 8 to get range of 0-127 for midi if (val2 != lastVal2) { MIDImessage(176,2,val2);} // 176 = CC command, 2 = Which Control, val = value read from Potentionmeter 2 lastVal2 = val2; val3 = analogRead(2)/8; // Divide by 8 to get range of 0-127 for midi if (val3 != lastVal3) { MIDImessage(176,3,val3);} // 176 = CC command, 3 = Which Control, val = value read from Potentionmeter 3 lastVal3 = val3;
val4 = analogRead(3)/8; // Divide by 8 to get range of 0-127 for midi if (val4 != lastVal4) { MIDImessage(176,4,val4);} // 176 = CC command, 3 = Which Control, val = value read from Potentionmeter 4 lastVal4 = val4;
val5 = analogRead(4)/8; // Divide by 8 to get range of 0-127 for midi if (val5 != lastVal5) { MIDImessage(176,5,val5);} // 176 = CC command, 3 = Which Control, val = value read from Potentionmeter 5 lastVal5 = val5;
val6 = analogRead(5)/8; // Divide by 8 to get range of 0-127 for midi if (val6 != lastVal6) { MIDImessage(176,6,val6);} // 176 = CC command, 3 = Which Control, val = value read from Potentionmeter 6 lastVal6 = val6;
delay(10); //here we add a short delay to help prevent slight fluctuations, knocks on the pots etc. Adding this helped to prevent my pots from jumpin up or down a value when slightly touched or knocked. }
void MIDImessage(byte command, byte data1, byte data2) //pass values out through standard Midi Command { Serial.write(command); Serial.write(data1); Serial.write(data2); }
Step 4: Install the Apps to Make Music and Test

INSTALL:
1) Hairless MIDI to Serial Bridge (this turns the serial data from the Arduino into midi code)
2) Ableton Live or Lite
3) TAL-NoiseMaker (free VST Plugin, that runs within Ableton)
TEST YOUR DEVICE
Plug your board into your PC USB port – (I have an Apple Mac)
Run the Hairless MIDI app, make sure you have flashing lights on the app and you can see the serial data running – IMPORTANT – don’t have the Arduino IDE app running or open in the background, or the Hairless MIDI app won’t pick up the serial code to send to Ableton.
Keep the Hairless MIDI app running and open up Ableton, and go to your preferences, and set up your device in your MIDI settings.
Step 5: Make Some Noises!
If you have not used Ableton before, there are plenty of tutorials on Youtube to show you how to get started. Then make a midi track, and use the TAL-NoiseMaker plugin, there is a preset called ‘LD Acid Saw TAL’, I used this setting, and configured a bunch of the filters to be MIDI-Mapped to the pots on the device.
Source: Photoresistor Arduino Midi Theremin