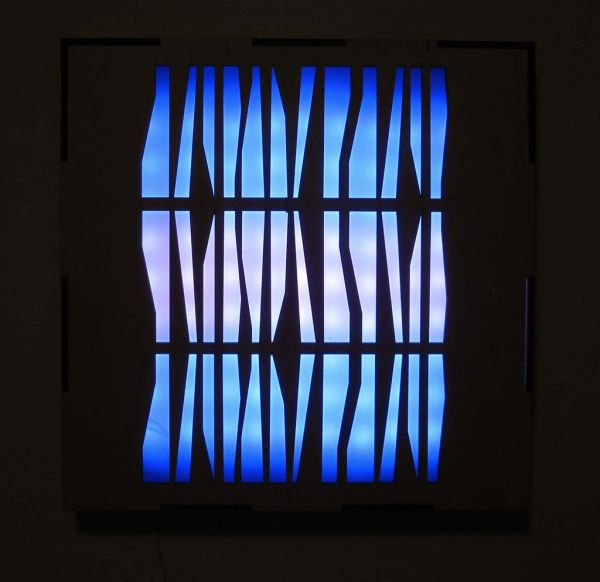
Dorm rooms are notorious for their dreadful lighting, so I wanted to make a cool alternative light source for my room at school. I made it phone controlled so there would be an easy and wireless way to change the color of the lighting.

The lighting consists of Tricolor LED Strips and are controlled by a phone through an app. The app is able communicate with the Arduino via bluetooth by using the Seeed Bluetooth Shield.
Step 1: Materials
(x1) Arduino Uno (RadioShack #276-128)
(x3) Tricolor LED Strip (RadioShack #276-249)
(x1) Universal 1000mA AC Adapter (RadioShack #273-316)
(x1) M-type Adaptaplug (RadioShack #273-344)
(x1) Grid-Style PC Board (RadioShack #276-149)
(x1) Seeed Bluetooth Shield
(x1) Android Phone or Device
(x1) 36″x24″x1/4″ plywood
(x1) 15″x11″x1/4″ milky white acrylic
(x4) Wood screw #6 x 3/8″
(x8) Washer #6 small
Step 2: Bluetooth shield
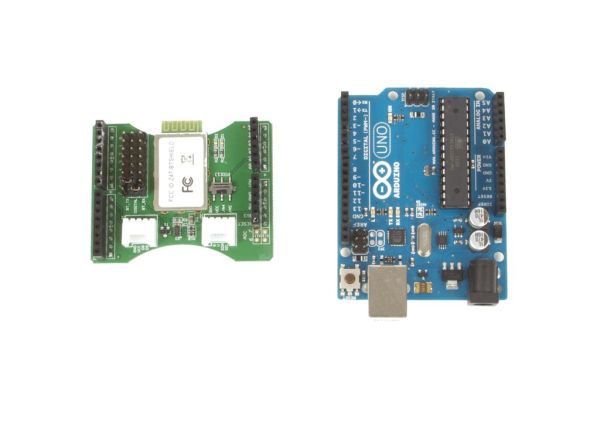
Fit the bluetooth shield onto the Arduino.
Arrange the jumpers on the board like in the first photo above. The first jumper should be connected to digital pin 7 and BT_RX and the second jumper should be connected to digital pin 6 and BT_TX. The shield will not be able to act as the bluetooth slave if the jumpers are not connected properly.
Step 3: Arduino with Bluetooth
Load the following code onto the Arduino in order to set up your Arduino as the bluetooth slave:
If the bluetooth is working correctly, a red and a green LED will flash one after the other in sequence on the shield. If this does not start happening a few seconds after you load the code onto the Arduino, try power cycling the Arduino and reloading the code.
Step 4: Processing and Android
I used Processing to create an app for my Android device. It provides good documentation for use with Android and is perfectly adequate for a simplistic app like the one I created for this project. Its format is also similar to the Arduino software, which makes it easy to use. I used a PC running Windows 8 and I tested the App on a Samsung Galaxy SIII and a Nexus tablet.
For the most part, you should follow the wiki to set everything up, but I have also included my own instructions below. I have simplified parts that I think the wiki does a good job of explaining and have expanded on other parts. I have also added additional tips that I used to get mine to work. Not everything worked perfectly every step of the way, so be patient. I have tried to include everything I did to get things working whenever I hit a road block. Note: If you are using a Mac, not all of my instructions will apply to you and I suggest you more closely follow the wiki page.
Here is the link for the wiki page on Processing with the Android:
http://wiki.processing.org/w/Android
USB Debugging
Once you have installed Processing, the Android SDK, and all of the necessary platforms and packages, you will need to enable USB debugging on your device.
On my Samsung Galaxy S III, I went to Settings then Developer options then checked USB Debugging. On a Nexus tablet, go to Settings then About tablet then click Build number seven times to activate USB debugging.
USB Drivers
If you haven’t already, plug your phone into your computer and install USB drivers for your device. I was able to download everything for my phone from this site:
http://developer.samsung.com/android/tools-sdks/Samsung-Andorid-USB-Driver-for-Windows
This is only necessary if you are using a PC.
Running a sketch (first attempt)
Open processing and switch from Standard mode to Android mode by clicking on the drop down menu on the top right corner of the window and selecting Android. To switch to Android mode, you may need to restart Processing after you have done this.
Copy and Paste the following code into your Processing sketch. This is a sketch that will turn the screen green if the Android device is able to find the Seeed Bluetooth and then turns purple once it has connected to the Seeed shield. The Android will also send the letter “a” to the Arduino’s serial.
Have the Arduino’s serial monitor open when you run the Android App so you be make sure that the two are communicating (Serial communication is how we will get the lighting to change later on). When you run the program, make sure you click “Run on Device.” I bypassed running on a virtual device because I always had access to my phone and I decided it was more trouble than it was worth to get the virtual device working. The first time you run the program, it likely will not work correctly. Do not worry. That is the next step.
Edit Android Manifest.xml
The Android Manifest only shows up after you have attempted to run the program once. It can be found in the folder containing the .pde file for your code. Edit Android Manifest.xml by adding the following two lines in between the second and third lines in the original manifest:
<uses-permission android:name=”android.permission.BLUETOOTH”/>
<uses-permission android:name=”android.permission.BLUETOOTH_ADMIN”/>
Reference the screenshot shown above to make sure you have it right.
Connect
Now run the sketch again. Everything should work now. Open the Arduino’s serial monitor to make sure it receives the letter “a” when the bluetooth is connected. If it does not, here are a few things you can try to get it to work properly:
1. Make sure that the Bluetooth shield is set up properly and the red and green lights are flashing when you run the Android program.
2. Run the App again on your device
3. Restart your Android Device
4. Restart your computer
I got mine to work using some combination of these additional steps.
Important tip: Every time you reconnect the bluetooth, you should reset or power cycle the Arduino and close your App and reopen it.
Step 5: Cut enclosure
Cut the attached pattern for the enclosure out of the plywood.
Cut out the attached pattern for the acrylic out of the acrylic sheet.
For more detail: Phone Controlled Mood Lighting

