Summary of Smartphone Controlled RC Car Using Arduino
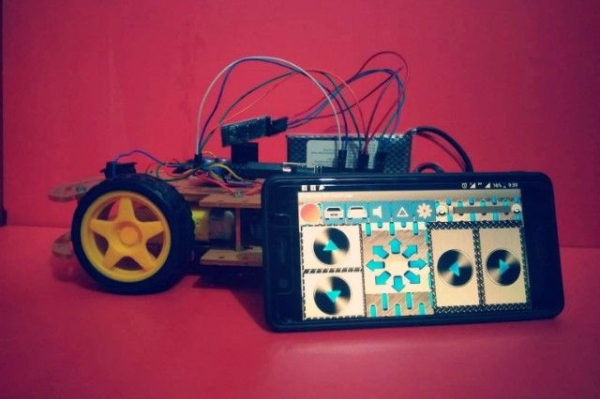
This Instructable guides users in building a smartphone-controlled Arduino robot car. The project utilizes a 4WD chassis, an Arduino Uno board, and an LM298 H-bridge module for motor control. A Bluetooth HC-05 module enables wireless communication with a smartphone, powered by a 12V Li-po battery. The assembly involves soldering wires to 6V DC motors, mounting them on the chassis, and installing a top roof structure using PVC or hardboard.
Parts used in the Smartphone controlled Arduino Robot Car:
- 4WD Robot Chassis kit
- Arduino Uno
- LM298 H bridge Module
- Bluetooth Module HC-05
- 12v Li-po Battery
- Male-Female Jumper Wires
- Male-Male Jumper Wires
- Duct Tape or any other tape
- Smartphone
- 6v DC motor
This Instructable shows how to make a Smartphone controlled Arduino Robot Car.
Update on 25th Oct 2016
Step 1: Youtube Video Link
Step 2: Parts and Tools Required
1. 4WD Robot Chassis kit
2. Arduino Uno
3. LM298 H bridge Module
4. Bluetooth Module HC-05
5. 12v Li-po Battery
6. Male-Female Jumper Wires
7. Male-Male Jumper Wires
8. Duct Tape or any other tape 9. Smartphone
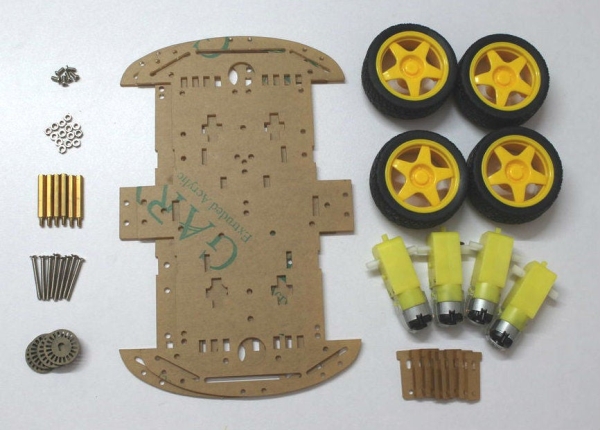
Step 3: Structure / Chassis
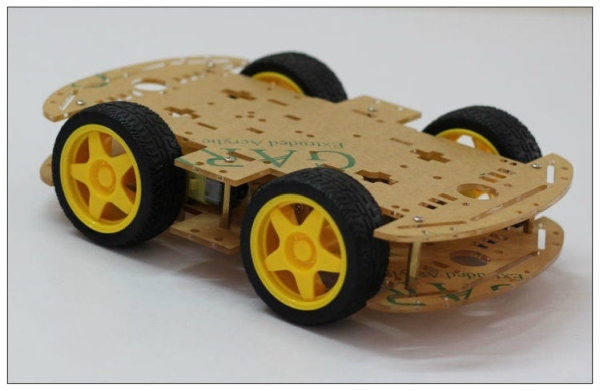
You can buy Ready made 4WD Car chassis or you can make it by using PVC / Any kind of Hard Board .
Step 4: Motor / Actuator
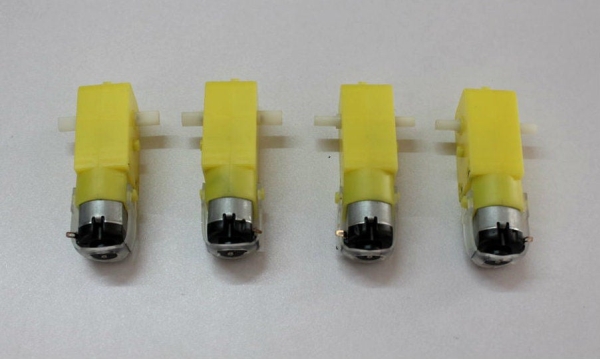
In this project i use 6v DC motor . You can used any kind of 6v DC motor .
Step 5: Prepare the Motors Terminal
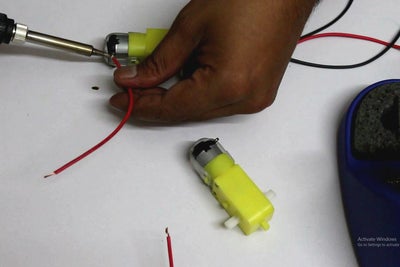
Cut 4 pieces of red and black wires with length approximately 5 to 6 inch.
0.5 sqmm wires can be used .
Strip out the insulation from the wires at each end Solder the wires to the motor terminal
You can check the motor polarity by connecting it to the battery pack.If it rotates in forward direction ( red wire with positive and black wire with negative terminal of the battery) then the connection is correct .
Step 6: Mount the Motor and Install the Top Roof

Source: Smartphone Controlled RC Car Using Arduino
- How can I check the motor polarity?
You can check the motor polarity by connecting it to the battery pack; if it rotates in the forward direction with the red wire connected to positive and black to negative, the connection is correct. - What type of motor is used in this project?
The project uses a 6v DC motor, though any kind of 6v DC motor can be used. - Can I make the chassis myself instead of buying one?
Yes, you can make the chassis by using PVC or any kind of Hard Board instead of buying a ready-made 4WD Car chassis. - What wire gauge is recommended for the motor terminals?
0.5 sqmm wires can be used for the connections. - How long should the wires be when preparing the motors terminal?
Cut 4 pieces of red and black wires with a length of approximately 5 to 6 inch. - Does the project require a specific power source?
The project requires a 12v Li-po Battery to operate. - What component allows the car to be controlled by a phone?
A Bluetooth Module HC-05 is used to enable smartphone control. - Is there a video tutorial available for this project?
Yes, a YouTube video link is provided in Step 1 of the article.