In the realm of do-it-yourself (DIY) electronics and robotics projects, Arduino stands as a prominent open-source microcontroller platform. It boasts a user-friendly nature and enjoys a vast community of users who actively contribute their projects and provide assistance to fellow enthusiasts. Throughout the year 2022, we embarked on numerous remarkable ventures involving Arduino, ESPs (such as the ESP8266 or ESP32), ARM microcontrollers, and Raspberry Pi.
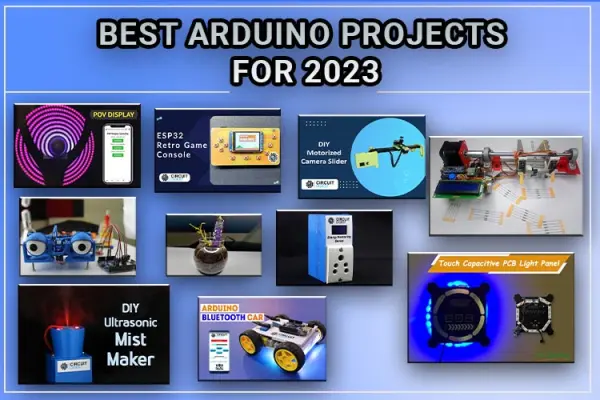
Here is a list of the top 10 Arduino projects that you can build:
1. Animatronic Eye with Arduino
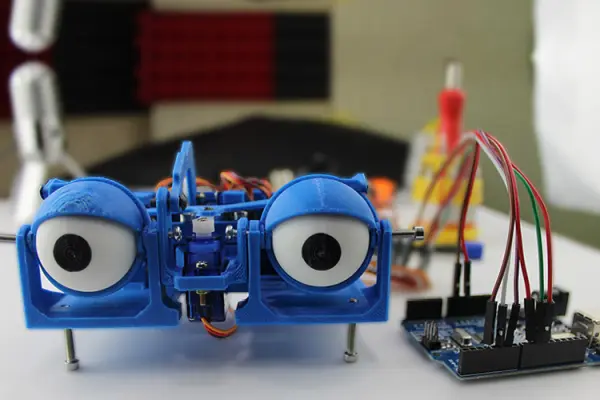
A mechanical apparatus known as an animatronic eye has been developed to imitate the visual attributes and movements of an actual human eye. Our circuit, powered by Arduino, has been constructed to cater to a wide range of applications, including robotics, entertainment endeavors, and educational initiatives. These animatronic eyes can be programmed to execute specific instructions or manipulated manually through the utilization of sensors and controls. Here is a list of the necessary components required for constructing an animatronic eye.
Components Required to Build the 3D Printed Animatronic Eye
- Six SG90 Servo Motor
- Screws M2, M3, and M4
- Arduino UNO
- Jumper Cables
- Breadboard
- Pinheadder
- PLA Filament and 3D Printer
For further information build instruction and code do check out the project How to Build a 3D Printed Animatronic Eye with Arduino.
2. Arduino Based Resistor Reel Cutting Machine
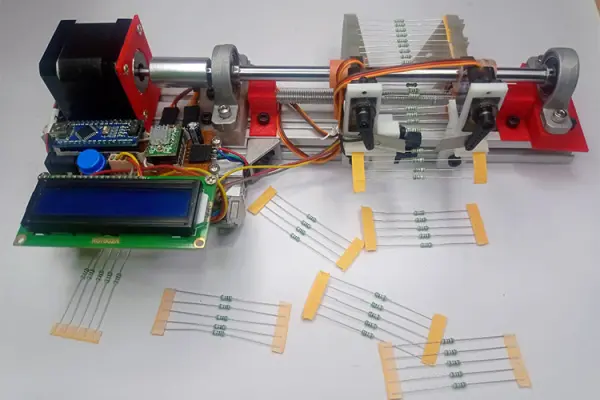
The Arduino-based resistor reel cutting machine is a device designed for the purpose of cutting resistor strips from a reel of resistor material. These strips are utilized in various electronic circuits and devices. Manual cutting of these strips from the reel can be time-consuming and prone to errors. However, the Arduino-based machine automates this process, ensuring precise and efficient cutting of the resistor strips.
Materials Required to Build a Resistor Reel Cutting Machine
Mechanical Components | Electronic Components |
|
|
For further information build instruction and code do check out the project Arduino Based Resistor Reel Cutting Machine.
3. DIY Arduino Bluetooth Car Controlled by Mobile Application
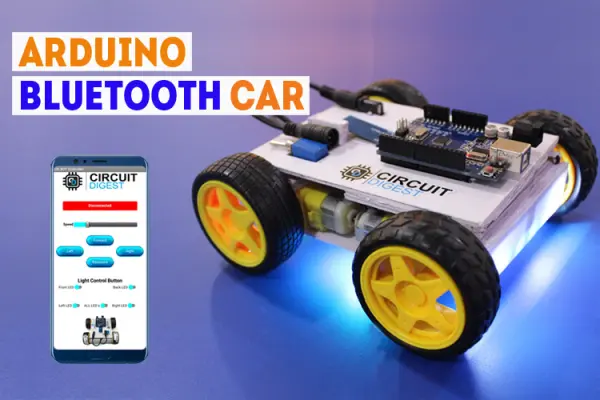
The Arduino Bluetooth car, controlled through a mobile application, presents an enjoyable and engaging project where you can use your smartphone to maneuver a small car. This undertaking necessitates fundamental understanding of Arduino programming and the capacity to establish a connection between an Arduino board and a Bluetooth module.
Components & Tools Required to Build Wireless Arduino Bluetooth Robot
To construct a DIY Arduino Bluetooth car controlled by a mobile application, the following components are necessary:
– Arduino UNO: 1 unit
– HC05 Module: 1 unit
– L298N Motor driver: 1 unit
– NeoPixel LED: as required
– Lithium-ion 18650 battery with protection circuit: 1 unit
– BO Motors with wheels: 4 units
– Perfboard (big): 1 unit
– Perfboard (small): 1 unit
– Toggle switch: 1 unit
– DC female jack: 1 unit
– Relimate connector pair: 1 unit
– Male Bergstrip: 1 unit
– Female Bergstrip: 2 units
– Single Strand Wires of various colors: as required
– Sunboard of medium thickness: as required
– Paper Cutter, Hot Glue, Feviquick, Ruler, Marker, Wirecutter, Screwdriver
For more detailed instructions and the code, I recommend consulting the project titled “DIY Arduino Bluetooth Car Controlled by Mobile Application.
4. POV Display with WS2812B Neopixel LEDs
![]()
A Point of View (POV) display is a display mechanism that presents a message or image that seemingly hovers in midair. By utilizing an Arduino and basic electronic components, it is possible to construct such a display. In this tutorial, we have successfully assembled a POV Display using WS2812B LEDs.
Components Required to Build Arduino Based POV Display
To create a POV display using WS2812B Neopixel LEDs and an ESP8266-01, you will need the following components:
– ESP8266-01: 1 unit
– WS2812B RGB LEDs: as required
– 3.7V 400mA Lithium Battery: 1 unit
– 12V DC Motor: 1 unit
– Perfboard: 1 unit
– Wires: as required
– Connectors: as required
– Two-Component Adhesive: as required
– A 12V battery (to power the motor)
For detailed instructions on how to build the POV display and access the code, I recommend referring to the project titled “How not to Build a POV Display Using WS2812B Neopixel LEDs and ESP8266.
5. IoT Based Compact Soil Moisture Monitoring Device
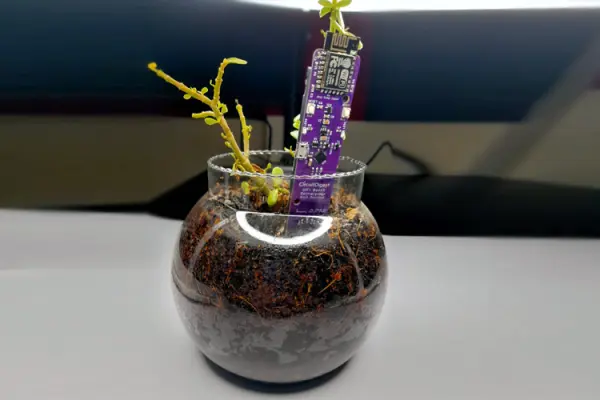
A compact soil moisture monitoring device based on the Internet of Things (IoT) is specifically designed to gauge the moisture levels in soil by employing sensors. The collected data is then transmitted through an IoT network to a remote location. These devices find extensive application in agriculture, aiding farmers in optimizing irrigation schedules, as well as in landscaping to ensure ideal moisture levels for plants. Some compact soil moisture monitoring devices may include supplementary features like temperature and pH sensors, providing further insights into soil conditions.
Components Required to Build Arduino Based POV Display
To create a low-power IoT-based compact soil moisture monitoring device, you will require the following components:
– ESP8266-01: 1 unit
– WS2812B RGB LEDs: as required
– 3.7V 400mA Lithium Battery: 1 unit
– 12V DC Motor: 1 unit
– Perfboard: 1 unit
– Wires: as required
– Connectors: as required
– Two-Component Adhesive: as required
– A 12V battery (to power the motor)
For comprehensive instructions on how to construct the device and access the necessary code, I recommend referring to the project titled Low Power IoT Based Compact Soil Moisture Monitoring Device.
6. Motorized Camera Slider using Arduino
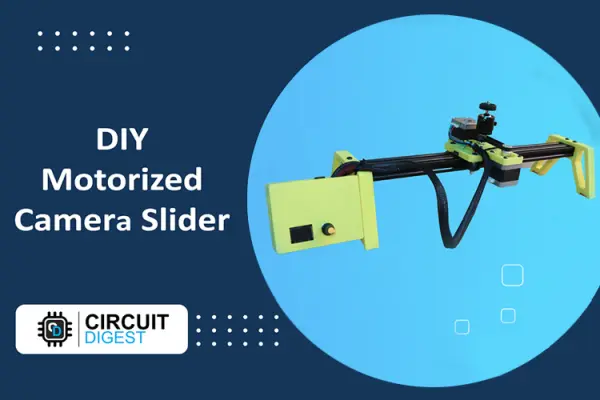
A motorized camera slider is a mechanism designed to enable horizontal movement of a camera along a track, typically employed to capture seamless, panning shots. When an Arduino microcontroller is employed to control such a slider, it becomes a motorized camera slider using Arduino. The Arduino microcontroller acts as a programmable small computer, allowing for precise control over various electronic components and devices in the slider system.
To construct an Arduino-based motorized camera slider, you will need the following components:
– Arduino Nano: 1 unit
– Motor Driver (A4988/DRV8825/TMC2209): 2 units
– OLED display 128×64: 1 unit
– Rotary encoder module HW-040: 1 unit
– NEMA N17 Stepper motor: 2 units
– Limit Switch 3 Pin SPDT: 2 units
– On/Off Switch: 1 unit
– DC socket 5521: 1 unit
– Aluminum Profile 2040 V slot: 50cm
– M5 Aluminium spacer 5mm bore 6mm length: 3 units
For a complete list of components, you can refer to the Circuit Digest website. For detailed instructions on how to build the motorized camera slider and access the relevant code, I recommend checking out the project titled “DIY Motorized Camera Slider using Arduino and Stepper Motors for Video Shooting.
7. DIY Handheld Retro Gaming Console using ESP32
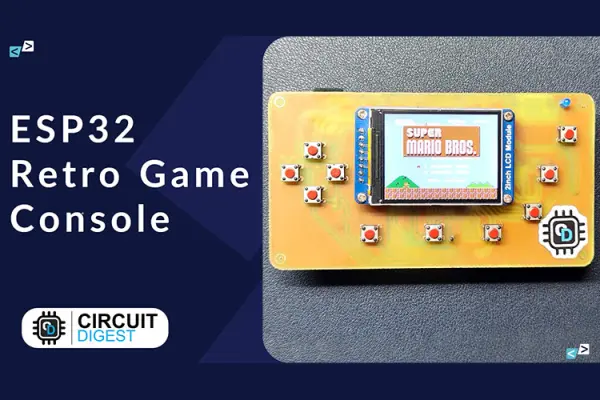
A portable retro gaming console powered by an ESP32 is a handheld device that offers the ability to play nostalgic video games while on the move. The ESP32, being a microcontroller with built-in WiFi and Bluetooth features, is an ideal platform for constructing wireless and portable gaming devices.
To build a handheld retro gaming console using an ESP32, you will need the following components:
– ESP32 Wrover Kit with 16MB flash: 1 unit
– Waveshare 2″ 320×240 IPS display module with ST7789V driver: 1 unit
– TP4056 module with protection: 1 unit
– AO3401 SMD P-Channel MOSFET: 1 unit
– SD Card Slot: 1 unit
– SMD Slide switch 1P2T: 1 unit
– 3.5mm Audio Jack SMD PJ-327-A: 1 unit
– 3.7V Lipo battery: 1 unit
– 2Pin JST XH battery connector: 1 unit
– 6x6x6mm tactile switches: 10 units
– 3mm LED: 1 unit
– 3.3V Active buzzer: 1 unit
– 100k Resistor: 2 units
– 10k Resistor: 7 units
– 1k Resistor: 1 unit
For detailed instructions on how to build the handheld retro gaming console and access the necessary code, I recommend referring to the project titled “DIY Handheld Retro Gaming Console using ESP32.
8. Touch Capacitive Based PCB Light Panel
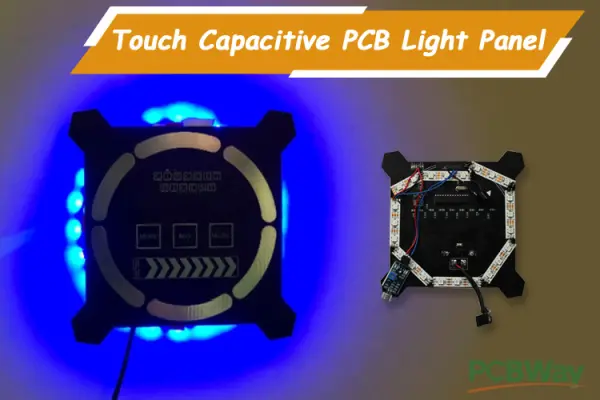
In this tutorial, we have constructed a Touch Capacitive PCB utilizing an ATMega328P IC, specifically designed to govern the NeoPixel LED strip. Our PCB incorporates several features, including music-reactive mode, random animation mode, and RGB controlling mode.
Components Required to build the Front Panel PCB
To assemble a Touch Capacitive PCB for controlling a NeoPixel LED strip, the following components are required:
– ATMega328P IC (DIP Package)
– SMD Resistors (1 Mega Ohm, 0805) x 9
– SMD Resistor (1K, 0805) x 1
– Piezoelectric Buzzer
– SMD 78M05 IC
– SMD Electrolytic Capacitor (10uF, 16V, 4x45mm) x 2
– SMD Capacitor (22pF, 0805) x 11
– Crystal Oscillator (16 MHz)
For comprehensive instructions on the build process and access to the relevant code, I recommend referring to the project titled “Design and Build a Touch Capacitive Based PCB Light Panel to Control NeoPixel LED Strip.
9. Power Consumption Monitoring Device using ESP32
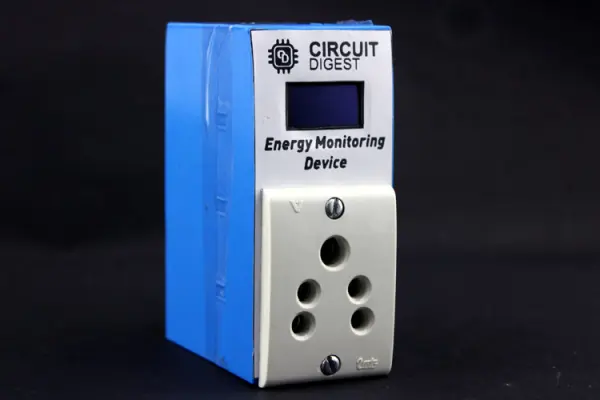
A power consumption monitoring device built with an ESP32 is designed to measure and monitor the power usage of electrical appliances or systems. This device utilizes an ESP32 microcontroller, which is equipped with WiFi and Bluetooth capabilities, to transmit the collected power consumption data to a remote location.
To construct a smart power consumption meter, the following components are needed:
– ESP32 WROOM 32D Module
– HI LINK 5V 3W SMPS
– 0.96″ 128X64 I2C LED
– ZMPT101B Voltage Sensor
– ACS712 Current Sensor
– 220V AC 3 Pin Socket (MALE)
– 220V AC 3 Pin Socket (FEMALE)
– 3D Printed Casing
For detailed instructions on the assembly process and access to the necessary code, I recommend checking out the project titled “Power Consumption Monitoring Device.
10. DIY Ultrasonic Mist Maker using ESP8266 and Arduino
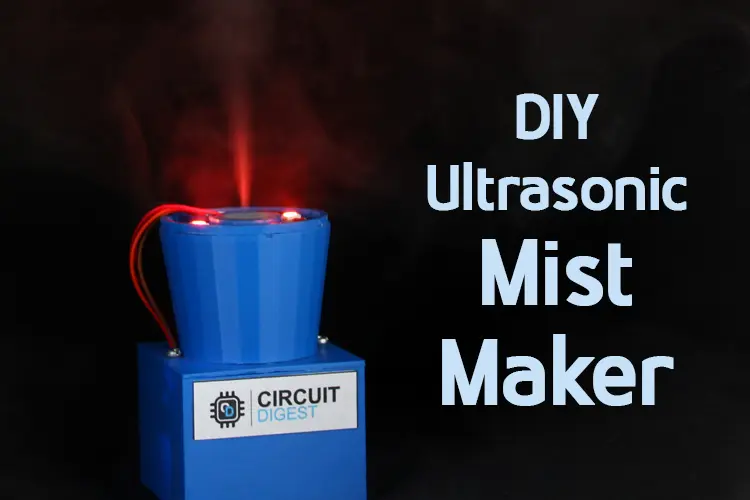
An ESP8266-based ultrasonic mist maker is a device that utilizes high-frequency sound waves to generate a fine mist. It is controlled by an ESP8266 microcontroller, which possesses WiFi and Bluetooth functionalities. This type of device is commonly employed to introduce moisture into the air, such as in a greenhouse or to enhance room humidity levels.
To construct an Arduino-based mist maker, the following components are needed:
– ESP8266 – ESP01 Module
– USB to TTL Converter Module
– Ultrasonic Humidifier Module
– WSB2812 IC (5 units)
– TP4056 Module
– 3.7V 700mAh Li-Po Battery
– LDR (Light Dependent Resistor)
– IRF540N MOSFET
For detailed instructions on how to build the mist maker and access the necessary code, I recommend referring to the project titled “DIY Ultrasonic Mist Maker.
