This Instructable shows the steps I took to build my own open source theremin (Open Theremin) when there was none available to buy online. The lovely thing about open source is that the plans are freely available to make and modify.
A theremin is an electronic musical instrument that you play waving your hands in proximity of its two antennas to modify the sound.
The Open Theremin is an Arduino based open sourced hardware implementation of the instrument designed by Urs Gaudenz in Switzerland. The open theremin PCB is a shield installed on top of an Arduino.
What led me to make this was I was looking to get an Open Theremin for my nieces birthday gift but at the time they were all out of stock. Here is a video of the build and short demo of playing it for first time.
Supplies:
- Soldering Iron
- solder
- flux
- Tweezers
- Stereoscope (optional)
- Computer
- tooth brush
- isopropyl alcohol
- Printer
- Arduino Uno
- USB A to B cable
- stereo audio cable
- Test lead with banana plug
- 1/4″ copper tubing
- Banana plugs and jacks
- Mini Tripod
- Nuts and Bolts
- Scrap Metal
Step 1: Download Open Source Gerber Files and BOM
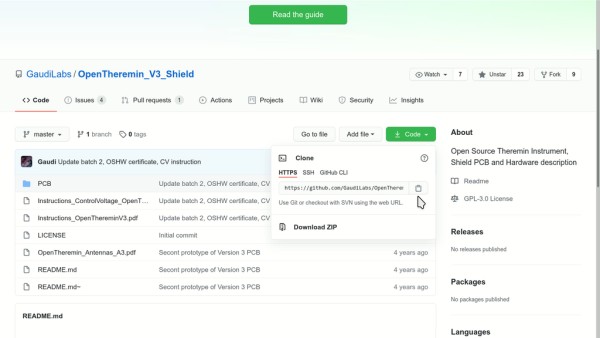
For this open source project, the link to the plans were conveniently posted on the Open Theremin website. The actual files are hosted on github.
https://github.com/GaudiLabs/OpenTheremin_V3_Shield
The gerber’s are what the board house will need to build the board.
The bill of materials (BOM) are what the assembler will need to make a finished board. I chose to assemble the PCB’s myself so I simply purchased all the parts to have them shipped to my house.
- Download the design files from github
- Extract the folder to get the gerber files and bill of materials
Step 2: Ordering PCB’s From JLCPCB

The open theremin boards only have 2 layers. I used JLCPCB.com to order them since they have the lowest price. They have a minimum order of 5 PCB’s.
The gerber’s from the file package don’t need any modification and can be sent directly to the vendor. You may need to view the gerber’s in order to gather overall dimensions and number of layers of the PCB to be entered into the JLCPCB quote.
- put the gerber’s into a zip file
- goto JLCPCB.com and make an account
- Start a quote and enter the board dimensions, number of layers, surface finish, etc. (I used lead free HASL)
- Upload the zip file with gerber’s
- Pay
Step 3: Ordering the Parts Off of the Bill of Materials (BOM)

The bill of materials contains a list of all the electronic components that will be installed onto the PCB. For the open theremin project, the bill of materials file is a Libre Office spreadsheet (*.ODS format).
- Using Libre Office, I exported this spreadsheet into an Excel .xls format
- Login to Mouser.com
- Goto BOM tool
- Uploaded the .xls spreadsheet to Mouser to create a shopping cart.
- Buy multiples of how many PCB’s you want to make + 1 or 2 extra of each line item in case of mistakes
Step 4: Assembly: Soldering Parts to PCB

This is the most tedious or fun part depending on if you enjoy soldering or not. With extra payment to the PCB manufacturer, this entire step can be done for you. Since I enjoy soldering, I chose to assemble the PCB myself. Take your time and be careful in this step. It is easy to create solder bridges or miss a terminal. Soldering problems can a primary cause of electronic problems when trying to bring up your boards.
- Print out or display the Bill of Materials
- Organize all the parts into categories: SMT IC’s, passive SMT components (resistors capacitors), thru-hole components.
- solder SMT IC chips first
- solder SMT passive components
- solder thru-hole components last
Step 5: Clean and Dry PCB’s
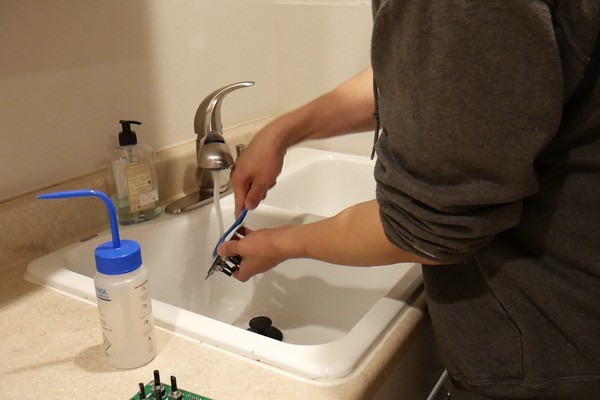
Whether using no-clean flux or not during soldering, I always clean the PCB after finishing soldering. This part is particularly important with sensitive electronics. Sometimes problems can arise from not cleaning flux/residue or not properly drying the PCB’s.
- Rinse the PCB’s with isopropyl alcohol and scrub with a tooth brush
- Rinse the PCB’s under water and scrub with tooth brush
- Spray canned air or compressed air to remove most of the water
- Let PCB’s dry or use a hair dryer to dry it faster.
Step 6: Build Antennas
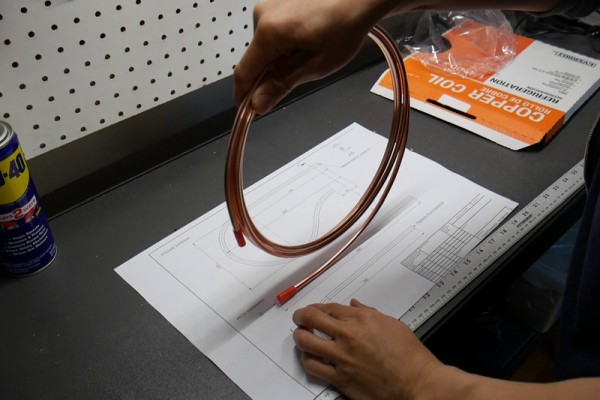
- Print out CAD drawings from Open Theremin file package. Ensure they are a 1:1 scale when printing.
- Take copper tubing and bend to the shape of the drawing outline
- Saw tubing sections after the shape of the antenna is pretty close to the drawing. Don’t worry if it isn’t exact, the theremin is not that sensitive to the shape.
- Insert banana plugs to the ends of the antenna sections
- Use a heat gun and solder to fuse the banana plugs to the sections of copper tubing
Step 7: Assemble, Program, Test, and Troubleshoot
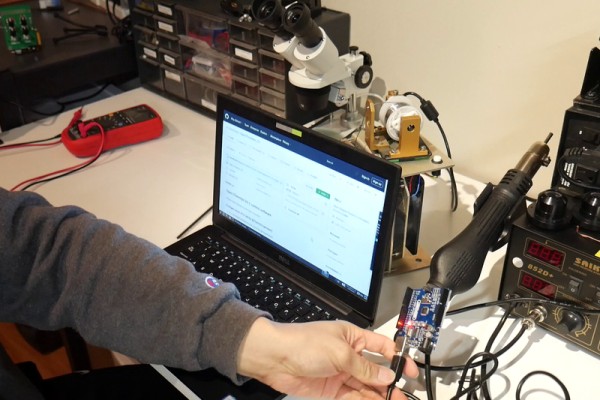
The open theremin is versatile in how you house it. I improvised a metal bracket to mount a mini tripod so it can stand by itself.
All of the major components are pretty much done. Now it is time to put it all together and see if it works. More often than not, there may be something wrong and the theremin doesn’t make any sound or sounds strange. Expect to troubleshooting some electronics.
When I first built this, I was not getting good pitch control. After inspecting the PCB closely, I found a solder bridge between two of the header pins that connect to the Arduino which caused only the volume control to function.
- Download open source theremin Arduino Code from here:
https://github.com/GaudiLabs/OpenTheremin_V3 - Connect Arduino to PC using a USB cable, and download firmware to arduino
- Connect the arduino to the open theremin PCB
- Connect the antennas to the theremin PCB
- Connect audio cable from theremin PCB to a speaker
- Connect grounding cable from theremin to ground terminal of an outlet or to some big metal furniture
- Connect USB cable to theremin to power it up
- Troubleshoot if making strange sounds or no sound
Source: Open Theremin From Scratch: Building a PCB From Open Source Plans