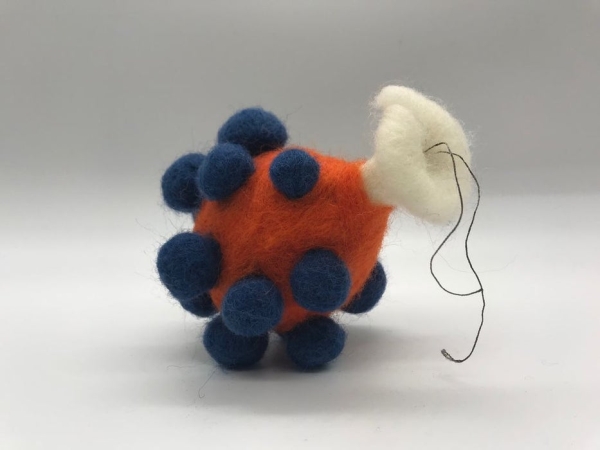
Summary of Needle-Felted Pressure Sensor
This article details the construction of a needle-felted pressure sensor compatible with Arduino analog inputs. The process involves creating a wool core, layering conductive thread on muslin fabric, and sandwiching a Velostat sheet between two fabric layers to detect pressure changes.
Parts used in the Needle-Felted Pressure Sensor:
- Needle-felted wool
- Thin muslin
- Velostat
- Conductive thread
- Felting needle
- Foam
- Unwoven wool (Leicester wool)
Create a pressure sensor using:
– Needle-felted wool
– Thin muslin
– Velostat
– Conductive thread
This sensor can be used an analog input for Arduino code.
Step 1: Prepare the Core Components
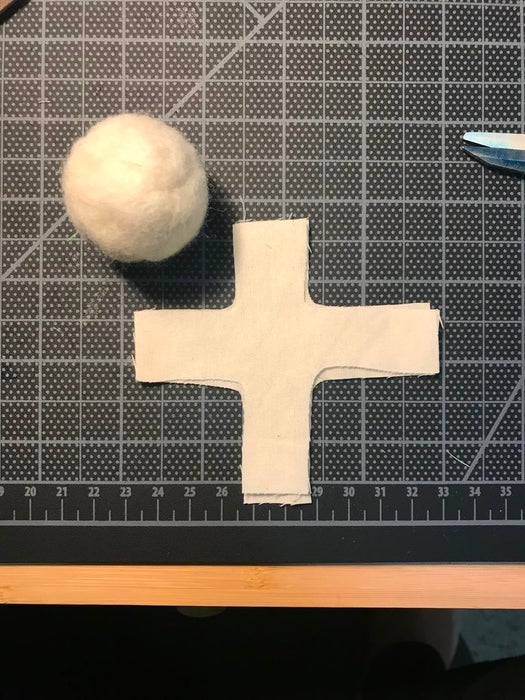
Component 1: A felted wool ball. This can be made using unwoven wool (I used Leicester wool), a felting needle, and a piece of foam. There are several tutorials specific to felting online. Here, we just have a basic ball.
Component 2: Two fabric swatches, each in an “+” shape. I used a thin muslin here.
Step 2: Add Conductive Thread to First Swatch
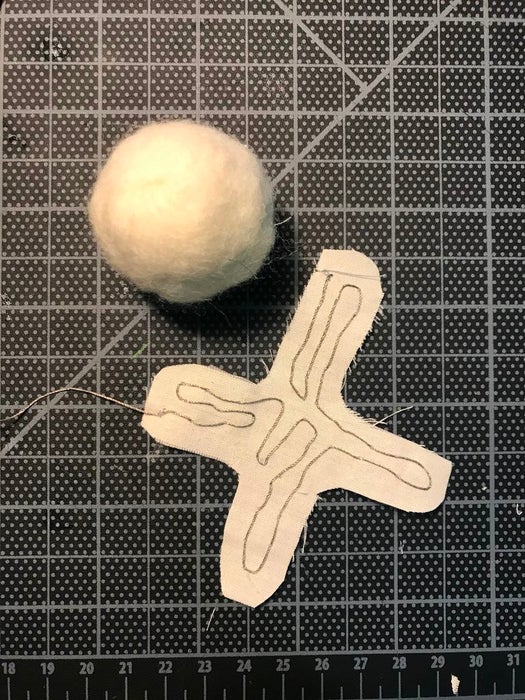
On one of the two swatches, sew a trace of conductive thread. I used stainless steel thread, and a couch stitch. Leave a few inches of extra thread at one end.
Step 3: Attach First Conductive Layer to Ball
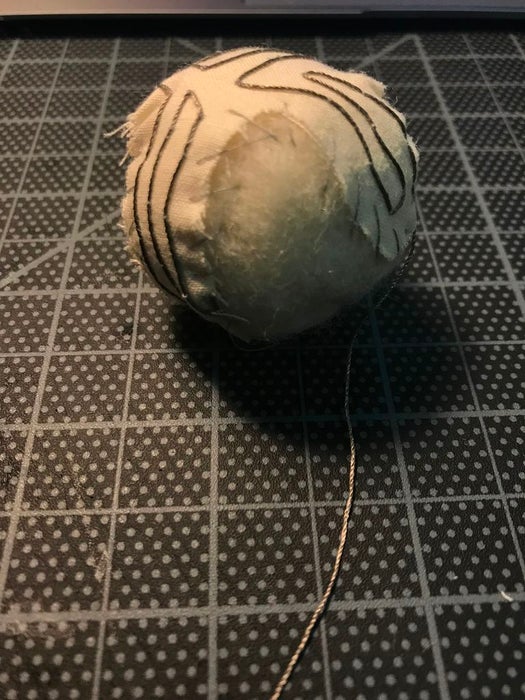
Sew this first swatch onto the ball, with the conductive thread facing outward.
Step 4: Add the Second Conductive Layer
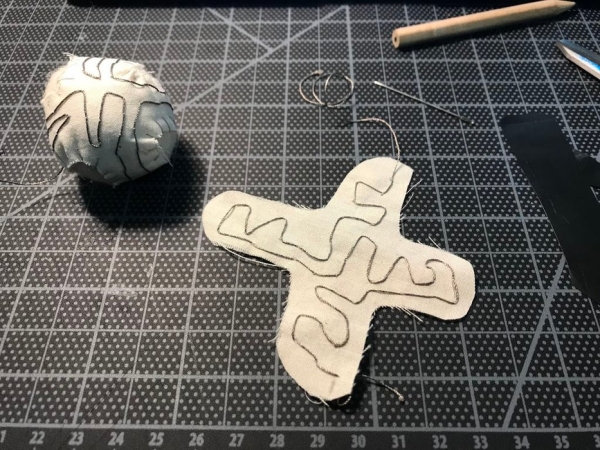
On the second swatch, create a new trace of conductive thread. This trace should be different than the first.
Not pictured here, but very important: cut a layer of velostat in the same “+” shape as the two conductive swatches. The velostat is a pressure-sensitive conductive sheet, and is essential to this sensor functioning.
You are going to wrap the second “+” swatch around the first one– so that the conductive thread on each face each other. But! before attaching, make sure the velostat is sandwiched between the two.
Source: Needle-Felted Pressure Sensor
- What materials are needed to create the core?
A felted wool ball made from unwoven wool like Leicester wool, a felting needle, and a piece of foam. - Can this sensor be used with an Arduino?
Yes, this sensor can be used as an analog input for Arduino code. - How should the conductive thread be attached to the swatch?
Sew a trace of conductive thread using a couch stitch and leave a few inches of extra thread at one end. - Why is Velostat essential for this project?
Velostat is a pressure-sensitive conductive sheet that is essential to the sensor functioning. - How do you assemble the second conductive layer?
Wrap the second plus-shaped swatch around the first so the conductive threads face each other with the Velostat sandwiched between them. - What shape should the fabric swatches be?
The fabric swatches should be cut into a plus shape. - Which type of thread was used in the example?
Stainless steel thread was used for the conductive traces. - Does the order of the Velostat placement matter?
Yes, the Velostat must be sandwiched between the two conductive swatches before attaching them.