Summary of Mr. Indecision – a small felt version of yourself that turns its head and looks at you using Arduino
This tutorial shows how to capture a full-body 3D scan using the 123D Catch iOS app, clean and merge scans in Meshmixer, slice the model in 123D Make for laser cutting, and integrate electronics (Arduino, sensors, servo) so the assembled puppet's head turns. It also outlines hardware, basic laser-cut prep, and example Arduino code used in the project.
Parts used in the Modern Day Puppet Master:
- iPhone or iPad
- 123D Catch app (software)
- Assistant (person to take photos)
- Computer
- Meshmixer (software)
- 123D Make (software)
- Arduino Software (IDE)
- Arduino UNO
- 2 x Sharp IR proximity sensors
- Standard servo
- Solid core wire
- 9 VDC power adapter
- Pencil or chopstick
- Hot glue gun and glue sticks
- Solderless breadboard (optional)
- Clay or Bluetack
This is a tutorial on how to use 123D Catch to get a 3D scan of your whole body. Once you have the scan or “catch” the tutorial will take you through a technique to clean it up and manipulate it ready for 123D Make. The tutorial will go through how to slice the model in Make and prep it for Laser cutting. The tutorial will briefly cover how lazer cutting and integrating the componentry and Arduino to make the head turn. The tutorial will wrap up with some example code of what worked for me during this project.
mr indecision from Richard Clarkson on Vimeo.

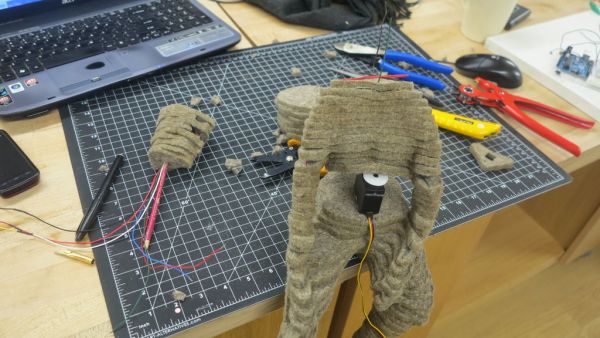
Modern Day Puppet Master.
You will need:
-iPhone or iPad
-123D Catch from the app store (free)
-An assistant
-A Computer
-Meshmixer computer program (download for free here)
-123D Make (download for free here)
-Arduino Software (download for free here)
– Arduino UNO $29.95
– 2 x Sharp IR proximity sensor $14.95 each
– Standard Servo $12.00
– solid core wire $2.50
– 9 VDC power adapter $6.95
– pencil or chopstick
– hot glue gun & glue sticks
– patience & some Arduino experience are recommended for the 2nd half of this instructable.
Step 1: Preparing the Catch
You (person being catched) should be sitting on a simple stool with enough room around them for the “assistant” (person assisting taking the catch) to walk around them taking photos keeping the catchee’s body within the frame.
The environment should be as evenly lit as possible but does not require studio quality backdrops or lights.
The catchee should sit as still as possible and stare directly forwards with eyes closed.
Step 2: Catching the body
Open 123D Catch and tap “New Capture” at the center bottom of the screen.
Taking a photo by taping the camera icon the assistant walks around the catchee taking photos of the catchee from the chest every keeping the catchee’s body within the frame. The aim would be to get 10-15 photos for every lap around the person and to have 3 laps; one from the floor looking up , one at the waist-chest level looking strait on, and one above looking downwards.
Once the catcher has completed the 3 laps and the image count is between 25-35 tap the “Review” button in the bottom right corner. Then tap Finish Capture button in the top right hand side.
Makerbot has some good tips on catching here. Tinkernut also has a very nice you tube clip of the whole process Weekend Hacker: Turn Photos Into 3D Models
Step 3: Catching the Head
Follow the Steps from the previous step but this time focus in on just the head. The details of the persons head is often lost in full body catches, so by doing an additional catch of just the head we can merge the two catches later to get the best result.
– 2 x Sharp IR proximity sensor $14.95 each
– Standard Servo $12.00
– solid core wire $2.50
– 9 VDC power adapter $6.95
Solderless Breadboard (optional)
Clay or Bluetack
For more detail: Mr. Indecision – a small felt version of yourself that turns its head and looks at you using Arduino
- What devices do I need to capture a full body 3D scan?
An iPhone or iPad running the 123D Catch app and an assistant to take photos around the subject are needed. - How many photos should be taken for a full body catch?
Aim for 10–15 photos per lap and about 3 laps, totaling 25–35 photos. - Why should I do a separate head capture?
The head details are often lost in full body catches, so a separate head capture can be merged later to improve detail. - What software is used to clean and merge scans?
Meshmixer is used to clean up and manipulate the catch for 123D Make. - What software slices the model for laser cutting?
123D Make is used to slice the model and prepare it for laser cutting. - Which electronics are required to make the head turn?
An Arduino UNO, two Sharp IR proximity sensors, and a standard servo are used to make the head turn. - Is prior Arduino experience required?
Some Arduino experience is recommended for the second half of the instructable. - What power supply is recommended?
A 9 VDC power adapter is listed for powering components. - What physical tools help with assembly?
Pencil or chopstick, hot glue gun and glue sticks, and optionally clay or Bluetack are suggested for assembly.