This instructable was created in fulfillment of the project requirement of the Makecourse at the University of South Florida (www.makecourse.com)
Step 1: Download Parts
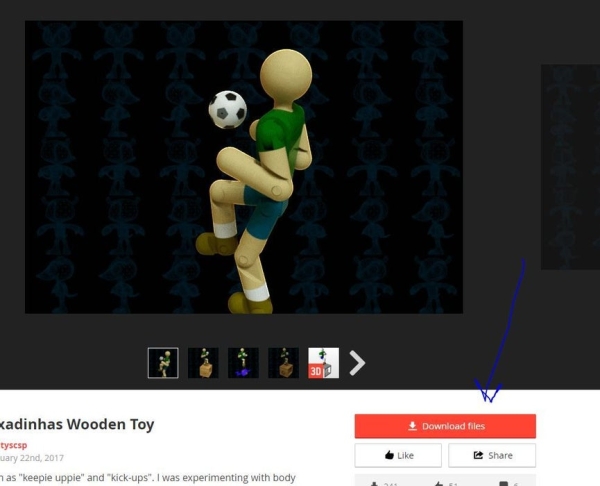
Go to: https://grabcad.com/library/embaixadinhas-wooden-t…
(If you do not already have one, you will need to create a GRABCAD account to access files.)
Click the downlaod all files button
Extract Files from the zip folder to a new folder
Step 2: Extract .rar File
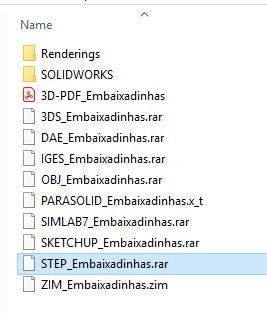
Go to: https://extract.me/
Find the “STEP_Embaixadinhas.rar” file in the folder with the extracted files.
Upload and extract
Step 3: Open Assembly in Solidworks
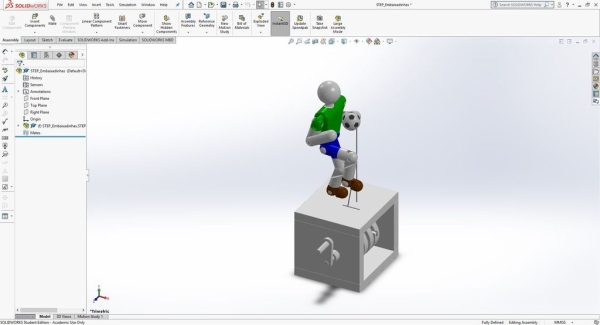
Open SOLIDWORKS
Find and open extracted STEP file from previous step
Step 4: Save Parts
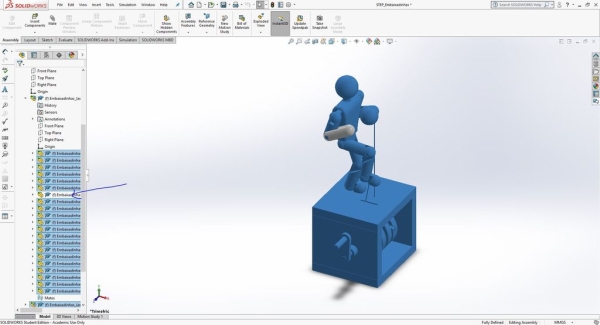
Double click individual parts of the assembly.
Right click highlighted part in assembly tree to the left.
Select invert selection.
Right click any highlighted selection.
Select suppress.
Save As part as a .sldprt file
Step 5: Repeat
Repeat STEP 5 until all parts needed for assembly have been saved.
Individual parts can also be edited.
Step 6: Assemble
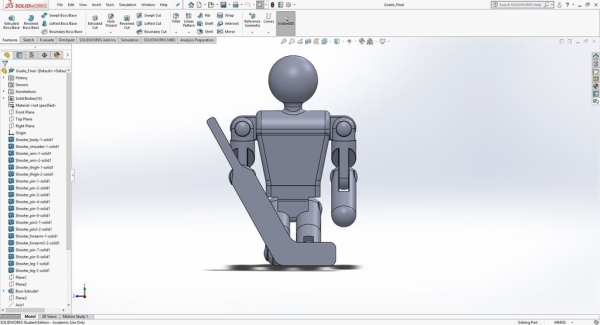
Assemble parts in SOLIDWORKS and create mates to form figure in the position of a hockey goalie.
Save As “.stl” file and have it 3D printed.
Step 7: Repeat STEP 6
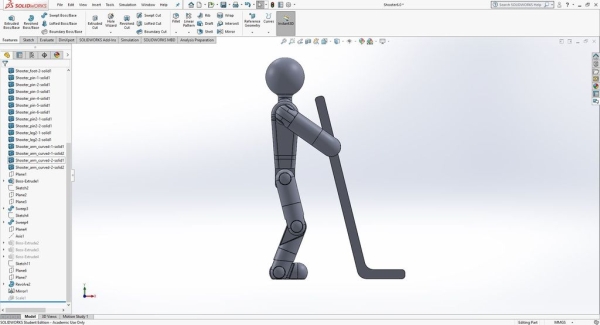
Repeat STEP 6 in form of a shooting hockey forward.
Source: Mr. Goalie
