
Summary of MP3 Interface for Arduino
This article details a low-cost method to integrate MP3 playback into Arduino projects using inexpensive "Clip" players. The process involves disassembling the player, removing the battery, and soldering wires to connect its circuit board to an Arduino via two analog switches. This setup allows the Arduino to control play, pause, volume, and file sequencing by loading sound files onto a MicroSD card.
Parts used in Cheap MP3 Shield for Arduino:
- Inexpensive MP3 "Clip" player (supporting MicroSD up to 8G)
- MicroSD card
- Arduino board or Arduino Mini
- Arduino protoshield
- Two analog switches
- Jeweler's Philips head screwdriver
- Soldering equipment and wires
- LC2093-B MP3 Decoder IC (internal component of the player)
I have added a follow-on to this Instructable:
http://www.instructables.com/id/Cheap-and-Easy-MP3-Shield-for-Arduino/
The follow-on shows you how to design, etch and build a PCB shield to connect the MP3 to the Arduino. Replaces the analog switches with a 74HC244. SIngle layer board with large surface mount component design. Only 5 thru holes. Take a look.
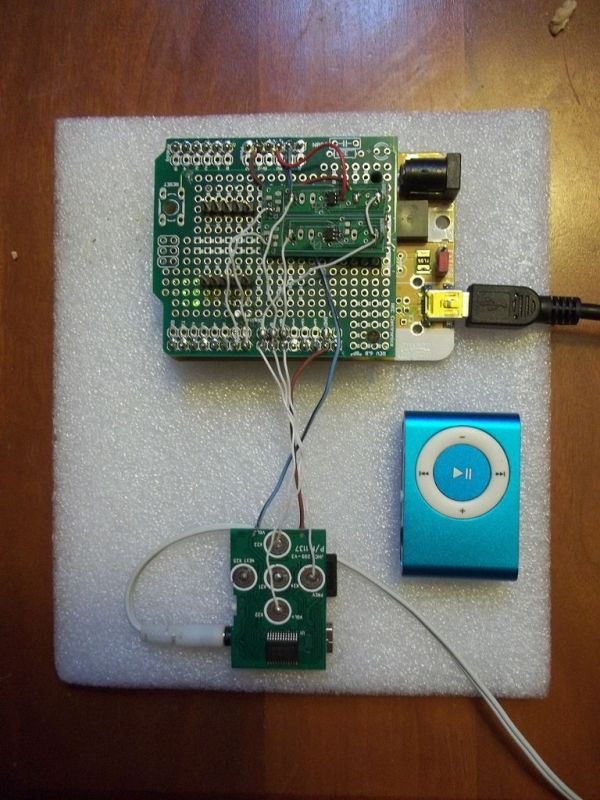
Ebay abounds with sales for REALLY inexpensive MP3 “Clip” players. These players support MicroSD cards up to 8G, have a built in headphone amp, have built in volume control and Next and Previous control for stepping thru MP3 files. The Clip Players have their own battery and a mini USB port for battery charging and file exchange with the MicroSD card. (You have to supply your own MicroSD card.) And considering the low price, the sound quality is quite good.
For instance:
http://www.ebay.com/itm/ws/eBayISAPI.dll?ViewItem&item=330654403698&ssPageName=ADME:L:OU:US:1123
I had originally bought mine for $5, now up to $6.75! Better buy a few now…
If you need to add a little music or voice to your next Arduino project, this simple hack will get you there. So here is how this works. We remove the guts to one of these inexpensive little MP3 players, solder on a couple of wires to the MP3 circuit board and attach then two an Arduino protoshield (if you are using a full size Arduino, I will show wiring to an Arduino Mini also.) The circuit also requires two analog switches to completely control all the front panel buttons. The Arduino code to control the MP3 player is really simple and an example is provided. You load your sound files on to a MicroSd card and name them in a way so that they can be sequenced in the way you want. When you are done, your Arduino will be able to step to and play specific sound files, adjust volume up or down, pause, etc.
I plan on following up with an EagleCad shield design. But for right now, its wires and solder and a little programming, so Arduinites can get going.
And of course, after I wrote this, I found this one also:
http://www.instructables.com/id/Adding-MP3-to-your-project-for-300/
Hopefully whatever I have left out, you can find in the above.
Step 1: Disassembly of the MP3 Player
These little guys are so cute and functional, it was hard to bring myself to open it up, but honestly, if I didn’t do it…
So, first get a really small jeweler’s Philips head screwdriver and remove the two screw on the white plastic side panel. The panel will pop off when the screws are off. (A small flat blade in the microsd slot. Be gentle!)
With the side off, you will be able to push out the other side. It is U-shaped.
With the other side out, you will be able to push out the PCB and battery. Again, be slow and gentle.
Now everything is out. Cool! Lets take a look at the circuit.
Step 2: Looking at the MP3 player internals
The PCB holds a power switch, stereo headphone jack, a 32kHz crystal, a MicroSD card socket and a mystery IC (at least for me). There is also a 3.5V (?) Li-Poly (?) battery. I don’t use the battery in this design… but don’t let me stop you.
The IC is an LC2093-B. Here is what I found on the web:
LC2093-B
AB1145D2G003
www.sztgmic.com
MP3 Decoder IC
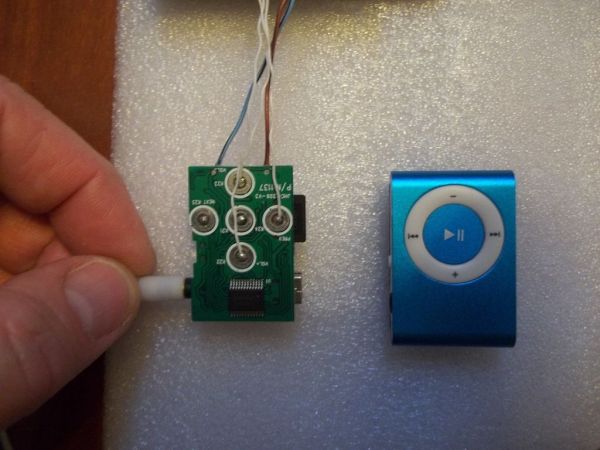
MP3 decoder board supports FM program features ….
1 Personal Emergency Link ( USB-AUDIO sound card) function,
just use mini- USB cable to connect between the computer,
cool dog can identify ‘MP3 simply repeating listen to ‘
direct control of key PC down selections / volume;
2 download (reader) function : Connect PC can act as a reader,
free copy of the SD card / TF card contents;
3.SD/TF / card playing / U disk playback MP3, 24bit DAC ,
the sound lifelike detail , S / N: 92dB , almost hear the noise
4 support FM , Bluetooth, Iphone
5. directly promote the headphone
output by nearly 3V
6. two line in input, Switch no popo sound
7.ADKEY hardware random selection button function
8. low BOM cost, built-in real RTC function , can save 24C02 memory IC ,
integrated IR decoding, instead of using infrared diode infrared receiver,
built- MUTE circuits, no external transistor , the master part only
10 external components than
9 built-in crystal compensation,
the use of very wide use of cheap 32.768KHZ crystal
10.SSOP 24 package processing cost is low
If anyone can locate a datasheet and post it, I would be very appreciative…
MP3
USB
For more detail: MP3 Interface for Arduino
-
How do I access the internal circuit of the MP3 player?
Remove the two screws on the white plastic side panel with a small jeweler's Philips head screwdriver, pop off the panel, and gently push out the U-shaped side and PCB. -
Can I use the battery from the MP3 player in this project?
The author does not use the battery in this specific design but notes that you are not stopped from doing so if you wish. -
What components are required to control the front panel buttons?
The circuit requires two analog switches to completely control all the front panel buttons. -
How do I name sound files for sequencing?
You must load sound files onto the MicroSD card and name them in a way so that they can be sequenced in the desired order. -
What functions can the Arduino perform with this setup?
The Arduino can step to and play specific sound files, adjust volume up or down, pause, etc. -
Does the MP3 player support FM radio features?
Yes, the LC2093-B decoder chip inside supports FM program features. -
What is the maximum capacity supported by the MicroSD card?
These players support MicroSD cards up to 8G. -
Is a separate headphone amplifier needed?
No, the Clip Players have a built-in headphone amp.
