Summary of Movement Activated Redstone
This article details a motion-activated redstone lamp project entered into a Minecraft competition. It combines real-world electronics with Minecraft concepts, using a Crumble microcontroller and an ultrasonic sensor to trigger a relay connected to a redstone block lamp. The build process involves gluing components together without soldering, wiring the circuit according to specific pin connections, and uploading custom code to activate the lamp upon detecting movement.
Parts used in the Motion Activated Redstone Lamp:
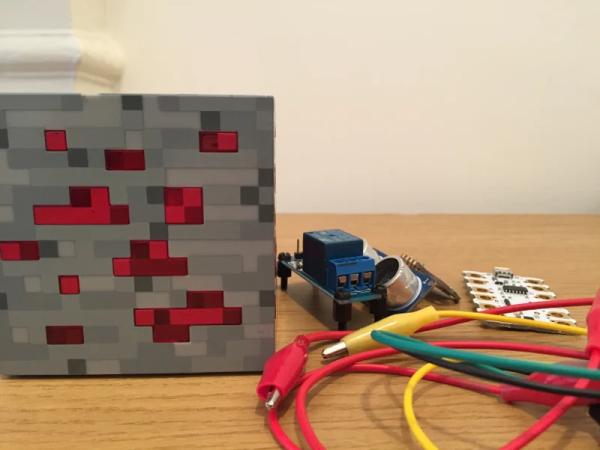
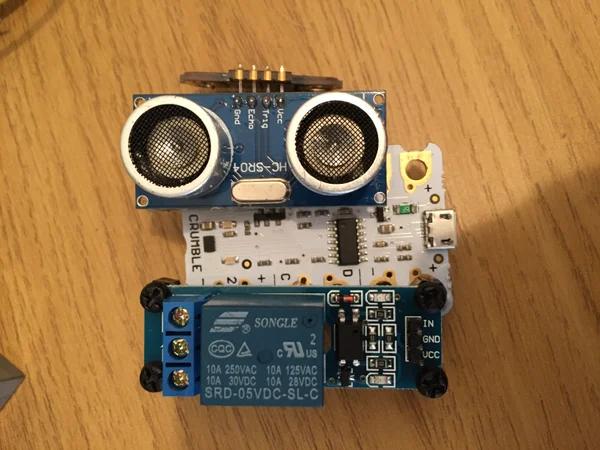
- One crumble microcontroller
- One ultrasonic distance sensor
- Crocodile Clips
- Relay
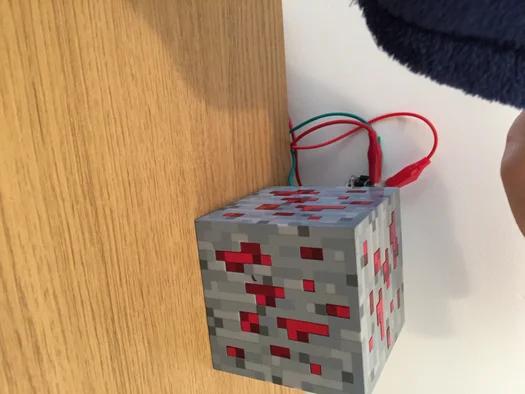
- Redstone block lamp
- Battery retainer
- Batteries (including a 3xAA battery pack)
- Hot Glue gun
- Small standoffs
This project is a motion activated redstone lamp.
It works by using a crumble microcontroller and an ultrasonic distance sensor wired up to a relay.
This project is being entered into the minecraft competition and any votes, favorites or comments would be greatly appreciated!
Step 1: Minecraft Redstone
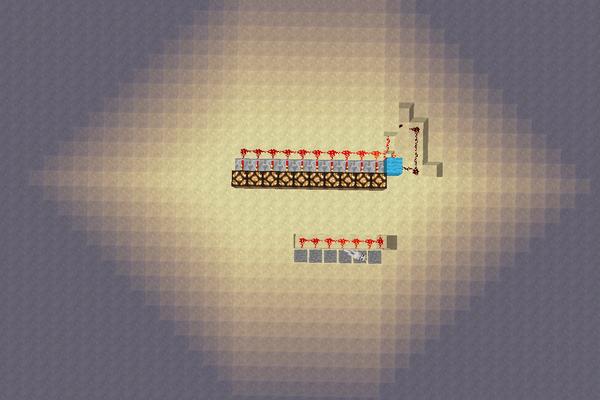
Having played Minecraft for quite a long time I have spent some time creating redstone circuits.
Mimicking real life circuits they can power things, have Logic Gates such as IF AND NOT OR as well as having the power to make things move.
I think it is important that you see a motion detector in minecraft before we attempt to create one in real life.
Each of the lamps is powered by a central line and repeaters. It is then linked underground by a set of NOT Gates until it reaches the desired level. Then it travels to where the input is; (The pressure Plates) and once any one of the plates is triggered, the circuit turns on the lamps!
I know this is a very simple circuit but I feel we should look at the minecraft aspect first!
Step 2: What Will You Need?
PARTS
One ultrasonic distance sensor
Redstone block lamp
TOOLS
Hot Glue gun
Brain
Once you have all of those you are good to go! ;]
Step 3: Get Your Glue!
Next we shall glue the components together, As I have no 3D printer and I don’t wish to use a soldering iron for this project I shall glue all of these together!
I used small standoffs to raise the components and then glued the standoffs in the appropriate places in the board, look at the pictures above to see where they go! Sometimes, due to different models , you may have to improvise as I did at some points!
Step 4: Destroy the Redstone Block
xD
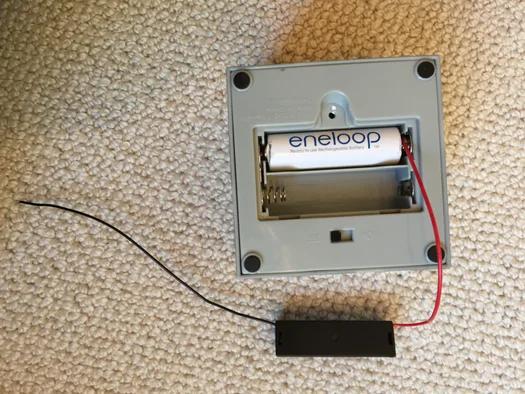
First we need to unscrew the battery retainer.
Then we shall insert one battery into the container.
For the next step we shall create a switch using the relay:
Put a crocodile clip on the final Ground as shown in the picture.
Connect a battery holder and add a battery to it
connect the red positive battery lead to the back of the battery inside the redstone block like in the picture.
If you switch it on and connect the wires it should power on, but we don’t want it to do this.
connect the two leads to the relay, by unscrewing the screws in the relay, inserting the bare wire and screwing it back down to create a connection the relay is now wired up!
Step 5: Do the Wiring
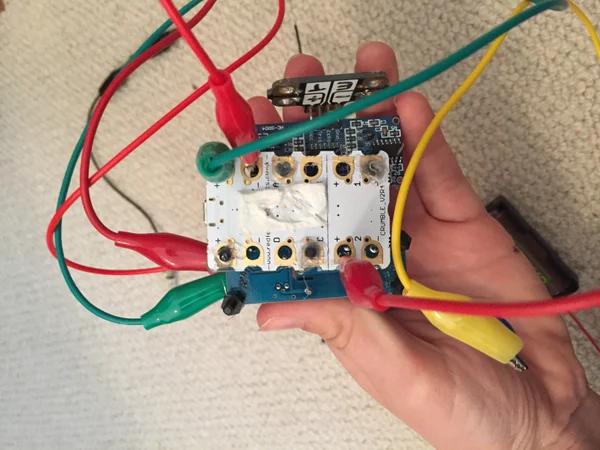
Now you need to do the wiring,
Connect the VCC from the relay to the + on the crumble
Connect GND from the relay to the – on the crumble
Connect the IN from the relay to the MOTOR 2 + on the crumble
connect the +from the Distance sensor to the + on the crumble
connect the -from the Distance sensor to the – on the crumble
connect the E from the distance sensor to the D on the crumble
connect the T from the Distance sensor to the B on the Crumble
Connect a different 3xAA batery pack to the crumble
Thats it!
Refer to the pictures if you want!
Step 6: Add Code!
Finally add the code that I have linked here and download it onto the crumble. You need to install the crumble software from their website
Source: Movement Activated Redstone
- How does the Minecraft redstone circuit work?
Lamps are powered by a central line and repeaters linked underground by NOT Gates until they reach pressure plates that trigger the lights. - What tools are needed for this project?
You need a hot glue gun and a brain; no soldering iron or 3D printer is required. - How do you connect the relay to create a switch?
Connect the two leads to the relay by unscrewing the screws, inserting bare wires, and screwing them back down. - Which pins on the Crumble connect to the relay?
VCC connects to +, GND connects to -, and IN connects to MOTOR 2 + on the Crumble. - How is the ultrasonic sensor wired to the Crumble?
The + and - pins connect to the corresponding power terminals, E connects to D, and T connects to B on the Crumble. - Can I use a soldering iron for this build?
No, the author chose to glue all components together instead of using a soldering iron. - Where can I find the source code for the project?
The code is linked in the article and must be downloaded onto the Crumble after installing the software from their website. - Why were small standoffs used?
Standoffs were glued to the board to raise the components and hold them in appropriate places.