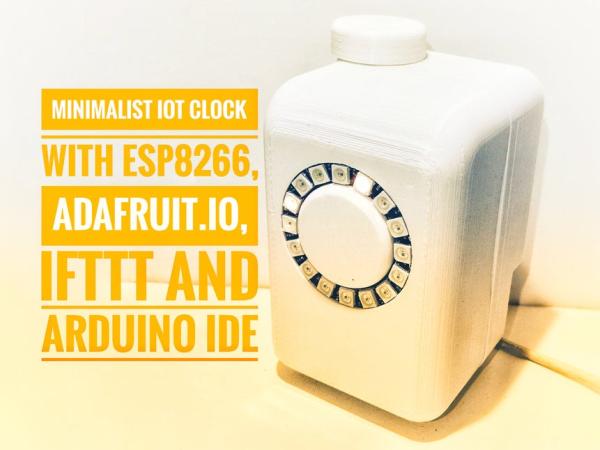
In this tutorial I show how you can make a minimalist clock synchronized with the internet. I tested it with two different ESP8266 based boards: Firebeetle and NodeMCU. The microcontroller gets current time from a Google server, and displays it on a NeoPixel LED ring. It also receives current weather data from WeatherUnderground, using IFTTT and Adafruit.io platforms, and change LEDs colors based on the weather condition.
It won’t have a good resolution (due to the small number of LEDs), but it’s a good way to practice your coding and electronic skills using a small number of components. I’ll also be able to create a device that ‘knows’ current time, without the use of an external real time clock circuit, and that’s able to ‘sense’ changes on the weather.
You might integrate it with other gadgets that already have an idle LED ring. It was designed for my IoT air freshner (https://www.instructables.com/id/IoT-Air-Freshner-with-NodeMCU-Arduino-IFTTT-and-Ad/), giving it a new functionality. You might do the same to other gadgets.
Some of the knowledges used here were based on Becky Stern awesome Internet of Things Class. It’s highly recommended!
Part of the code was based on torntrousers comment on ESP8266 forum http://www.esp8266.com/viewtopic.php?f=29&t=6007&start=5. Thanks for helping the community!
Step 1: Tools and Materials
For this project I needed a small amount of materials:
- Solder wire. I needed it to solder some wires to the LED ring, and to solder the pins bar to my ESP8266 boards;
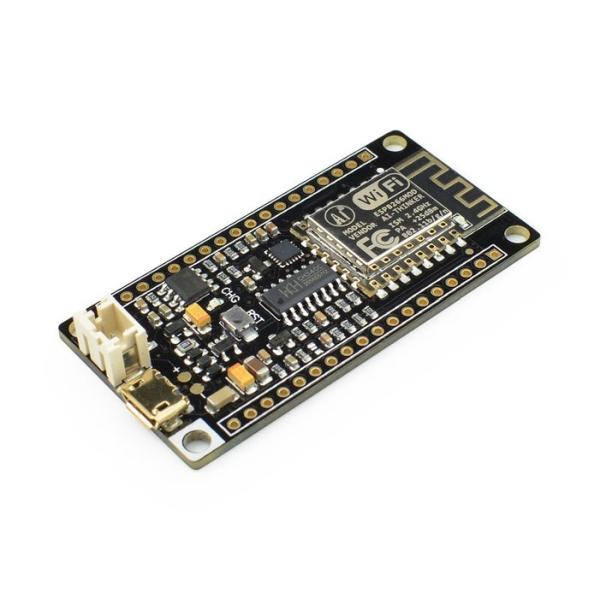
- ESP8266 dev board. There are several ESP8266 based boards. I tried two of them in this tutorial:
- NeoPixel 16 x WS2812 5050 RGB LED (link / link / link);
- MiniUSB cable, for the connection between the ESP8266 board and the computer (for uploading the code);
- 5V, USB charger (phone charger, for instance) for powering the circuit;
- 3 female-female jumper wires. I used it for the connection between the LED ring and the ESP8266 board.
The development board connects a given Wi-Fi network, and receives some data from Adafruit.io platform. A NeoPixel ring is used as a clock. It can also indicate the status of the gadget (if the Wi-fi connection was successful, for instance). The color of the LEDs will depend on the data received from an Adafruit.io feed. A 5V USB charger was used to power the control board and all the peripherals.
Once a 16 LEDs NeoPixel ring was used, the resolution for my clock was quite limited. The minimum division for the seconds LED is around 4 seconds. The minutes LED is only updated every 4 minutes. You can use a ring with more LEDs if you want a better resolution. There are versions with 24 LEDs (link / link), for instance. A 12 LED ring would also be a good choice for displaying the hours (link / link).
The links above are only a suggestion of where you can find the items used in this tutorial (and maybe support my future tutorials). Feel free to search for them elsewhere and buy at your favorite local or online store.
You can also design a 3D printed case for your clock. Did you know you can buy a Anet A8 for only $169.99? Click here and get yours!
Step 2: Preparing the NeoPixel Ring
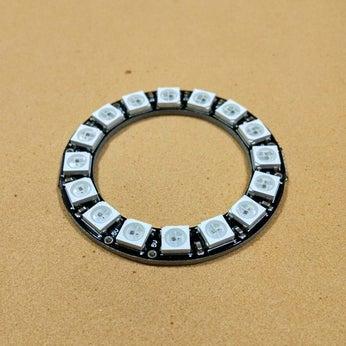
NeoPixel rings usually comes without wires connected to their terminals. This means you’ll have to solder some wires for the connection of the LEDs to your microcontroller. For that I used three female-female jumpers. I cut one side of the jumper and soldered the wires in NeoPixel ring terminals. I kept the other end of each jumper with a female terminal, which I connected on my ESP8266 board.
- Red wire = 5V
- Black wire = GND
- Blue wire = Data input
Step 3: Circuit With Firebeetle Board
For this project I tried two different ESP8266 boards: Firebeetle and NodeMCU.
DFRobot FireBeetle is a low-power-consumption development board designed for Internet of Things. It has an integrated WiFi, TCP/IP, 32-bit MCU, 10-bit ADC and multiple interfaces such as HSPI, UART, PWM, I2C and I2S. Firebettle boards are compatible with Arduino IDE.
It has a connector for a Li-ion battery, which might be really useful! It has a great finishing too.
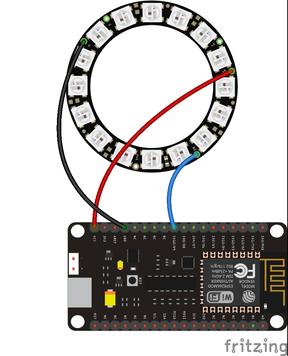
Once the NeoPixel was soldered, I connected the wires according to the schematics.
- NeoPixel 5V (red wire) => Firebeetle Vcc pin
- NeoPixel GND (black wire) => Firebeetle GND
- NeoPixel Data input (yellow wire) => Firebeetle GPIO 12 (pin D9)
Step 4: Circuit With NodeMCU Board
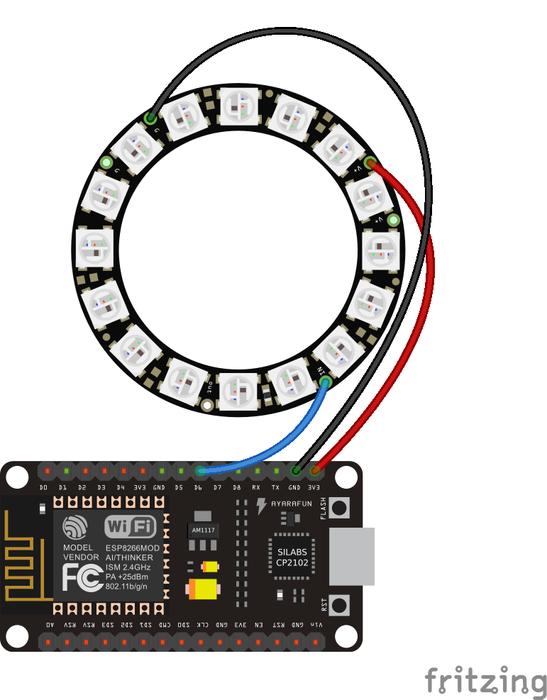
NodeMCU is an open source IoT platform, which runs on an ESP8266 Wi-Fi SoC from Espressif Systems. It’s hardware is based on the ESP-12 module.
Once the NeoPixel was soldered, I connected the wires according to the schematics.
- NeoPixel 5V (red wire) => NodeMcu 3V3
- NeoPixel GND (black wire) => NodeMcu GND
- NeoPixel Data input (blue wire) => NodeMcu GPIO 12 (pin D6)
Step 5: Setup ESP8266 Board on Arduino IDE
For this project I used Arduino IDE for programming my ESP8266. It’s the easier way if you’ve already used an Arduino before, and you won’t need to learn a new programming language, like Python or Lua for instance.
If you’ve never done this before, first you’ll have to add ESP8266 board support to the Arduino software.
1. Download and install Arduino IDE latest version
You can find the latest version for Windows, Linux or MAC OSX on Arduino’s website: https://www.arduino.cc/en/main/software
Download it for free, install it on your computer and launch it.
2. Adding ESP8266 board
Arduino IDE already comes with support to a lot of different boards: Arduino Nano, Mine, Uno, Mega, Yún, etc. Unfortunatly ESP8266 isn’t by default among those suported development boards. So in order to upload your codes to a ESP8266 base board, you’ll have to add its properties to Arduino’s software first.
2.1. Firebeetle
- Navigate to File > Preferences (Ctrl + , on Windows OS);
- Add the following URL to Additional Boards Manager textbox (the one on the bottom of the Preferences window): https://raw.githubusercontent.com/DFRobot/FireBeetle-ESP8266/master/package_firebeetle8266_index.json
- If the text box wasn’t blank, it means had already add other boards before on Arduino IDE before. Add a comma at the end of the previous URL and the one above.
- Hit “Ok” button and close the Preferences Window.
- Navigate for Tools > Board > Boards Manager for adding your adding your Firebeetle ESP8266 board.
- Type “Firebeetle-ESP8266” on the search text box, select “FireBeetle-ESP8266 by DFRobot” and install it.
Now your Arduino IDE will be ready to work with the Firebeetle ESP8266 development board.
2.2. NodeMCU
- Navigate to File > Preferences (Ctrl + , on Windows OS);
- Add the following URL to Additional Boards Manager textbox (the one on the bottom of the Preferences window): http://arduino.esp8266.com/stable/package_esp8266com_index.json
- If the text box wasn’t blank, it means had already add other boards before on Arduino IDE before. Add a comma at the end of the previous URL and the one above.
- Hit “Ok” button and close the Preferences Window.
- Navigate for Tools > Board > Boards Manager for adding your ESP8266 board.
- Type “ESP8266” on the search text box, select “esp8266 by ESP8266 Community” and install it.
Now your Arduino IDE will be ready to work with a lot of ESP8266 based development boards, like the generic ESP8266, NodeMcu (which I used in this tutorial), Adafruit Huzzah, Sparkfun Thing, WeMos, etc.
3. Adding the libraries
The following libraries will be used for our Arduino code. Download the following libraries:
- Adafruit NeoPixel library (https://github.com/adafruit/Adafruit_NeoPixel)
- Arduino http client library (https://github.com/arduino-libraries/ArduinoHttpClient)
- Arduino IO library (https://github.com/adafruit/Adafruit_IO_Arduino)
- Adafruit MQTT library (https://github.com/adafruit/Adafruit_MQTT_Library)
Navigate to Sketch -> Include Library -> Manage Libraries… on your Arduino IDE and add the libraries above.
Source: Minimalist IoT Clock (using ESP8266, Adafruit.io, IFTTT, and Arduino IDE)
