
Summary of Mechanical Bull for Dolls
This article describes a DIY mechanical bull for dolls built as a weekend hobby in under two hours using recycled materials. The project focuses on recycling items like soda cans and cardboard while teaching the use of an Arduino Uno with a joystick shield. It outlines a simple assembly process involving servomotors, screws, and hot glue to create a moving doll bull.
Parts used in the Mechanical Bull for Dolls:
- A volunteer (doll)
- Pieces of cardboard
- An empty soft drink can
- Two servomotors
- An Arduino Uno
- A Joystick Shield
- Arms for the servos
- Three screws
- Nuts and washers
- Hot glue, scissors, knife, etc.
This mechanical bull was created as a weekend hobby. The creation process was simple and did not last more than two hours. The materials I already had at home. For those who wish to make an equal, will be a good opportunity to recycle materials and learn how to use the joystick shield with Arduino. Hope you enjoy.
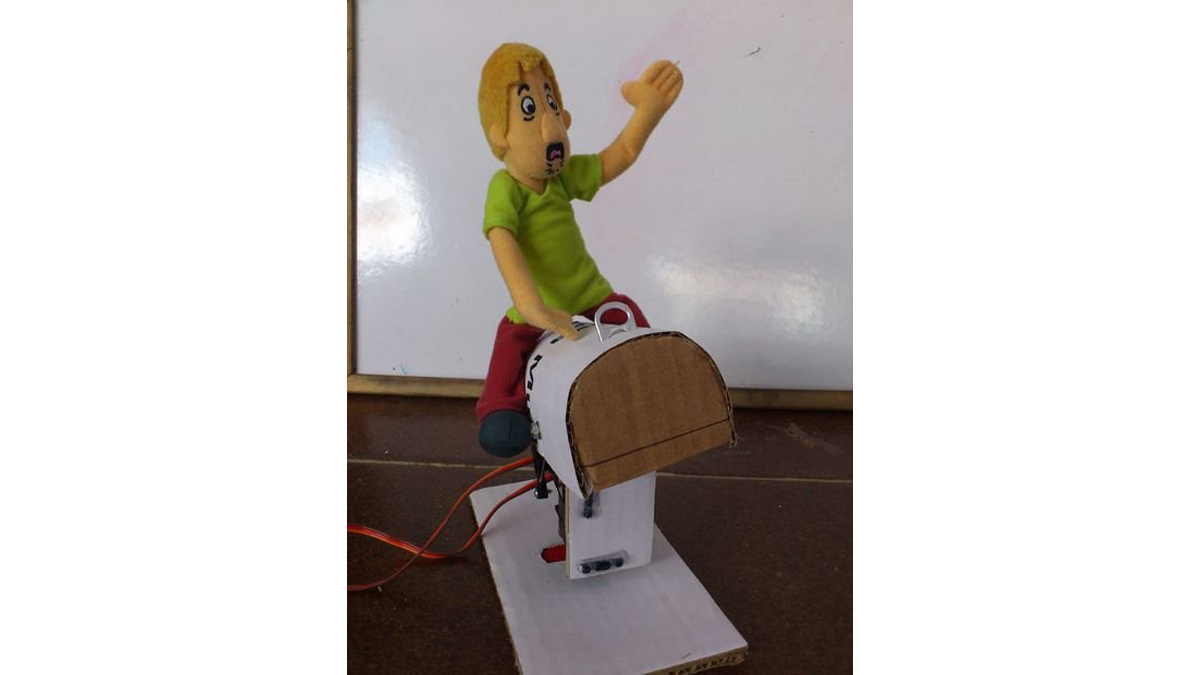
Step 1: Materials:
– Pieces of cardboard
– An empty soft drink
– Two servomotors
– A Arduino Uno
– A Joystic Shield
– Arms for the servants
– Three screws
– nuts and a washers
– Hot glue, scissors, knife, etc. …
The servo motors are fixed on each other as shown, using a piece of cardboard to position them correctly and hot glue.
Joining small pieces of cardboard with a hole in the center, was made a bracket to hold the mount in servants.
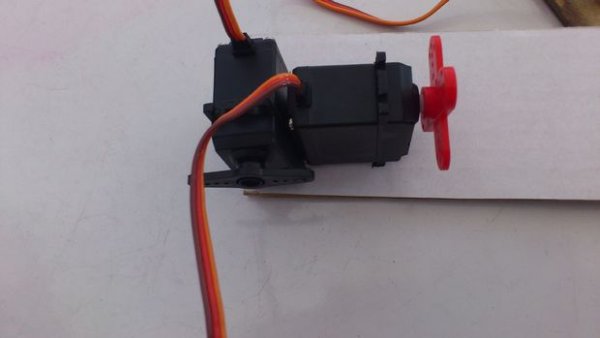
I used a bolt, a nut and washer to secure the mount in servants, according to the figure.
Also used a piece to make the linking of movement between the servo arm and mount. This part should be a little slack for not hang with the movements.
The base was made with a simple cardboard cutout. I made the design of servo arm that controls the base, cut out and pasted it on cardboard with hot glue.
I used a part of the soda can as a handle to hold the puppets up on it.
For more detail: Mechanical Bull for Dolls
- How long did it take to build this mechanical bull?
The creation process was simple and did not last more than two hours. - What is the best way to obtain the materials for this project?
The creator used materials already had at home and suggests recycling them. - Can I learn how to use the joystick shield with Arduino through this project?
Yes, the project offers a good opportunity to learn how to use the joystick shield with Arduino. - What model was used for the doll bull riding?
A can of soda was used as a model for the doll bull riding. - How are the servo motors fixed together?
The servo motors are fixed on each other using a piece of cardboard to position them correctly and hot glue. - How is the mount secured to the servos?
A bolt, a nut, and washer are used to secure the mount in the servos. - What part of the soda can is used as a handle?
A part of the soda can is used as a handle to hold the puppets up on it. - How is the base of the mechanical bull constructed?
The base was made with a simple cardboard cutout and the design of the servo arm was pasted on it with hot glue.
