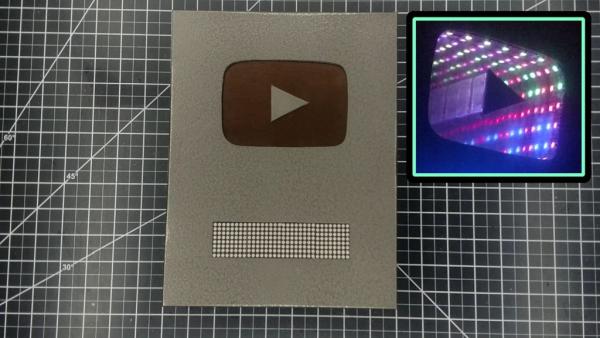
In this post we will discuss Make a Bronze Infinity YouTube Play Button Subscriber Counter: Sometimes when people reach different milestones on YouTube, they will create their own play button. I decided that I would love to do that too, and I also wanted to have a subscriber counter. So to accomplish both goals, I came up with this: an Infinity Play Button! The infinity has a double meaning here because it has the subscriber counter AND the play button mirror is also an infinity mirror.
For the infinity mirror, I just used a regular LED strip controller. For the subscriber counter display, that’s being controlled by an Arduino. I didn’t create the code that I used here, but I found this video made by the person who did create the code. https://www.youtube.com/watch?v=bePgZIXHSkM
Here is a video that I made where I updated their video: https://youtu.be/YBJOAiQ848c
I have also made a video of this Instructable, and you can check that out here: https://youtu.be/YaTuyXnq8VI
This was a pretty big project. Hopefully, I described the steps well, and it is very important to also refer to the pictures that I have added.
Here is what I used for it:
Tools for Make a Bronze Infinity YouTube Play Button Subscriber Counter:
- Ruler
- Sharpie
- Removable, Double Sided Tape
- Tin Snips
- Screw Clamps
- 2″ Spring Clamps
- Rubber/Plastic Hammer
- Dremel
- Cutoff Wheel
- Cone Grinding Stone
- Sanding Drum
- Sanding Block
- Sand Paper
- Drill
- 1/8″ Drill Bit
- 1/16″ Drill Bit
- Countersink Bit
- Soldering Iron
- Solder
- File
- Hot Glue Gun
- Hot Glue Sticks
- Handheld Saw
Parts:
- D1 Mini WiFi Board
- X7219 Dot Matrix Module,Red
- MAX7219 Dot Matrix Module,Blue
- MAX7219 Dot Matrix Module,Green
- Round Mirror
- Aluminum Sheet Metal
- Wood Glue
- E6000 Glue
- Flat Black Paint
- Hammered Bronze Paint
- Addressable LED Strip
- LED Connectors
- Addressable RGB LED Controller #1
- Addressable RGB LED Controller #2
- 5VDC Power Supply
- Plexiglass
- Mirror Film, Gold
- Mirror Film, Bronze
- Painters Tape
- Aluminum Foil Tape
- 16 Gauge Wire
- 1″ Square Dowel
- Screws
Step 1: Make the Layout
On my computer, I made a layout of how I wanted the play button to look and printed it out. I wanted a subscriber counter, and I used this LED matrix display for that. For the play button mirror, I used this 5 1/2 round mirror.
On this sheet of copper colored aluminum, I marked all of my lines. The aluminum sheet is 12″ x 14 1/2″ and the final play button will be 8 1/2″ x 11″. I added alignment lines to help me center and align the play button emblem. After attaching it to the metal sheet, I traced around it. I used double-sided removable tape to help me hold it in place. I also drew the triangle in place, extending each of the lines.
Read Full post