Summary of Make A 4x4x4 LED Cube Using Arduino
This article details the construction of a 4x4x4 LED cube controlled by an Arduino. The project emphasizes low cost, simplicity, and modularity, allowing users to build the frame using craft wire or solder LEDs directly to a perfboard. It explains the electrical layout where vertical columns share common anodes and horizontal layers share common cathodes, controlled via transistors or direct Arduino connections. The guide covers preparing components, soldering techniques, and circuit assembly, requiring basic electronics knowledge.
Parts used in the 4x4x4 LED Cube:
- 64 diffused LED Lights
- 16 220 resistors
- 4 22k resistors
- 4 NPN type Transistors
- 1-2 Perfboard
- 1 Arduino (MEGA or UNO)
- Insulated 22 gauge Wire
- Craft wire
- Wood piece for drilling holes
- 3v battery for testing
After seeing all the different instructables for Led cubes I was still left with a lot of unanswered questions. So after reading everything I could find this is what I got. I decided to make the instructable after building it…so ill try to recreate the process the best I can.
This cube is different from others for many reasons:
1. It connects directly to your Arduino.
2. It uses few components, so its relatively inexpensive.
3. Runs on code that’s easy to write. or you can use the ones provided.
4. Everything can be bought at your local Radio Shack
Parts Needed:
- 64 diffused LED Lights (it cost a lot less to order 1000 off ebay for around $20) (Also I used 3mm LEDs, but 5mm or 8mm would work to)
- 16 220 resistors
- 4 22k resistors
- 4 NPN type Transistors
- 1-2 Perfboard (The kind with the little copper circles) (you only need one if you are good at compacting your soldering unlike me….)
- 1 Arduino (I went ahead and bought a MEGA so there’s room to expand for future projects, however UNO has just enough i/o ports)
- Insulated 22 gauge Wire
- some craft wire
In all the cost of this cube is relatively low at around $100 (according to where you get your parts)
the Arduino was the most expensive part at around $60 For MEGA and I think a UNO is around $30.
So if you already have a Arduino the cost is brought down to $40.
Knowledge Needed:
- Basic electronics and soldering
- Be capable of following directions
Read the ENTIRE instructable before building design options mentioned in last steps.
Step 1: Prepare The LED’s
The first thing you must do is make the cube.
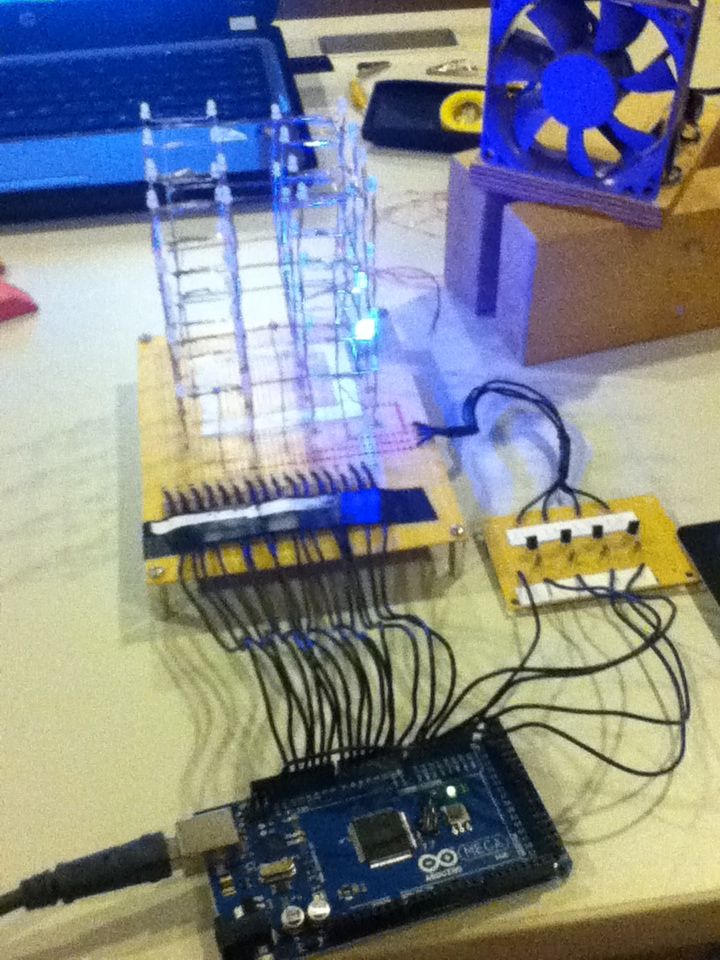
If you look at the pictures of mine the LED’s are not all just soldered to each other. This is because I actually made all the wiring and circuitry when I was waiting for my LED’s to get here from China….(Note that it takes about two weeks for the lights to get to you).
Therefore when Finally got the LED’s they were a lot smaller than I anticipated, and I did not want to redo my circuit board, so I just made frames out of craft wire to hook all the cathodes to. After I started to do that I then realized that it would the be shorter than it is tall making it a rectangle rather than a cube. So that’s when I added the vertical columns of wire to solder the anodes too.
The cube is split into 4 layers of 16 LEDS.
All the LEDs aligned in a vertical column share a common anode (+).
All the LEDs on a horizontal layer share a common cathode (-).
Now if I want to light up the LED in the upper left corner in the back (0,0,3), I just supply GND (-) to the upper layer, and VCC (+) to the column in the left corner.
To begin the Construction of the cube use a drill with the proper size drill bit to make holes in a piece of wood. draw a grid to the size of the cube you want. (this is determined by how long the leads are on your LED’s.
Your going to want to test you LED’s before you solder them into place because it would be sad if you put your cube together and had one in the middle that didn’t work. I’m sure they would be pretty hard to replace. So just use a 3v battery between the two legs of the LED. (long leg is positive, short is negative)
Step 2: Solder the LEDs
As I said before, I decided to to this after I built it, so I don’t really have any pictures of the building process.
However the pictures below are exactly what it should look like. These are from Chr’s instructable for his 4x4x4 cube. Also there is additional information on his that may not be included on mine. So go read his too.First make all four layers, then solder the layers together.
Step 3: Build the Circuit
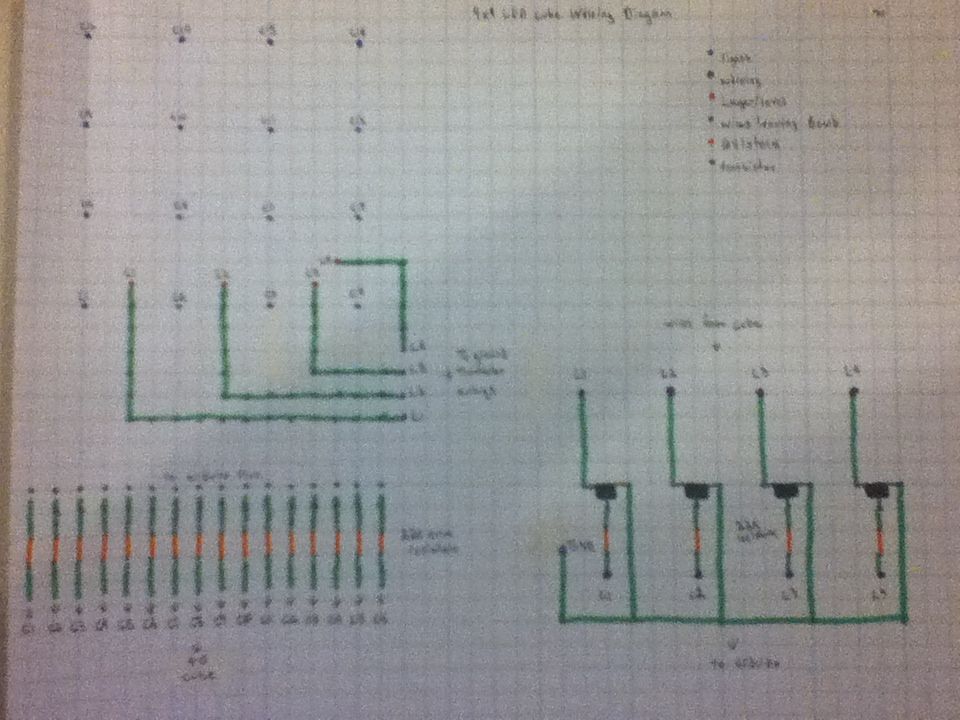
The circuit is pretty simple. Each of the 16 columns will connect to a pin on the Arduino through a current limiting resistor. Each of the four levels connects to ground via a NPN transistor when activated by an Arduino pin.
I drew these drawings if you can understand my way of labeling.
First Make the Transistor arrays:
NOTE: The transistors are only necessary for some of the codes out there. If you plan on writing your own like i did you can skip this and plug the four ground layers directly into the Arduino!
Its made with 4 NPN type transistors. and 22k ohm resistors. In a nut shell connect all the collectors together, theses all go to a ground pin on the Arduino. Then all four bases should go their own pin on the Arduino. Lastly the Emitters should go to the layers on the Cube. (Look at picture 2 and it will make since.
For more detail: Make A 4x4x4 LED Cube Using Arduino
- How can I save money on the LED lights?
You can order 1000 off eBay for around $20 instead of buying individually. - Can I use different sizes of LEDs for this project?
Yes, 3mm LEDs were used, but 5mm or 8mm would also work. - What determines the size of the cube?
The size is determined by how long the leads are on your LEDs when drawing the grid on wood. - How do I test the LEDs before soldering?
Use a 3v battery between the two legs of the LED, ensuring the long leg is positive. - Do I need transistors for every code?
No, transistors are only necessary for some codes; you can plug ground layers directly into the Arduino if writing your own. - Which Arduino board is recommended for expansion?
The MEGA was used for room to expand, though the UNO has just enough i/o ports. - What is the estimated total cost without an Arduino?
If you already have an Arduino, the cost is brought down to $40. - How many layers does the cube have?
The cube is split into 4 layers of 16 LEDs.