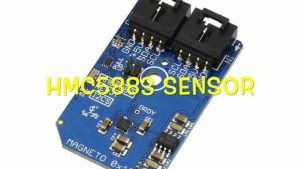
The materials that we need for accomplishing our goal includes the following hardware components:
2. Arduino Nano
The hardware hookup section basically explains the wiring connections required between the sensor and the arduino nano. Ensuring correct connections is the basic necessity while working on any system for the desired output. So, the requisite connections are as follows:
The HMC5883 will work over I2C . Here is the example wiring diagram, demonstrating how to wire up each interface of the sensor.
Out-of-the-box, the board is configured for an I2C interface, as such we recommend using this hookup if you’re otherwise agnostic. All you need is four wires!
Only four connections are required Vcc, Gnd, SCL and SDA pins and these are connected with the help of I2C cable.
These connections are demonstrated in the pictures above.
Step 3: Arduino Code to Measure Magnetic Field Intensity:
Lets start with the arduino code now.
While using the sensor module with the arduino, we include Wire.h library. “Wire” library contains the functions which facilitate the i2c communication between the sensor and the arduino board.
The entire arduino code is given below for the convenience of the user:
Read more: Magnetic Field Measurement Using HMC5883 and Arduino Nano

