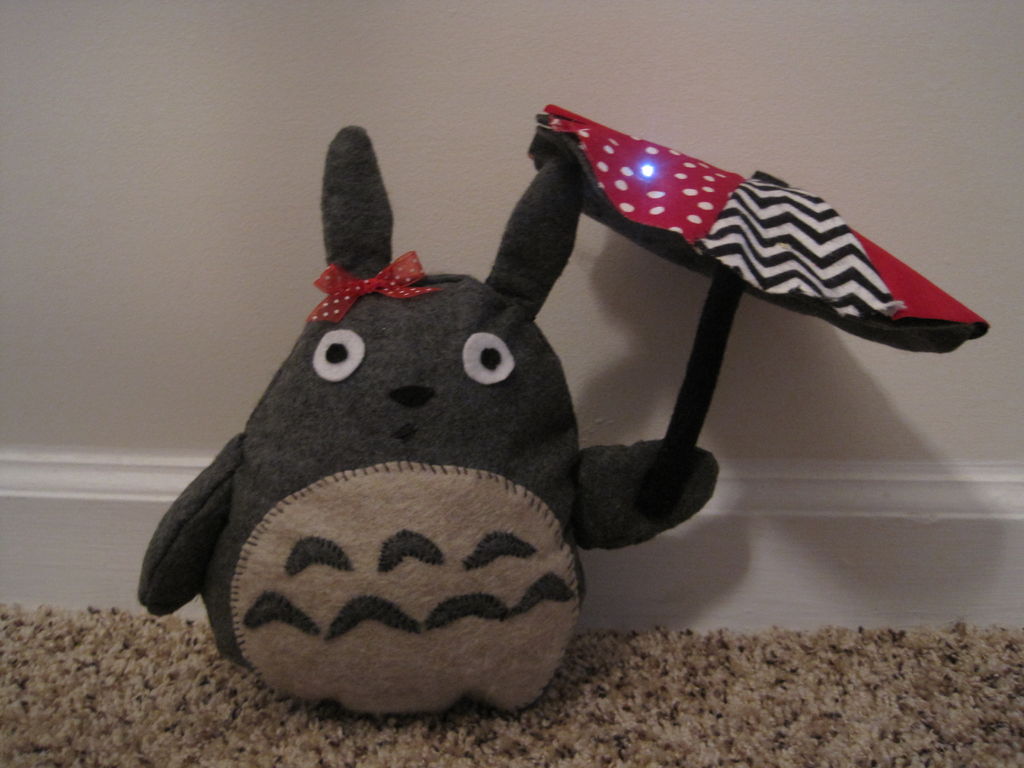
For Totoro:
Felt: 1 black, 3 grey, 1 white, 1 beige
Needle
Black Thread
Poly-fil stuffing
Cardstock
Scissors
Pins
Pen or chalk
DIY Totoro Plush Tutorial HERE
Totoro Pattern HERE
For Umbrella:
3 or 4 different types of fabric
Felt: 1 grey, 1 black
2 popsicle sticks
Needle
Black Thread
LilyPad Arduino:
LilyPad Arduino Board
4 LilyPad LEDs
Conductive Thread
Needle
Battery
Mini USB cable
(I purchased the ProtoSnap LilyPad Development Board, but because of the simplicity of my project, it may have been cheaper to buy the needed pieces individually… check out all the LilyPad gadgets here!

Step 1: Sew Your Plushie
I made a few minor changes to my Totoro:
1. I didn’t sew quite as many little half-moon pieces on the stomach
2. I used a different colored piece of felt for the bottom of the tail, instead of making it all one color (pictured)
3. I sewed on one of the arms so it stuck straight out– I needed something to sew the umbrella onto
4. I didn’t stuff my Totoro’s ears with the Poly-fil like suggested– I didn’t think it was necessary once I had them all sewn together
Also, I found it was easier to print the pattern on regular computer paper (as opposed to the card stock suggested)) and pin it to the felt (before cutting the pattern pieces out) and cut the pattern & felt out together– just like what is done with most patterns.
Doesn’t it look funny without ears!!
Step 2: Make the Umbrella– Part 1
Here are the steps:
1. Decide what size you want your umbrella to be. Once I figured out how big I wanted mine, I found a bowl in the kitchen to trace that was about the right size.
2. Divide your circle into an equal number of pieces– I divided mine into 8 sections. I assigned each section a number, and made myself a note of the order I wanted to sew the different fabrics together. (see pictures)
3. I used four different fabrics; I wanted each different one to appear twice on the umbrella. **Note the solid red and black (far right) below are actually not fabric. The red is a thicker piece of paper with a velvety feel to it; the black is stiff, sparkly felt. I would not advise trying to sew paper and stiff felt together. It took forever!
4. Next, I cut out each individual piece of the circle and pinned it to the piece of fabric it corresponded with. It is kind of hard to see in the picture, but each piece has a number penciled on it, so I wouldn’t lose track of which pieces to sew together.
5. Finally, I sewed the pieces together, following along the line I drew on the fabric when tracing the paper. I pinned the pieces to each other as I went along– this made it easier to sew them together.
Step 3: Make the Umbrella– Part 2
1. First, I cut a rectangular piece of out of black felt.
2. Next, I placed two popsicle sticks in the middle, and sewed the felt up around them.
3. Finally, I cut the extra felt off the bottom and sewed it all up. (not pictured)
Step 4: Coding the LilyPad Arduino
I was most uncertain about the coding aspect of this project, so I decided to keep it simple and only attach four blinking lights to the top of the umbrella.
I did this by sewing the LilyPad and LEDs on a piece of grey felt separate from the actual umbrella.
Then, I cut tiny holes in the umbrella fabric so the lights could shine through.
Finally, I sewed the felt to the bottom umbrella, the LilyPad Board and lights on the “inside” of the umbrella– so all you see on the bottom is plain grey felt (pictured).
I didn’t go all the way around with stitches, I just put a few right around the LEDs and that was enough.
I did use a small piece of duct tape on the edge right near the LilyPad– it needed a little something and I didn’t want to sew over the conductive thread.
**Since I used paper and hard felt for 4 sections of the umbrella, I only put the LED lights on the polka dot and striped sections. The LEDs peek through fabric in the middle of the sections, and are closer to the edge of the umbrella.
The lights blink one at at time, but not randomly– that is they go around the umbrella blinking in a consecutive order
For more detail: LilyPad Arduino Totoro Plush with Umbrella

