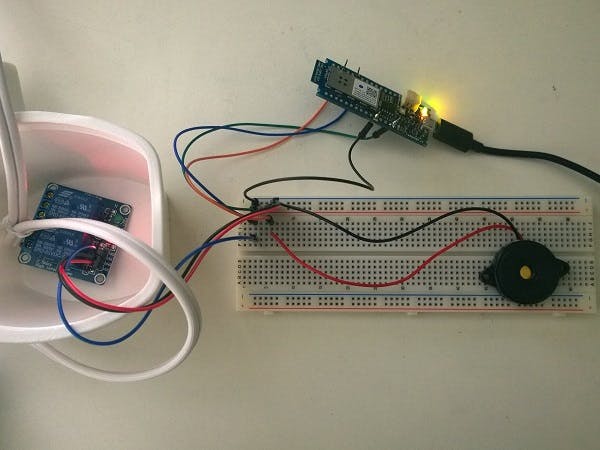
If the WiFi connectivity goes down, this will reboot the router.
Story
There are times you are unable to connect to your WiFi router. This can be especially problematic when you have increasing number of WiFi dependent IoT devices. Many times, the remedy is to simply reboot the router i.e. unplug the power cord, wait for a few seconds and plug it back again.

If you do not want to go through that trouble on the ongoing basis, this apparatus will keep an eye on the wifi connectivity. If the connectivity goes down, it will turn on the buzzer to give warning to the user, then it will turn the router off for a predefined time using a relay. Will turn the router on again. After the router turns on, it will wait for a while to perform check on the WiFi.

This has been designed using Finite State Machine design pattern.
It uses MKR 1000 board that has built in WiFi. (You can also use Arduino with WiFi shield or equivalent.) It checks the WiFi connectivity by attempting to connect to google.com. If the connection is successful, it puts the device in the Connected State. In the Connected state, it simply waits for a period of time and switches to Checking state to perform periodic check.
If the connection is not successful, it puts the device in Disconnected state. This state will turn the buzzer on through port 3. Will wait for a few seconds and then enter RouterOff state.
When RouterOff state is entered, router is turned off by the relay connected on Port 0. After a while, it will turn the router on and change the state to RouterOn.
When RouterOn state is entered, router is turned on by relay. It waits for a while giving time to router to boot and start the WiFi. Then the state is changed to Checking which will perform the check.
Here are the steps to build it.
Step 1: Connect the Speaker
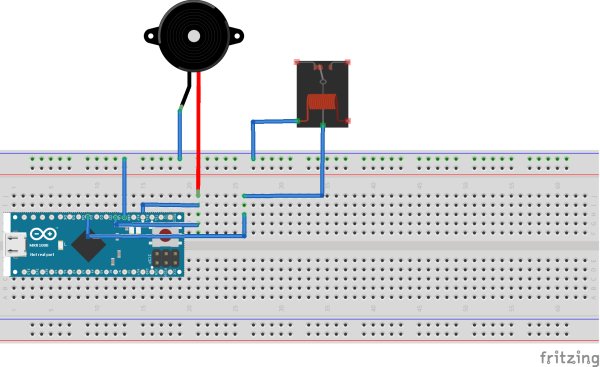
Connect pin 3 of Arduino to the red wire of the speaker
Connect ground of Arduino to the black wire of the speaker
Step 2: Connect the Relay
Take a power cord and cut one of its wires to connect to relay. Connect one end to the common terminal of the relay and other to the NC (Normally Closed) terminal of the relay. Be careful that the strands do not touch any other parts. Connect relay to Arduino as per schematics. Ensure that Relay is on non-conductive surface and preferably in non-conductive enclosure. This is important because the bottom part of the RELAY exposes HIGH VOLTAGE FROM the main electrical line. DO NOT Connect cord to main till the project is ready.
Read more: Keep the WiFi On
