Hi there,
This is my contribution to the Space-Contest.
There are some ISS-Pointer around the WWW. Some of them use several PSUs and/or quite big motors.
My goal was to build something cheap, looking cute and a little bit badass – all powered with only one 5 Volt PSU.
If the GIF and/or the embedded Video don’t work, here is the direct youtube link:
It’s just a demo. Not a real fly-by in this video.
So what you realy need is:
- one Stepper-Motor (28BYJ-48)
- one Servo-Motor (9G SG90)
- Wemos D1 mini
- decent 5 Volt source (i use a raspberry power supply with on/off switch)
- something running a python-script to calculate the iss.position (raspberry, linux server, nas)
- soldering stuff
- cables
Everything else is up to your taste and possibilities.
I added lots of Lego-Bricks (internal) and other “stuff” to get those metal plates together, two old-fashioned Light-Bulbs from Bike-Spare-Parts, an arm from an old Harddrive, a tiny display, some eyebrows, small magnets and a reed-contact. After some weeks i was able to print an axis instead of using even more legos.
Fun-Fact: Legos do perfectly fit on a 28BYJ-48 stepper.
In a way it turned out as a spare-part-project which lights up our living room time by time.
There is even a little LED-blinking (the embedded LED on the chip), everytime the motor starts.
The bulbs only lit up when the ISS is realy high enough from the horizon to be seen. This is hardware based with magnets and a reed-contact.
Step 1: Dryrun Everything
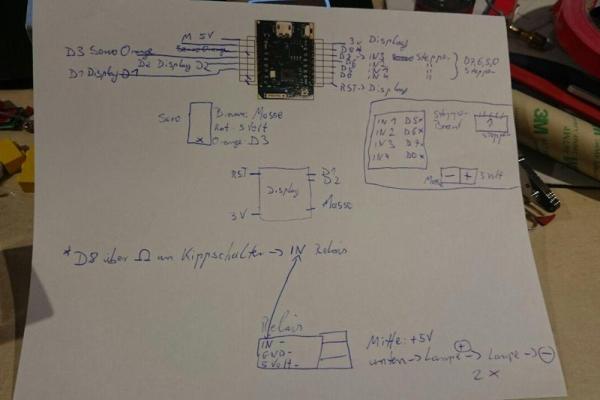
You want to build something cool that works? Then make it work first 🙂
Write everything down and start on your breadboard. The pictures above were my first attempts.
There are a lot of wires. Nearly every possible pin will be used, if you add the display, too.
You can flash the arduino code whenever you want, but you’ll have to add your wlan credentials first.
const char* ssid     = "xxx";  // YOUR WIFI SSID
const char* password = "xxx";  // YOUR WIFI PASSWORD

// change this to your motor if not NEMA-17 200 step
#define STEPS 2048  // Max steps for one revolution
#define RPM 10     // Max RPM
#define DELAY 1    // Delay to allow Wifi to work
So edit those lines, keep the com-monitor active, and flash it.
The number of steps work for me – if you use another stepper, you will have to find other values.
After flashing you should get some output on your com-monitor. At least your IP-Adress should show.
Now you can connect to the webserver by typing the ip-adress and play around a little bit.
No errors so far? Then take of the usb an start connecting everything on your breadboard.
In the end, some things didn’t work as expected, so here is all in “code-language”, just to get everything correctly wired.
int SVRO = D3;    // GPIO 15 Servo Control
int STBY = D5;     // GPIO 5 TB6612 Standby
int LEDIN = D4;    // GPIO 0 (built-in LED)
int LEDEX = D8;    // GPIO 4 External LED
In line 204 you can change the word “uhr” to whatever your language is.
The Display connects to
SDA=D2
SCL=D1
You should use the 3Volt from your ESP to power it.
The arm (Servo) goes to D3.
Stepper is: D5, D7, D6, D0
Thats it. You need to put all 5V to one power-source and all grounds.
(My bike-bulbs are connected directly to 5 Volt and ground. There is a reed contact in line which gets closed by magnets on the pointing arm. They are not connected to the ESP.)
When everything is wired up, you still can use your usb-connection as the power source, which makes debugging easy.
But the Ampere from your PC is not enough for two motors, so at least the Servo will make some ticking noise.
Connect just one motor or give them power with an external source for testing.
Everything connected and double-checked you should be able to let your motors run.
The display works as a debug-output, too 😉
Step 2: Get Your Location and the ISS-Position
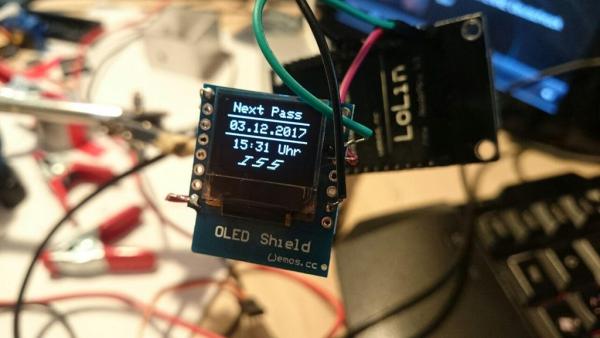
If you have your own Design in mind, this is the last step to get an iss-pointer running.
All other steps are about my way to build it.
Get the python code (isspointer3.py), get your local latitude/longitude, edit lines with the # at the end and fill the ip-adress of your ESP.
The STEPS are 2048 with my stepper. That seems to be a very big number, but it works.
You have to test it with the webinterface of your ESP to get the right number.
(I’ve used another IP for the LEDIP. You can use the ip of your ESP as well.)
<p># YOUR LOCATION<br>LAT = <strong>41.6</strong>	# Your Latitude (+N) deg
LON = <strong>5.3</strong>	# Your Longitude (+E) deg
ELV = <strong>64.0</strong>	# Elevation at your location (meters)</p><p># FOR ALT/AZ POINTER
# FOR ALT/AZ POINTER
STEPIP = "http://192.168.1.77/" # IP Address of YOUR ESP8266 AltAZ Pointer
LEDIP = "http://192.168.1.73/" # IP Address of GLUEHBIRNE
STEPS  = 2048    # Replace with your stepper (steps per one revolution)</p>
Save and run with:
python isspointer3.py
The output should look something like this:
don@NAS ~ $ python isspointer3.py

DEBUG MODE</p><p>ISS PASS INFO
Seconds since last TLE check: 3600
['ISS (ZARYA)', '1 25544U 98067A   18099.10205194  .00002348  00000-0  42552-4 0  9998', '2 25544  51.6434   3.1158 0001739 321.6269 181.4219 15.54218240107772']
Current UTC time  : 2018/4/10 07:57:50
Current Local time: 2018-04-10 09:57:50.000001<a href="http://192.168.1.77/2018-04-10">

http://192.168.1.77/2018-04-10  </a> 13:57:53.000001
Stepper usage:<a href="http://{ip_address}/stepper/stop">

http://192.168.1.77/2018-04-10  </a><a href="http://{ip_address}/stepper/start">

http://192.168.1.77/2018-04-10 ><a href="http://{ip_address}/stepper/rpm?[1">

http://192.168.1.77/2018-04-10  </a> to 10]<a href="http://{ip_address}/stepper/steps?[-2048">

http://192.168.1.77/2018-04-10  </a> to 2048]</p><p>Servo usage:<a href="http://{ip_address}/servo/value?[0">

http://192.168.1.77/2018-04-10  </a> to 90]</p><p>LED usage:</p><p><a href="http://{ip_address}/led/on" style="background-color: initial;">http://{ip_address}/led/on</a></p><p><a href="http://{ip_address}/led/off">http://{ip_address}/led/off</a></p><p>Free Heap: 45040 Byte</p><p>Next Pass (Localtime): 2018-04-10 13:57:53.000001
UTC Rise Time   : 2018/4/10 11:57:54
UTC Max Alt Time: 2018/4/10 12:01:52
UTC Set Time    : 2018/4/10 12:05:50
Rise Azimuth: 183:06:43.9
Set Azimuth : 86:07:53.0
Max Altitude: 8:08:16.8
Duration    : 476</p><p>CURRENT LOCATION:
Latitude : -6:39:50.3
Longitude: -135:40:12.7
Azimuth  : 313
Altitude : -62
ISS below horizon
doAzReset(0)
The display on your Pointer should (after some seconds) show the next fly-by.
Congrats. All your components are working.
If you want to have some “maker-fun” or just get an idea of building your own, follow the next steps.
Step 3: Motors
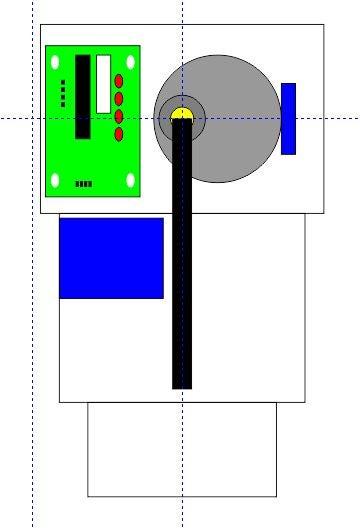
Picture one shows a raw idea of the final system.
Everything was made out of aluminium.
Stepper:
The stepper sits upside-down, so the whole body rotates around the base.
Why not putting the stepper into the base? I wanted a small base – so it’s a design based solution.
My first attempts (in picture two and three) didn’t work out as expected. Later the stepper was glued at the highest position.
In picture four it is in the right position with shortend cables and a piece of metal i found in an old cd-drive.
See the annotations for some details.
Servo and pointing arm:
Not as much fun as expected. I’ve tried a lot of things, but at the end it barely fitted into the side and the hard-drive arm was glued.
You can see the tiny magnets which are glued, too. They close the reed-contact to lit the bulbs.
See pictures for more details.
Step 4: Head, Eyes, Body, Basement
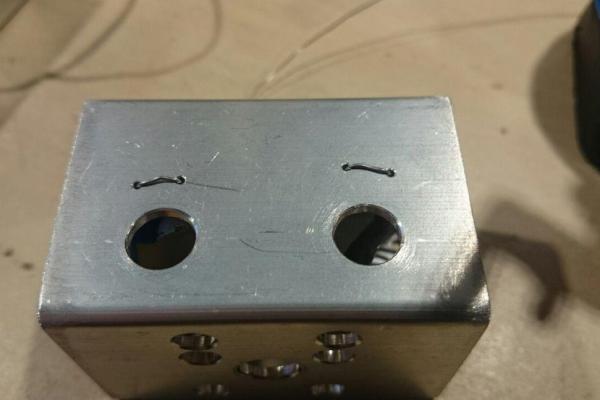
To make the “cuteness”-part work, you need a big head, big eyes which are a little bit to low and eyebrows.
Those eyebrows are made from soldering wick. The bulbs are set into some caps, which are used for screws.
Both bulbs are soldered in row. They are too bright, when soldered each to 5 Volt.
The body gets a lot of drilling. All wires have to go through it.
I should have built it slightly bigger.
The base could be closed with legos. Didn’t plan that. Power comes through an USB-connector in the back of the base.
Keep all wires long enough. Espacially those Power-Wires from your usb-connection into the body.
The Body runs nothing more then one round in one direction. So if you choose wires which last for three rounds, it should be enough.
Step 5: Wires, Joints and Drilling
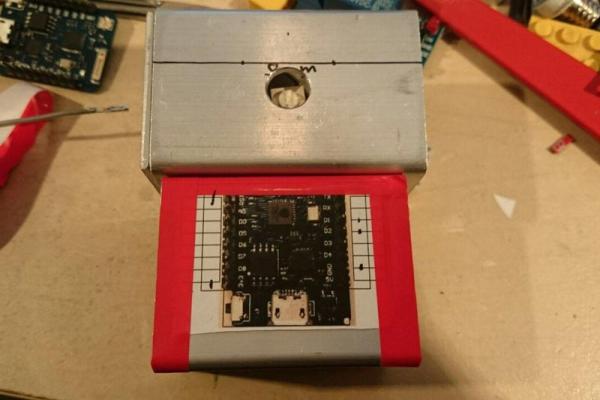
As you can see in the pictures i’ve used a lot of things i found in my drawers.
Some tips:
- be patient 🙂
- drill as perfect as you can
- use what you have – if it works
- don’t try to make it toooo small.
- make annotations onto the wires
Source: ISS Pointer Robo
