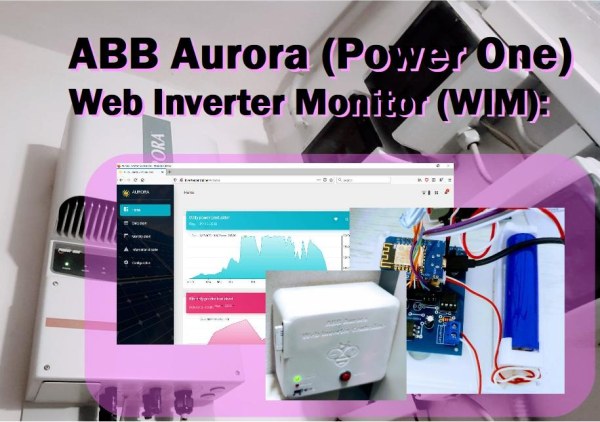
Autonomous centraline with an esp8266 that grab and store data from inverter and show charts and various data of production and can send notification email if there are some problems.
It is a quite user-friendly browser based monitoring solution, It’s allows to track energy produced on a solar power plant in a simple and intuitive fashion. It’s can track key energy metrics as well as the energy produced throughout the lifetime of their solar power plant. 😉
The PCB is free and you can get 10 pcb for 5$ at this link
Why this project 😛
I put solar panels over my roof some years agò, the company that installed them had also guaranteed me a production monitoring and analysis system, but they forgot to tell me that it would be free only for the first year, and I would have had to pay to access my data that are stored on a site, the cost is not so enough (70€ for year) but I felt cheated.
Step 1: Demo Video of Multilanguage Interface Served From Esp8266
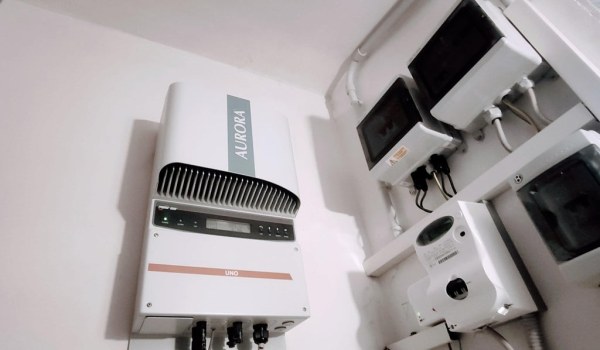
Step 2: Inverter Aurora ABB (ex PowerOne Now Fimer) Supported
Here a partial list of Aurora PV series supported
- PVI-2000
- PVI-2000-OUTD
- PVI-3600
- PVI-3.6-OUTD
- PVI-5000-OUTD
- PVI-6000-OUTD 3-phase interface (3G74)
- PVI-CENTRAL-50 module
- PVI-4.2-OUTD
- PVI-3.6-OUTD
- PVI-3.3-OUTD
- PVI-3.0-OUTD
- PVI-12.5-OUTD
- PVI-10.0-OUTD
- PVI-4.6-I-OUTD
- PVI-3.8-I-OUTD
- PVI-12.0-I-OUTD (output 480 VAC)
- PVI-10.0-I-OUTD (output 480 VAC)
- PVI-12.0-I-OUTD (output 208 VAC)
- PVI-10.0-I-OUTD (output 208 VAC)
- PVI-12.0-I-OUTD (output 380 VAC)
- PVI-10.0-I-OUTD (output 380 VAC)
- PVI-12.0-I-OUTD (output 600 VAC)
- PVI-10.0-I-OUTD (output 600 VAC)”
- PVI-CENTRAL-250
- PVI-10.0-I-OUTD (output 480 VAC current limit 12 A)
- TRIO-27.6-TL-OUTD
- TRIO-20-TL
- UNO-2.0-I
- UNO-2.5-I
- PVI-CENTRAL-350 Liquid Cooled (control board)
- PVI-CENTRAL-350 Liquid Cooled (display board)
- PVI-CENTRAL-350 Liquid Cooled (AC gathering)
Step 3: Project Introduction
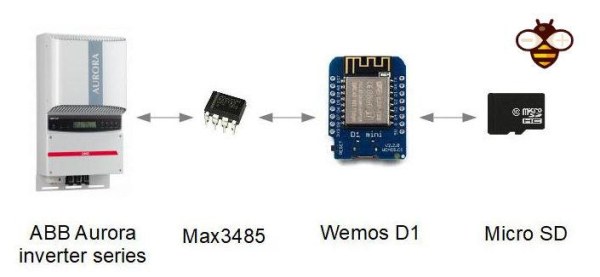
My idea is to use an esp8266 (Wemos D1) with enough power to manage an http server, a rest server and ftp server, naturally with an IC can interface my inverter (ABB Autora – ex PowerOne), all data taken from the inverter will be stored in an SD.
Step 4: Project Layers
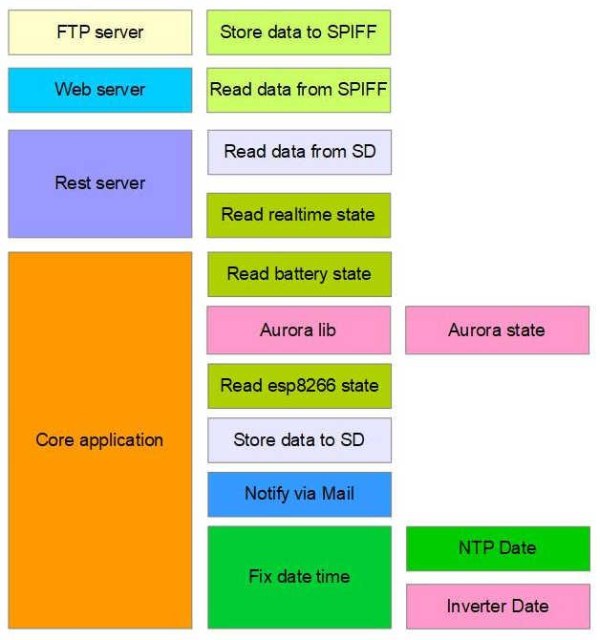
Phisical layers as you can see in the image are very simple, I add some additional logic layer.
First I create a library to manage a full set of informations of the inverter from the interface RS-485 available, than I create a series of thread (simulated) with specified delay to get data and store they in an SD in JSON format, than I create a full set of REST api to retrieve this set of information, a WebSocket server for realtime data, and a responsive web app to show all this data finally a configurable notification system via mail.
Step 5: Microcontroller
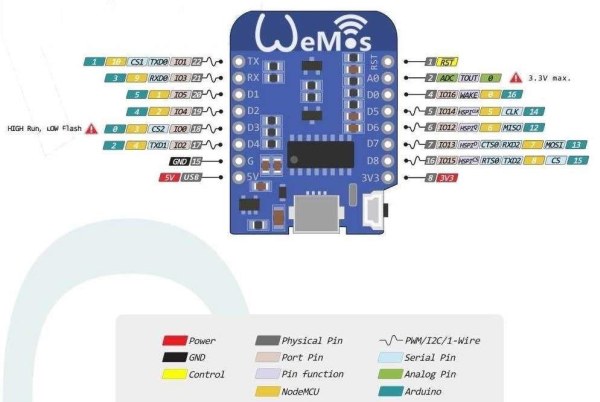
My selected microcontroller is an WeMos D1 mini, I choice this esp8266 device because It’s very low cost and have sufficient specs to do all features I have in my mind. Here a mini guide on how to configure your IDE “WeMos D1 mini (esp8266), pinout, specs and IDE configuration“.
Step 6: Debug the Device
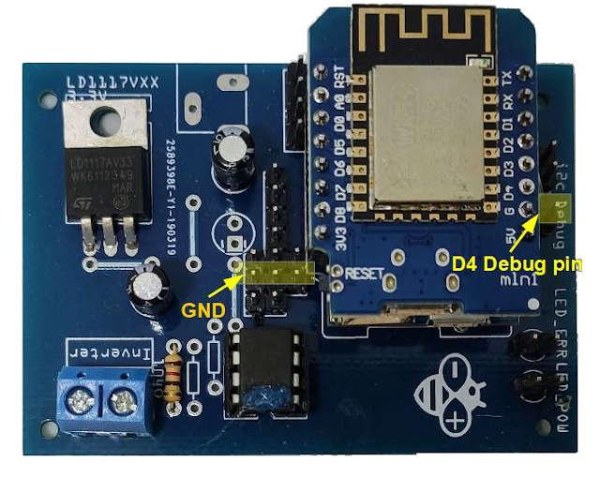
I think that an interesting thing is that It has more Hardware Serial, so you can use Serial for communication with Inverter and Serial1 D4 (only Transmission) to debug. You can check how to connect debug USBtoTTL device on “WeMos D1 mini (esp8266), debug on secondary UART“.
Step 7: Store Static Content and Data
We are going to put WebServer data in SPIFFS, the size needed is less than 2Mb. SPIFFS is explained in this article “WeMos D1 mini (esp8266), integrated SPIFFS Filesystem“.
To update WebServer pages I use an integrated FTP server “FTP server on esp8266 and esp32“. To store logging data we must add an SD card, It’s not sure use SPIFFS (exist a 16Mb version of esp8266) because have a write cycle limitation. You can connect directly via an SD adapter, but I prefer a module to better fit in my case. You can find information on how to connect SD card in this article “How to use SD card with esp8266, esp32 and Arduino“.
Step 8: Communication Via RS-485
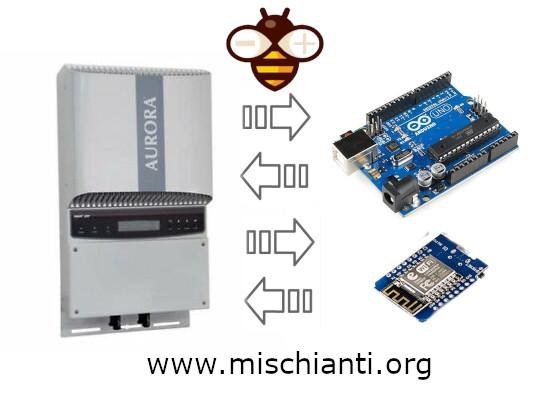
Aurora ABB (ex PowerOne) communicate via RS-485 connection (more info how to do that “How to interface Arduino, esp8266 or esp32 to RS-485“), so the most important features is the communication protocol, and for first I create a complete library to interface on this interface via Arduino, esp8266 or esp32 device “ABB Aurora PV inverter library for Arduino, esp8266 and esp32“.
Step 9: Simple Internal UPS

I use a 18650 rechargeable battery as UPS to grant server active when It’s nigth and there aren’t energy production, I use the schema from this article “Emergency power bank homemade“.
Step 10: Manage Date and DST
To logging data It’s also important get current date and time, so I choice to try to get data from NPT server, if It isn’t possible I get data from internal clock of inverter, I explain NTP with DST on this article “Network Time Protocol (NTP), Timezone and Daylight saving time (DST) with esp8266, esp32 or Arduino“.
Step 11: Dynamic WiFi Configuration
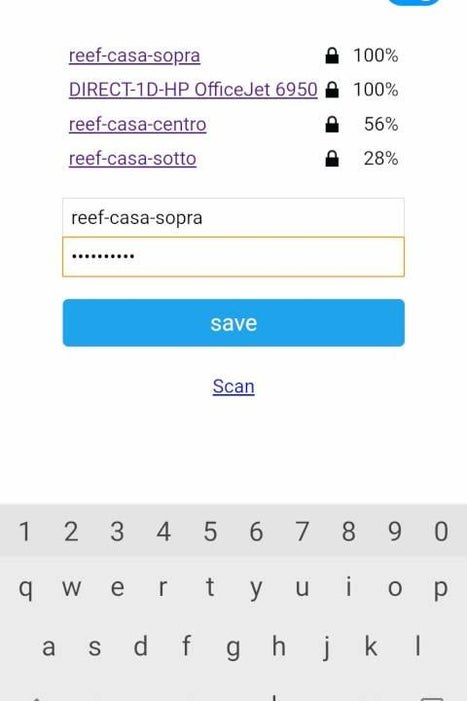
To connect device I use and fix WIFIManager thar start esp8266 as Access Point and give an interface to set connection parameter, for this argument you can refer to this article “How to manage dynamic WIFI configuration on esp8266 or esp32“.
Step 12: Notification Via EMail
I also create a library EMailSender to manage an SMTP server to send email when a problem raised in the inverter, I explain better this features (how to configure and where to get the library) on this article “ABB Aurora web inverter centraline (WIC): debug and notification“.
Source: Inverter Aurora ABB (Power One) Web Monitor (WIM) With Esp8266