Summary of Internet/cloud Controlled Home Automation Using Esp8266 (aREST, MQTT, IoT)
This project uses an ESP8266 (NodeMCU or Wemos D1 Mini) to control relays/actuators via arest.io MQTT cloud, with ULN2003 as a relay driver and simple jumper wiring. Arduino IDE with arest and PubSubClient libraries runs firmware using a unique 6-digit device id; pins are declared as outputs via arest URLs and toggled with digital endpoints. Controls can be triggered from anywhere (e.g., Android HTTPRequest widgets). The design supports relays, RGB lights, servos, and other actuators and requires declaring pins once after reboot.
Parts used in the Cloud Controlled Home Automation Using Esp8266 (aREST, MQTT, IoT):
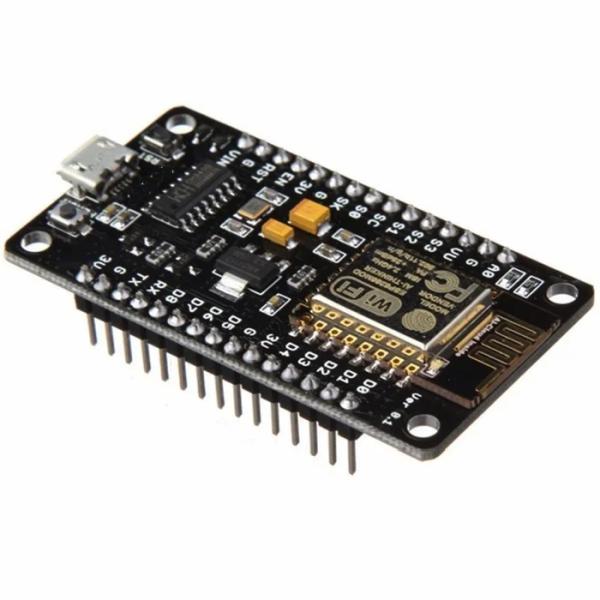
- ESP8266 NodeMCU or Wemos D1 Mini (or any ESP8266 WiFi development board)
- Relay (5V or 6V)
- ULN2003 or UNL2003A (Relay driver IC)
- Jumpers

Step 1: COMPONENTS REQUIRED
Only 4 components required –
1. ESP8266 NODEMCU or WEMOS D1 mini or any esp8266 wifi development board
2. RELAY (5V or 6V)
3. ULN2003 or UNL2003A (Relay driver IC)
4. Jumpers (obviously or else solder it!!)
The main structure of the project is that
ESP8266 module will receive the signal from the MQTT server (i.e. arest.io) and forward the signal to the pin or processor. ULN2003 relay driver IC connected to the Nodemcu board pins. Output pins are connected to relay or any RGB light or servo motor etc.
Step 2: Software
I have used Arduino IDE as the programming software. If you are new to this Nodemcu or esp8266 development board then please refer to my previous instructable. To interface the Nodemcu or wemos board with Arduino IDE.
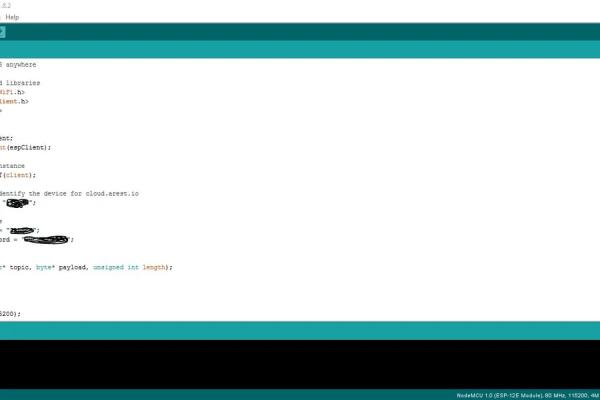
In the Arduino IDE after setting up previous told things, go to SKETCH -> INCLUDE LIBRARY -> MANAGE LIBRARIES -> SEARCH FOR “arest” -> INSTALL THE LIBRARIES -> NOW SEARCH FOR PubSubClient -> INSTALL THE LIBRARY.
Now its half done… almost there!!!
Step 3: CIRCUIT DIAGRAM
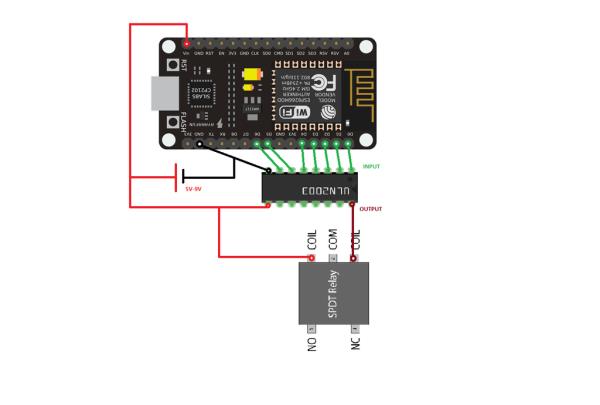
As the above circuit depicts everything still the input side of the ULN2003 relay driver IC is connected to the pins of the esp8266 and the output is connected to relay’s coil leg as when esp8266 pin gets high the output pin of ULN2003 gets low thus giving the relay a 5V potential to work.
Instead of sending the 0 or 1 to the relay esp8266 pins we can also send other values for servo but declaring servo.attach(pin) to rotate the servo to the certain value. Its easy but everyone need to innovate, read and think a little.
Step 4: CODE
I got the idea from “Marco Schwartz” project and modified it. He have use d the arest.io MQTT but we can also use adafruit.io. The main part of the program is :
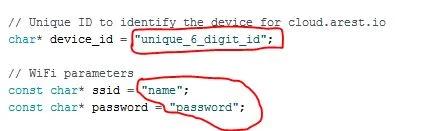
Unique 6digit arest id
char* device_id = “unique_6_digit_id”;
WiFi credentials
const char* ssid = “ssid_name”; const char* password = “your_password”;
Choose any unique id as you like but it should be unique not my or your name unless its a telugu name!!
example of unique id: pf4h6q (just example)
there can be many changes made in the code as according to the code, we have to mention the output after every reboot of the development board.
Code: https://github.com/abhrodeep/Arduino_projs
Step 5: CONTROLLING
2 CRUCIAL steps:
1. declaring output pin
2. toggling or sending information in that pin
Declaring output pin:
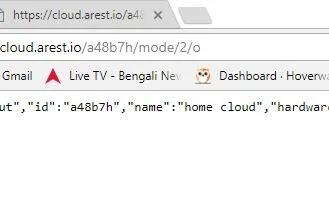
http://cloud.arest.io/pf486q/mode/5/o
“pf486q” is the 6 digit unique code for arest.io
“o” as output
reply after executing this in any browser {“message”:”Pin D2 set to output”,”id”:”pf486q”,”name”:”home cloud”,”hardware”:”esp8266″,”connected”:true}
Toggling or sending information in the pin:
https://cloud.arest.io/pf486q/digital/2/0
digital pin 2 is send a bit “0” or “1” as we wish
https://cloud.arest.io/pf486q/digital/2/1
Declaring pin is necessary for once after a reboot/reset/shutdown otherwise for continuous run of esp8266 it’s unnecessary.
I have used an Android app HTTPRequest to create widget on home-screen with the necessary URL. As shown in my previous instructable. Please view that otherwise this will be lengthy.
Step 6: CONCLUSION
This is an IoT project for controlling home appliances, door, window, everything and can be customized according to individual’s need. Its not locally controlled, this whole thing can be controlled from anywhere.
EACH COMMAND OR URL WITH ARGUMENT NEEDS SOMETIME 1-2 second/s to execute as this is not a dedicated server… but to control your house from anywhere in this world is AWESOME!!
ENJOY AND BE LAZY… BE ABSENTMINDED AND FORGET TO SWITCH OFF APPLIANCES BUT WITHOUT A HEADACHE!!!!
Thanks to “arest.io” MQTT services and to “Marco Schwatrz“…
if you like the instructable support and enjoy… and for any problem regarding this ask me.
Source: Internet/cloud Controlled Home Automation Using Esp8266 (aREST, MQTT, IoT)
- What are the required components for this project?
ESP8266 NodeMCU or Wemos D1 Mini, a 5V or 6V relay, ULN2003 or UNL2003A relay driver IC, and jumpers. - Which software environment is used to program the ESP8266?
Arduino IDE with the arest and PubSubClient libraries installed. - How does the ESP8266 receive control commands?
The ESP8266 receives signals from the arest.io MQTT cloud server and forwards them to its pins. - How do you declare a pin as output using arest.io?
Use the URL http://cloud.arest.io/your_device_id/mode//o to set the pin to output. - How do you toggle a digital pin via arest.io?
Use the URL https://cloud.arest.io/your_device_id/digital//0 or /1 to set the pin low or high. - Is declaring the output pin required every time?
Declaring the output pin is required once after a reboot, but unnecessary for continuous operation. - Can this setup control servos or RGB lights?
Yes; instead of simple 0/1 commands, you can send other values and use appropriate code like servo.attach(pin) to control servos. - How long do commands typically take to execute?
Each command or URL may take around 1–2 seconds to execute because arest.io is not a dedicated server.