I bought this skull to decorate my computer desk. However, analyzing better, I could do something more interesting.
I hope you enjoy.
Step 1: Materials
– 8 screws;
– Microcontroller (I used an Arduino board);
– A Protoboard
– A nunchuck (for nintendo wii control) with a adaptador
Note: I bought the adapter but can be easily made by following this step by step: http://www.instructables.com/id/Wii-Nunchuck-Adapter/
– Mini servos (initially, I use 2. An eye and another to the jaw);
– Batteries (attached to the computer, use the power from usb);
– Drill, various drills, a metal rod of about 20cm, glue, bits of wire, etc …
Step 2: Riding the skull
If the skull comes disassembled (like mine), mount it by following the manufacturer’s instructions.
i detachedthe teeth and fixed then on the jaw. Note: I tried to use the most of the stuff I bought. Then I used the disposable part where the teeth were fixed.
The brain was not used because in his place will be the servos and the microcontroller.
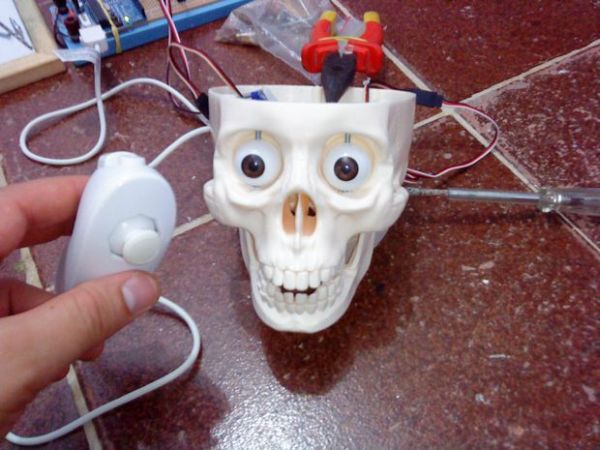
Step 3: Preparing eyes
nspired by Achmed the Dead Terrorist, jeff dunham´s puppet, I decided to make the eyes move only sideways. Thus, it would be easier to assemble. Just increase the hole is in the eye with the aid of a drill.

Step 4: Preparing the Skull
The skull has two holes where the eyes are to fit a screw. Take care to drill the more centralized as possible because his skull will get a bit cross-eyed. In the eyes, has a “beak” that i had put one screw. For the eyes move, two holes were opened with a drill so that the rods made with the screws behind the eyes to move from one place to another. That done, I made a guide to uniting these rods, temporarily with a popsicle stick. The result was very good.
Now just put the servomotor and make linking a guide to terms with the eye movements controlled.
For more detail: Interactive skull