Summary of Your Image on an Arduino! – TFT LCD Screen Guide
This tutorial shows how to use the Arduino official TFT LCD screen to display images and sensor data, including loading images from a microSD card and showing potentiometer readings, with setup instructions, required parts, and example sketches.
Parts used in the Arduino TFT LCD Project:
- Arduino UNO
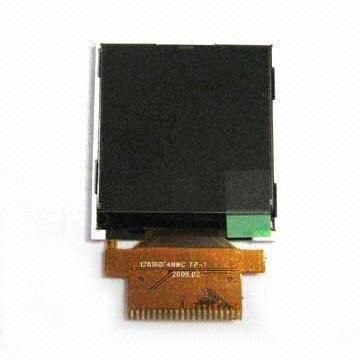
- Arduino TFT LCD Screen (with microSD card socket)
- ArduSensor Pot (potentiometer)
- Half sized breadboard
- microSD Card (2GB recommended)
- Jumper wires
- USB-B cable
- Laptop
- microSD Card adapter and USB SD card reader
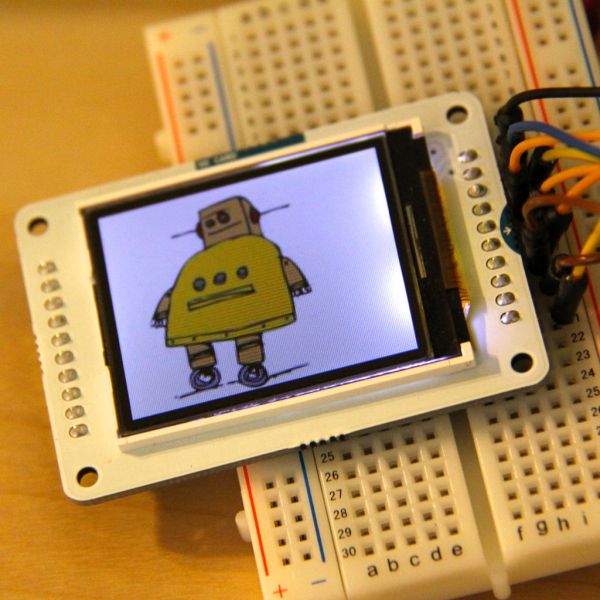
The TFT LCD screen is a great way to detach your computer, and have the Arduino relay information that you need to know onto the LCD. A great part of the LCD is that it has a built in microSD card socket. You can store images on the microSD card socket, and even some text!If you like this Instructable, please vote for me in the Arduino contest by clicking the orange ribbon in the upper right hand corner, then vote!!!
Step 1: Parts & Tools
To make the project, you will need the following:
Parts:
Arduino UNO (Amazon, $22)
Arduino TFT LCD Screen (Arduino Store, ~$28)
ArduSensor Pot (Qtechknow, $8)
Half Sized Breadboard (Amazon, $5.50)
microSD Card 2GB (optional, Amazon, ~$6)
Jumper Wires
Tools:
USB-B Cable
Laptop
microSD Card Adapter & USB SD card reader
Step 2: TFT LCD Basics
TFT LCD Screens (Thin-film-transistor liquid crystal display) are great graphical displays to display information. They are a variant of a liquid crystal display (LCD) which uses TFT technology to improve image qualities such as addressability and contrast. They are used often in video games, smartphones, cell phones, and sometimes even TV’s. Now, with the technology and accessibility today, you can use one with your Arduino!
LCDs, or liquid crystal displays, are easy to use with your Arduino. They are a very simple ways of telling the user data from the Arduino. Standard 16×2 character LCDs are found in grocery stores, when the display tells you what you bought as the cashier scans each item, and how much it costs.
Step 3: Displaying Instructables Logo
For the first example, let’s put the Instructables Logo on our TFT display! Download the zip file below, and put it onto a microSD Card (2GB). You will probably a microSD to SD Card adapter. There is no special software needed, just copy and paste it onto the card.
Next, open up the Arduino IDE. You’ll need Arduino 1.0.5 or better to run the sketches. Open up the InstructablesTFT example.
Hook up the circuit above from the Arduino TFT LCD to your Arduino UNO.
Then, upload the sketch. After you open the Serial Monitor, the LCD should have the Instructables Logo on it!
Step 4: Sensor Readings
Let’s try another example. This time, we’ll be mimicking the Serial Monitor on our TFT LCD. Keep the same circuit, and then upload the new code below.
This sketch will gather the reading from the ArduSensor Pot, and then relay it onto the TFT LCD screen 10 times per second. This is a great way to display data without a computer.
For more detail: Your Image on an Arduino! – TFT LCD Screen Guide
- What does this tutorial teach?
How to get the Arduino TFT LCD running, load images from the SD card, and display sensor readings. - What hardware is required to follow the tutorial?
An Arduino UNO, Arduino TFT LCD screen, ArduSensor Pot, half sized breadboard, microSD card, jumper wires, USB-B cable, laptop, and microSD adapter/reader. - Can the TFT display images from a microSD card?
Yes, the TFT has a built-in microSD card socket and the tutorial shows copying image files to the card to display them. - Which Arduino IDE version is needed?
Arduino IDE 1.0.5 or better is required to run the example sketches. - How is the Instructables logo displayed on the TFT?
Copy the provided image zip to a microSD card, hook up the TFT to the Arduino UNO, open the InstructablesTFT example sketch, upload it, and open the Serial Monitor to see the logo. - Can the TFT show live sensor data?
Yes, an example sketch reads the ArduSensor Pot and relays the readings to the TFT 10 times per second. - Do I need special software to put images on the microSD card?
No special software is needed; just copy and paste the image files onto the card using your computer. - What is a practical use of the TFT described here?
Detaching from a computer and having the Arduino display needed information such as images or live sensor readings on the TFT.