Summary of Making the TFF: a dress that gets excited when tweeted
This project describes a Twitter-activated interactive dress (TFF) that flutters wings and plays bird songs when it receives tweets, celebrating online friendships. The creator combined sewing, mechanics, electronics, and Arduino programming, iterated patterns in muslin, pleated a vintage fabric bodice, and incorporated hijacked singing greeting-card electronics and a tweet sensor. It debuted at Museums and the Web 2012.
Parts used in the TFF project:
- Vintage-inspired KAS fabric
- Muslin (for pattern prototyping)
- Paper pattern materials
- Thread (high-quality)
- Fusable interfacing
- Sewing tools (scissors, pins, iron)
- Greeting-card bird song modules (speaker, power, switch)
- Wires and soldering supplies
- Arduino (for tweet sensor and code)
- Tweet sensor hardware (to detect tweets)
- Mechanical wing components (for fluttering wings)
The idea of this dress comes from a series of tweets with online friends @shineslike and @arduinogirl. @shineslike and I had taken a half day Arduino workshop given by @arduinogirl at the MCN 2011 conference. I was immediately inspired creatively by the sensory and interactive opportunities. Over the next few months I struggled with the electronics learning curve, but my ever supportive online friends really made it a blast. Acquaintances ‘IRL’ (in real life), online we had become TFFs —Twitter Friends Forever.
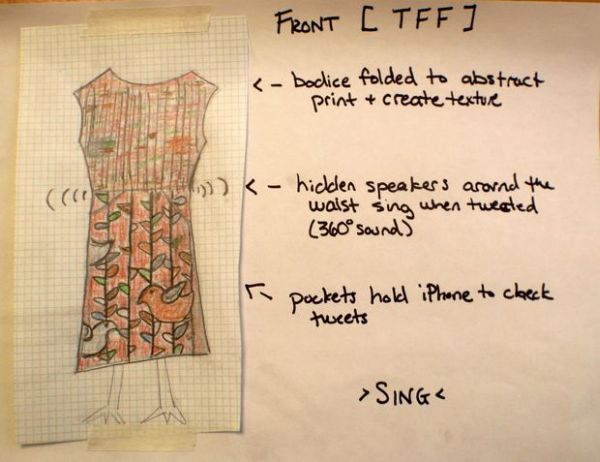
These online connections happen quietly in fiber-optical pulses, dimensions accessed through my iPhone. The TFF brings the excitement and interaction back into the physical world. When the wearer receives a tweet, the vintage-inspired dress flutters its wings and sings like a bird. Surely, this celebratory display will attract tweets—and moreTFFs. It was debuted at the 2012 Museums and the Web conference where I was united IRL with my TFFs
This dress aspires to be an homage to the many fulfilling friendships that have been able to hatch and grow online.
Step 1: What’s in this Instructable?
The TFF project breaks down into different streams of work including sewing, mechanics, electronics, and programming.
- Dress – Reviewed resources for designing clothes from Built by Wendy-Dresses and Pattern Magic books. Vintage-inspired KAS fabric
- Bird songs – From the start I just wanted to cannibalize greeting cards with bird sounds. I love these songs.
- Wings – Looked at many a costume designer videos on YouTube. These wings are not be huge, just a little flutter and hopefully not costume-like
- Tweet sensor – to activates the dress
- Arduino Code – to pull it all together
Step 2: Designing the Dress
I had never designed a dress from scratch before, so this was a laborious and iterative (though satisfying) process. For guidance and inspiration I referred to the very accessible Built by Wendy-Dresses and the very beautiful, but difficult to understand, Pattern Magic.
The key is to do all your testing and iterating with cheap fabric called muslin. I recommend starting with a dress pattern model. For example, I started with a simple dress pattern from the Built by Wendy book. Trace that model and sew it in muslin. Try it on, play with it! Modify the design with pins and rubberbands, by cut and re-sew it. Turn on music, dance in front of a mirror, cut it more (don’t cut yourself.)
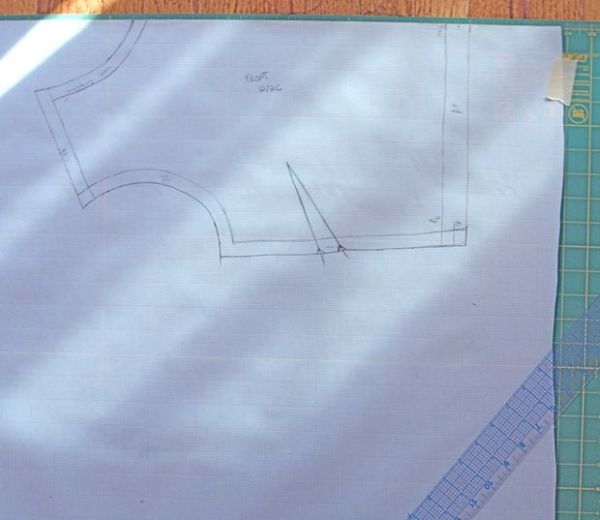
When you’ve got something you like in the muslin, then trace it back to paper, marking folds, seams and match ups. Use a ruler and only trace half of each element (if the dress is intended to be symmetrical.) Then, cut that pattern on a fold in muslin, re-sew it and see if it works. (or play with it, dance with it and repeat.)
I’m sure an experienced designer could simplify this step, but I must have looped through this step 4 or 5 times to iterate the design. When evaluating your progress, take into consideration the differences between your quality of your final fabric and the muslin. In the case of the TFF, the vintage canvas fabric is vastly different from the diaphanous muslin.
Have fun at this stage–make it what you want!
Step 3: Sewing the Dress
Once you’ve had your fun and are completely happy with the muslin, trace the final paper pattern, it’s time for the moment of truth: cutting into the expensive fabric. I picked particularly pricy threads making this a bit of a scary transition.
Preparing the pleated top
With such busy fabric, my design called for the pleating of the bodice (the shirt part of the dress) to provide extra texture and abstract the figurative graphic pattern which would be visible on other parts of the dress. Using the paper pattern I defined how much fabric height I would need for the bodice and cut it a width of it (with patterned fabric it’s important to always cut the same direction.)
I folded 1/2 inch overlaps and pressed with an iron creating the pleats. Beware: I had seriously underestimated how much fabric this treatment would require and had to sew widths together just for my small top. I almost ran out of fabric!
With the pleats ironed in place, I used fusable interfacing to hold the seams in place for sewing.
Cutting/Sewing
With the pleats, you can’t really cut on the fold, so I folded the final paper pattern and cut a new final full sized pattern of the top front in paper. Otherwise treat the pleated fabric as you would any fabric in the sewing–really thick barely manageable fabric.
Some problemsolving had to happen along the way to make up for this very thick fabric. For example, the shoulder seams would have never laid flat down using regular seams. Instead, I tucked the pleated front into the back pieces (like a coin going into a slot) and hand sewed these parts together to obscure the construction.
Indeed many little issues needed to be solved at this step since the muslin hadn’t needed to deal with finished seams. Putting it together in the right order can be complicated, but that’s part of the fun.
Step 4: Adding Bird Songs
Those little singing greeting cards can be pretty useful for projects. They have power, an amplified speaker and can simply be activated by hijacking the switch used in the card. You can just find one you like and cut the gut out for your project.
For the TFF, I found wonderful high-quality bird song cards at PadBlocks. Since they were $8.00 each, I first experimented with the cheapest cheesiest Easter singing card from the drug store (always experiment with the cheapest thing possible!) I soldered to the + and -. Touching the wires closes the circuit and makes the bird sing.
I attached the speaker card under the waist of the dress with speaker facing out and fed the wires to the back opening of the dress.
For more detail: Making the TFF: a dress that gets excited when tweeted
- What inspired the TFF dress?
The dress was inspired by online friends and an Arduino workshop, celebrating Twitter Friends Forever connections. - How is the dress made interactive?
An Arduino-based tweet sensor activates mechanical wings and bird song modules when a tweet is received. - What sewing preparation is recommended?
Iterate designs using muslin, trace patterns, test fittings, then transfer to final fabric once satisfied. - How were bird songs incorporated?
By cannibalizing greeting-card bird song modules, wiring to their + and - terminals, and placing speakers under the waist. - What resources guided the dress design?
The creator used Built by Wendy Dresses and Pattern Magic for pattern inspiration and techniques. - How were pleats handled on the bodice?
Pleats were folded, pressed with an iron, held with fusable interfacing, and extra fabric widths were sewn together when needed. - How were thick seams problem-solved?
The pleated front was tucked into back pieces and hand-sewn to allow seams to lay flat and obscure construction. - Where was the TFF dress debuted?
It debuted at the 2012 Museums and the Web conference.