Summary of How to Increase work area in Proteus ???
This article explains a simple trick to expand the Proteus simulation workspace when circuit designs become too crowded. The author demonstrates that while the default blue work area is fixed, users can customize its dimensions via the "Set Sheet Sizes" menu. By selecting the fifth option in the dialog box, designers can input custom measurements (e.g., 15x10 inches) to accommodate more components like PIC microcontrollers without them becoming too small or unmanageable.
Parts used in the Proteus Simulation Project:
- PIC Microcontroller
- Arduino Mega 2560
- Proteus Software Interface
Hello friends, hope you all are fine and having fun with your lives. Today’s post is about How to increase work area in Proteus. Its quite a simple tutorial and I think its better to say it a simple trick rather than a tutorial. Actually today I was working on a simulation project in which I have to design the complete load management system in Proteus and it was quite messy as I have to include a lot of components and the area of Proteus got quite small for that and then I encountered this problem that where to place the components.
You have seen in Proteus software that there’s a blue rectangle which is considered as the work area in Proteus. This area is constant and doesn’t increase or decrease on its own. So if we are dealing with some messy circuit design then we have to increase this area which we are gonna see today that How to increase work area in Proteus. IF you have checked my Arduino Library for Proteus then you must have seen that the size of Arduino Mega 2560 is quite big and when I design Proteus simulations in which I need to use Arduino Mega, I have to increase the Proteus work area to embedded all the other components. So, let’s get started with how to increase work area in Proteus..
How to Increase work area in Proteus ???
- First of all, if you are working on some project in Proteus then simply don’t increase the area because when you increase the area then the components get very small and its too difficult to arrange or connect them with each other.
- So, my suggestion is to go on in the default window when your circuit got messy and you need more space then increase work area in Proteus.
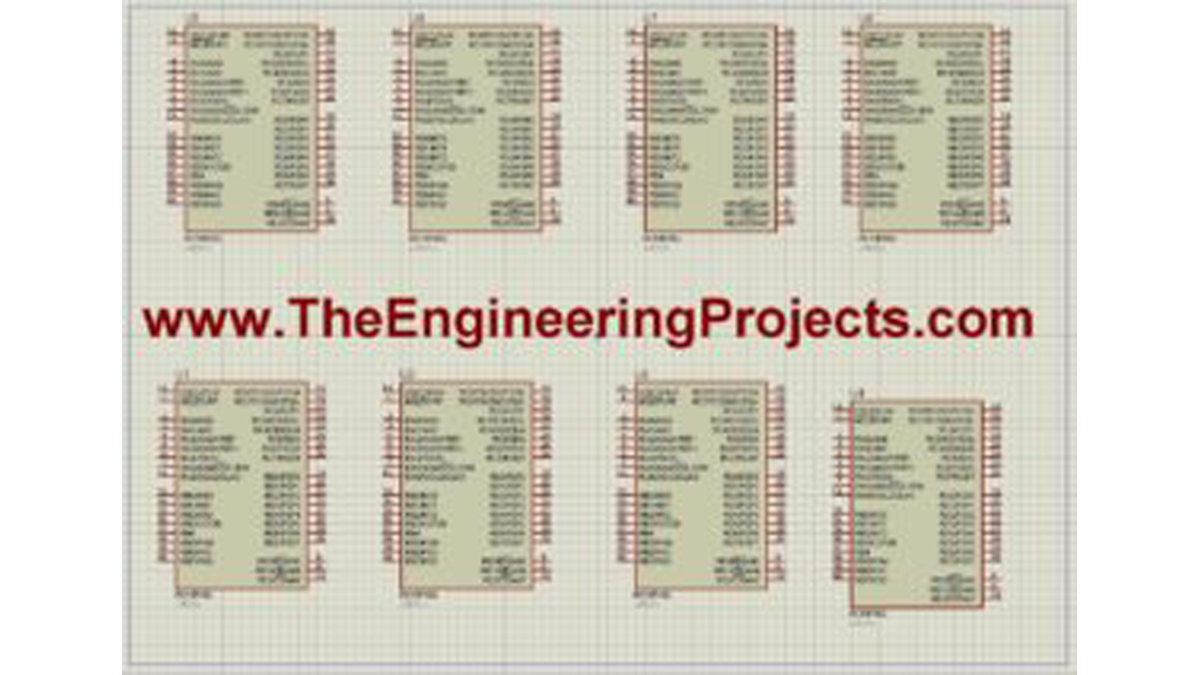
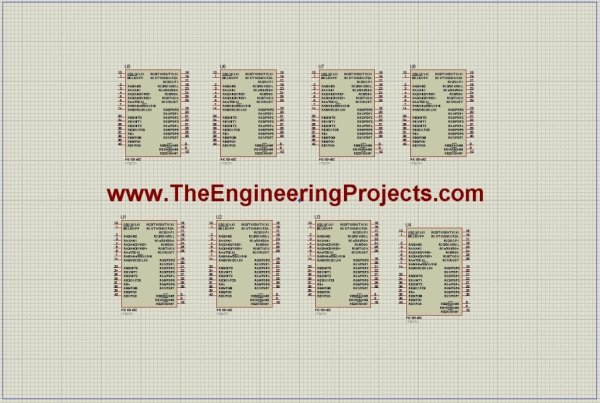
- Let’s open Proteus software and place few components in it, as an example I am just placing PIC Microcontroller to cover the available space as shown in below figure:
- Now you can see in the above figure that I have just randomly placed 8 PIC Microcontrollers just to fill the space and in the center a big text to fill the width.
- Now suppose I want to add four more microcontroller in this Proteus file then there’s no place to add them.
- Now in order to add more components which in many case are four more PIC Microcontroller, I have to increase the size of available work area in Proteus.
- In order to do so click on Systems in the above menu bar and then click on Set Sheet Sizes as shown in below figure:
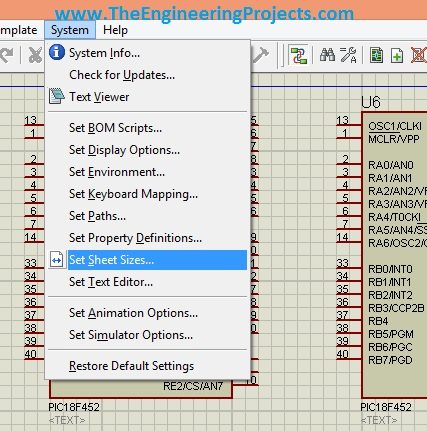
- Now when you click it a new pop up window will open up as shown in below figure:
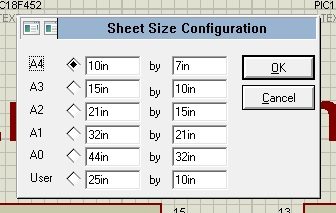
- Now you can see in the above figure, there are six sizes available for the user, among them the first five are fixed sizes while the fifth one is changeable and you can set it to any size you want.
- The default size of available work area in Proteus is A4 size which is the first option 10inch by 7 inch.
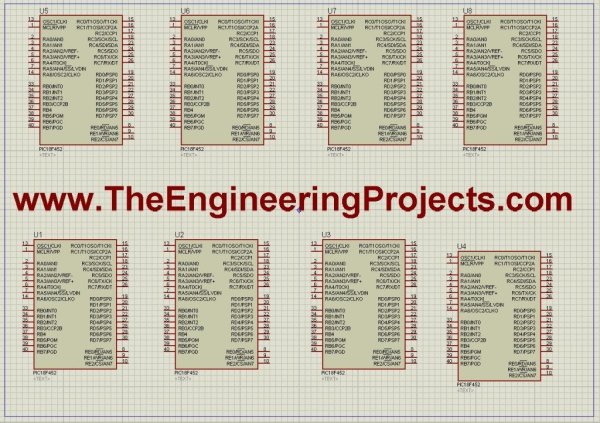
- So, now let’s increase it a little and check the effect. So I am selecting the fifth option in above figure and I am giving 15inch by 10 inch and now the result is as follows:
- Now its quite obvious from the above figure that the area has increased now.
- We have the same 8 PIC Microcontrollers but now we have space for more components in both directions.
- So, that’s how you can quite easily increase work area in Proteus ISIS. That’s all for today, it was quite easy but still as always if you are having any problems, then ask in comments and I will resolve them. Till next tutorial, take care !!!
- How do I increase the work area in Proteus?
Click on Systems in the menu bar and select Set Sheet Sizes. - Does the Proteus work area increase automatically?
No, the blue rectangle representing the work area is constant and does not change on its own. - What is the default size of the Proteus work area?
The default size is A4, which measures 10 inches by 7 inches. - Can I set a custom size for the Proteus sheet?
Yes, the fifth option in the Set Sheet Sizes window allows you to enter any custom dimensions. - What happens if I increase the area too much?
The components will get very small, making it difficult to arrange or connect them. - Which menu option opens the sheet size settings?
You must click on Systems in the top menu bar to find the Set Sheet Sizes option.