Summary of TIA Weak Artificial Intelligence IoT Assistant
This project builds an IoT security and environment monitoring system featuring NFC and fingerprint authentication alongside a Weak AI assistant. It utilizes two Arduino Uno boards for user verification, an MKR1000 for sensor data collection and Azure IoT Hub connectivity, and a Windows Universal App for control and AI interaction using SIML.
Parts used in the TIA Weak Artificial Intelligence IoT Assistant:
- Arduino UNO & Genuino UNO
- Arduino MKR1000
- Solderless Breadboard Half Size
- SeeedStudio Grove Base Shield
- SeeedStudio Fingerprint Scanner
- PN532 NFC Module V3
- LED (generic)
- Temperature Sensor
- Proximity Sensor
- SparkFun Magnetic Door Switch
- Jumper wires (generic)
- Resistor 330 ohm
IoT security/environment monitoring device with NFC & fingerprint authentication devices and a Weak Artificial Intelligence Assistant.

Things used in this project
Hardware components |
||||||
 |
|
× | 2 | |||
 |
|
× | 1 | |||
 |
|
× | 1 | |||
|
× | 1 | ||||
|
× | 1 | ||||
|
× | 1 | ||||
 |
|
× | 3 | |||
 |
|
× | 1 | |||
 |
|
× | 1 | |||
|
× | 1 | ||||
 |
|
× | 10 | |||
 |
|
× | 1 | |||
Software apps and online services |
||||||
|
||||||
 |
|
|||||
 |
|
|||||
|
||||||
Hand tools and fabrication machines |
||||||
 |
|
|||||
Story
INTRODUCTION:
This project consists of three devices:
2 x Arduino Uno boards (AuthWayNFC & AuthWayFP)
1 x MKR1000 (DoorGuard1000)
1 x Windows Universal Application (TIA).
The two Arduino Uno boards are used for authentication to the Windows application and the MKR1000 is an IoT security device. The Arduino Uno boards communicate with the Windows Application using serial, the MKR1000 is a web server and the Windows Application controls it and reads sensor data via HTTP.
The Windows Universal application is a Weak Artificial Intelligence application using SIML – the Synthetic Intelligence Markup Language. The Windows application is programmed in C# and also uses speech recognition and speech synthesis.
The plan was to integrate Azure IoT Hub & Stream Analytics completely and be able to manage and monitor devices etc via the Windows Application but due to issues I came across with the Azure API’s and other work commitments I did not have enough time to do this but will be doing in the future. For now the DoorGuard1000 sends its data to Azure IoT Hub.
ARDUINO IDE SETUP:
First of all you will want to setup your Arduino IDE, to do this download the latest Arduino IDE from here, at the time of writing this article the latest version is 1.6.7. Once you have downloaded and installed the latest version follow the steps that follow:
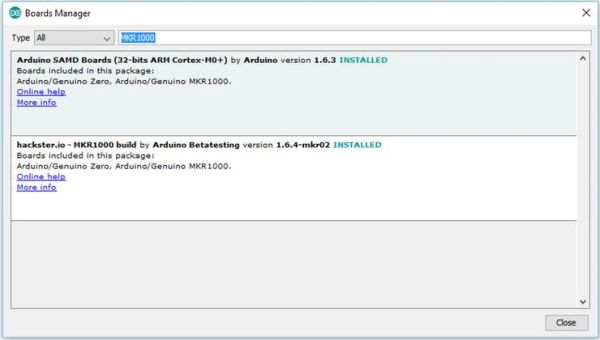
1. Using the Boards Manager install the MKR1000 build by Arduino BetaTesting and the Arduino SAMD Boards.
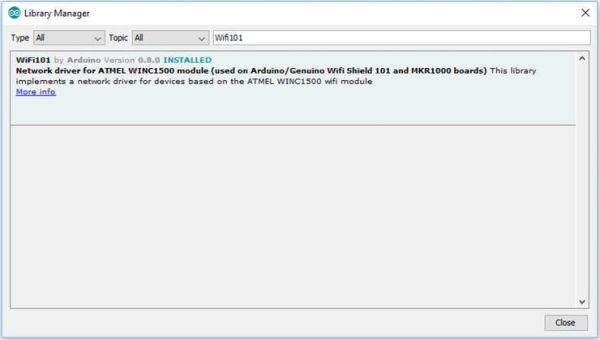
2. Using the Library manager install/update the Wifi101 library.
AZURE IOT HUB SETUP:
Next you will need to set up an Azure account and also an IoT Hub that will manage data from the DoorGuard1000. Follow the following instructions to compete this stage:
1. Register your free Azure account from here if you don’t already have one.
2. Login to the Azure Portal.
3. Create your new Azure IoT Hub.

3. Download and install SetupDeviceExplorer.msi for Windows from here, or the IoT Hub Explorer via NPM if you are running a different operating system, instructions here.
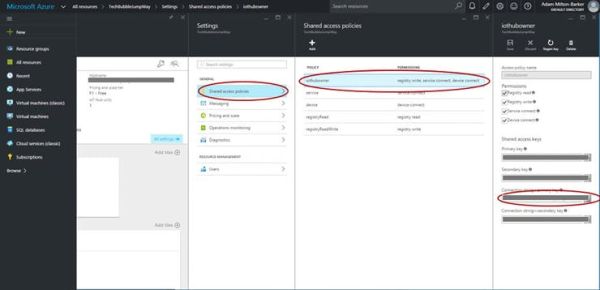
4. In Azure select your IoT Hub and go to Settings -> Shared Access Policies -> iothubowner and copy the Connection string—primary key.
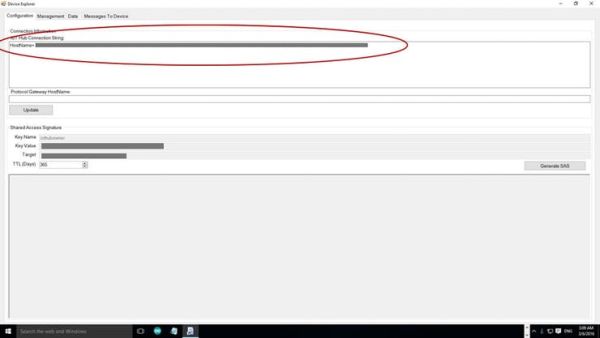
5. Open up Device Manager and paste your Connection String into the IoT Hub Connection String section on the first page of Device Manager.
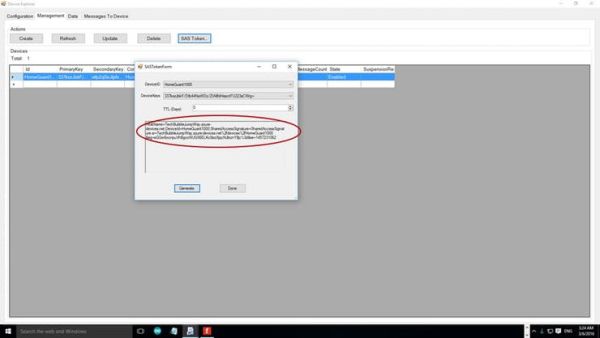
6. Create a new device that will represent your DoorGuard1000 in the Management tab.

7. Create a SAS for your device and save it for later.
8. Next you need to install the SSL certificate for your IoT Hub onto the MKR1000. First of all download the Wifi101 Firmware Updater.
9. Navigate to File > Examples > WiFi101 > FirmwareUpdater in the Arduino IDE.
10. Upload the sketch to your MKR1000.
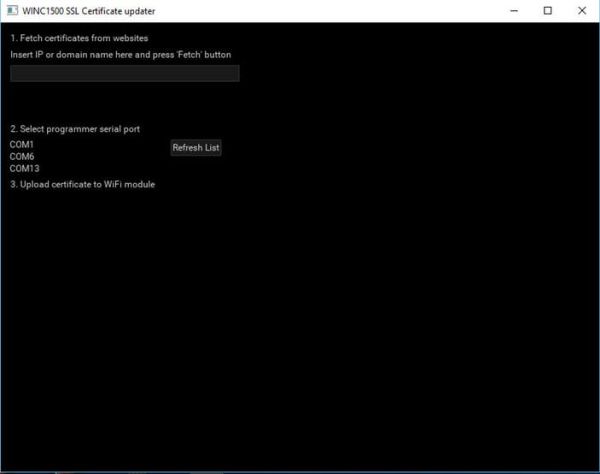
11. Run the winc1500-uploader-gui file found in the firmware updater folder you just downloaded.
12. Follow the instructions in the application to download the SSL certificate for your IoT Hub and upload it to your MKR1000.
SIML SETUP:
For the AI part of this project I have implemented SIML, Synthetic Intelligence Markup Language. The following info will help you if you want to create your own SIML files.
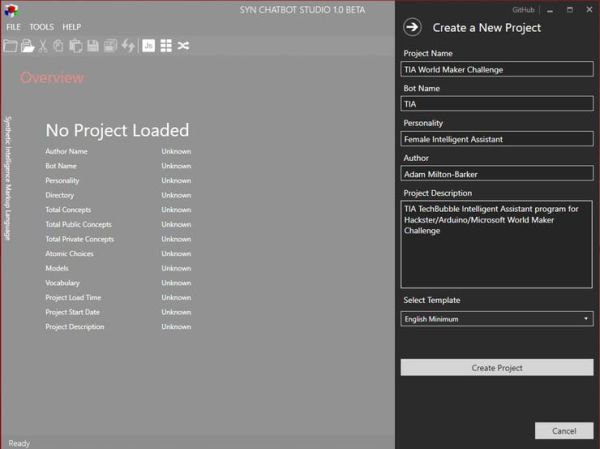
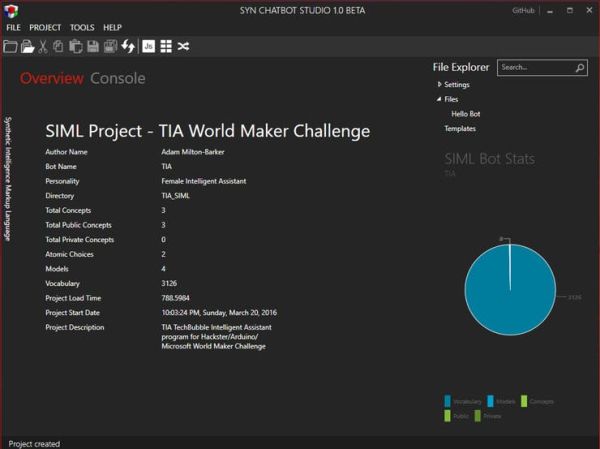
1. There is a SIML package preloaded in the Windows project but if you want to modify the SIML package you will need to download the Syn Chatbot Studio software from here and create your own.
2. Create a new project, to find out how to do this you can study the documentation here.
3. Edit the SIML file with your desired content for more information you can check out the link here. You will need the basic layout provided in the GitHub repository so that integrated functions of the Windows app will work:
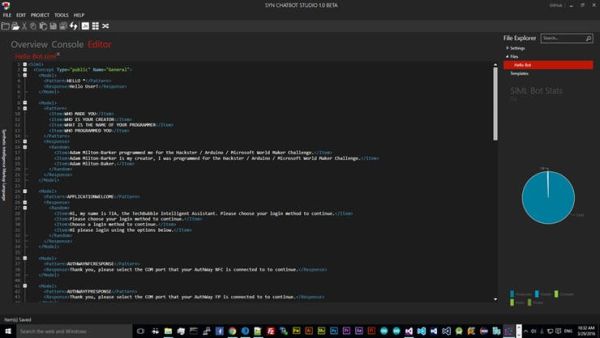
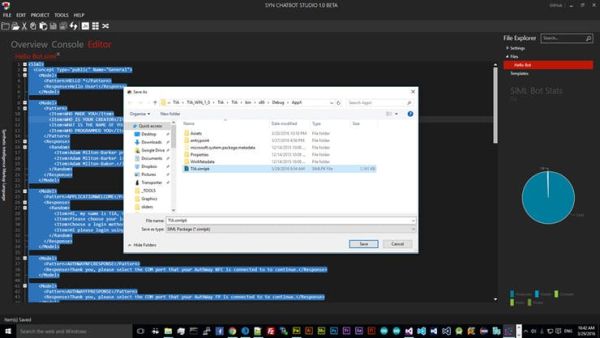
4. Export the package into the bin\x86\Debug\AppX folder of the Windows app, replacing the file named TIA.simlpk
LETS GET INTO IT:
Now that we have set up the basics it is time to get to work on the devices. The following set of instructions and schematics will help you to get the devices and application ready so you can start playing using them.
If you need any additional help with setting up the following, my hourly rate is 30euros per hour 😉 Just kidding leave a message in the comments below and I will make sure to answer any issues as quickly as possible. If you find any bugs please use the “Issues” section on the GitHub repository.
Here we go….
DEVICE: DoorGuard1000
The DoorGuard1000 is an IoT security/environment monitoring device developed on the MKR1000 that is manageable via the Windows Universal Application. The device includes a temperature sensor, proximity sensor and a switch that detects when a door is open. The following information will tell you how to set up the DoorGuard1000:
1. Follow the schematic below:
2. Edit the IntelliLanDoorGuard1000AzureHTTP sketch and replace your configuration at the top of the file, you will need your IoT Hub settings and the SAS generated in the above steps.
2. Upload sketch to your MKR1000.
DEVICE: AuthWayFP
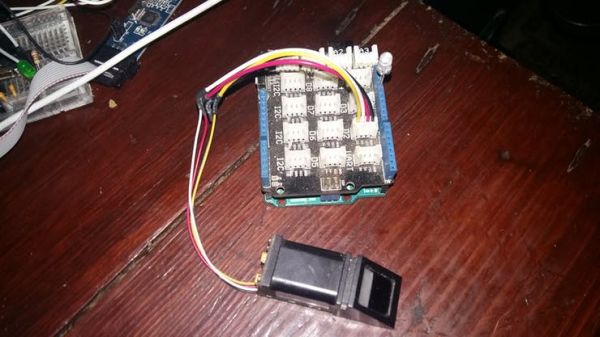
The AuthWayFP device is a fingerprint scanning device built on the Arduino Uno that communicates with the Windows app via serial. The device is used to authenticate onto the app by scanning your finger. The following information will tell you how to set up the AuthWayFP:
1. Follow the schematic below.
2. Install the Adafruit-Fingerprint-Sensor-Library library to your Arduino IDE.
3. Follow the instructions here and use the examples to register your fingerprint to the device.
4. Upload the AuthWayFP sketch to your Uno.
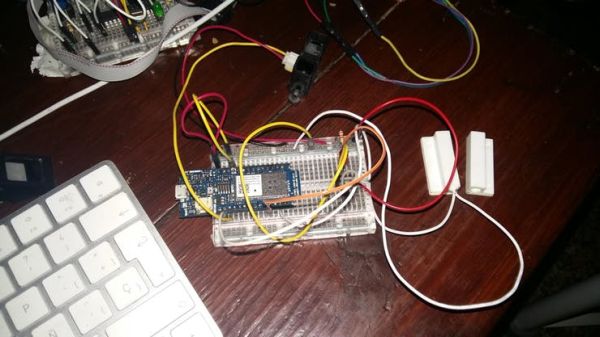
DEVICE: AuthWayNFC
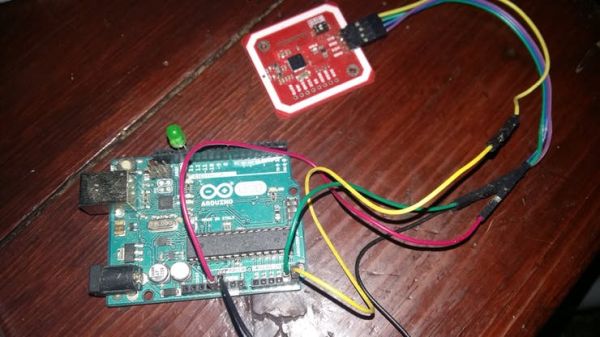
The AuthWayNFC device is an NFC scanning device built on the Arduino Uno that communicates with the Windows app via serial. The device is used to authenticate onto the app by scanning an NFC chip. (See video above to see me using an NFC chip implanted in my hand to authenticate onto the app.) The following information will tell you how to set up the AuthWayNFC:
1. Follow the schematic below.
2. Install the PN532-PN532_HSU library to your Arduino IDE.
3. Upload the AuthWayNFC sketch to your Uno.
THE TECHBUBBLE INTELLIGENT ASSISTANT WINDOWS UNIVERSAL APP (TIA)
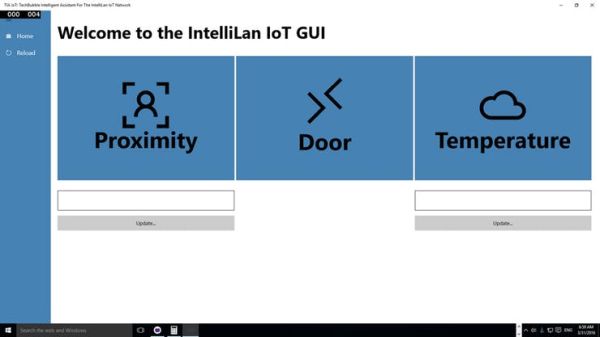
As mentioned before this application was meant to be more advanced with more features but is still able to allow monitoring and control over the DoorGuard1000 and communicates with the other two devices to allow additional login options. The application has the foundations for you to build on and add additional features if you wish.
For the AI section of the app SIML is used (Synthetic Intelligent Markup Language) users of AIML should find it very similar but also a lot more advanced. Again I have only provided the basics but you can go much more in depth using their documentation. Commands are not directly connected to the SIML package but you can also program ways to allow SIML to directly communicate with C# functions.
1. Download the IntelliLan TIA Windows Universal Application from GitHub.
2. Open the solution in Visual Studio 2015.
3. Edit the settings in the TechBubbleIoTConfigs.cs file in the Classes directory.
4. To add more commands edit the commandCheck function in the Pages/appHome.xaml.cs file.
5. Run the application and you are away!
The Windows Application is the bare knuckles you should implement a database for your user logins and implement security for passwords etc. Other ways to build on the app would be to implement native communication between SIML and the C# code and also build up your SIML package with your own vocabulary.
WRAPPING IT UP:
I hope you like this project and can put it to good use, I tried to implement several types of technologies to keep it interesting. I did not have enough time with my other commitments to complete all of the features I had planned for the project but enjoyed working on the MKR1000 and building my first real tutorial on Hackster. I will be keeping the project updated with new features etc so keep an eye on it. Please “respect” it and feel free to follow me as I am new around here and feeling lonely 😉 Thanks to Arduino, Microsoft and of course Hackster for putting together this great challenge I have had a lot of fun building the project and a lot of sleepless nights 😉
If you use this project please share a link to this page for me, appreciated.
Adam Milton-Barker
https://plus.google.com/+AdamMiltonBarker
TechBubble Technologies Founder.
Code
Source : TIA Weak Artificial Intelligence IoT Assistant
- How many Arduino Uno boards are used in the project?
The project uses two Arduino Uno boards for authentication. - What is the role of the MKR1000 in this system?
The MKR1000 acts as an IoT security device that functions as a web server and sends data to Azure IoT Hub. - Which language is used for the artificial intelligence component?
The application uses SIML, which stands for Synthetic Intelligence Markup Language. - How does the Windows Application communicate with the MKR1000?
The Windows Application controls the MKR1000 and reads sensor data via HTTP. - Can users modify the SIML package for custom commands?
Yes, users can download Syn Chatbot Studio software to create their own SIML files and replace the default package. - What tools are required to install the SSL certificate on the MKR1000?
You need the Wifi101 Firmware Updater and the winc1500-uploader-gui file to upload the certificate. - Does the project currently use Azure Stream Analytics?
No, the author did not have enough time to fully integrate Azure IoT Hub and Stream Analytics due to API issues. - How do the AuthWayFP and AuthWayNFC devices connect to the Windows app?
Both Arduino Uno based devices communicate with the Windows Application using serial communication.