
Summary of Home Temperature while you’re on holiday …
This article describes a project to monitor home temperature and humidity remotely during holidays using an Arduino MKR1000. The system connects a DHT11 sensor to the microcontroller, which transmits data via Wi-Fi to the Blynk platform. Users can view real-time values on a smartphone dashboard from anywhere in the world.
Parts used in the Home Temperature Monitor:
- Arduino MKR1000
- DHT11 Temperature & Humidity Sensor (4 pins)
- Breadboard (generic)
- Jumper wires (generic)
- 10 kOhm pulldown resistor
When you are out of your home for Christmas Holiday you can visualize the Temp and Humidity values by your smartwatch using ArduinoMKR1000.

Things used in this project
Hardware components |
||||||
 |
|
× | 1 | |||
 |
|
× | 1 | |||
 |
|
× | 1 | |||
 |
|
× | 1 | |||
Software apps and online services |
||||||
 |
|
|||||
 |
|
|||||
 |
|
|||||
 |
|
|||||
Story
I live away from my family and during the Christmas holidays I reach my loved ones. When I’m away from home I want to have everything under control! I have IP cam, and remote switches. I missed a useful accessory to monitor the temperature and humidity.
For this project I decided to use the powerful Arduino MKR1000, and the famous temp and humidity sensor DHT11. To manage the sensor will need to install the library for DHT11 of Adafruit available at which you can read below.
Or you can upload the code on Genuine MKR1000 directly from create.arduino.cc platform.
The real power of the project is the ease of use, and in the building speed. Using the development platform Blunk, can me view your data directly on your smartphone, or any other computer connected to the Internet. From anywhere in the world! You can also share your dashboard Blynk sending a simple link.
Hardware
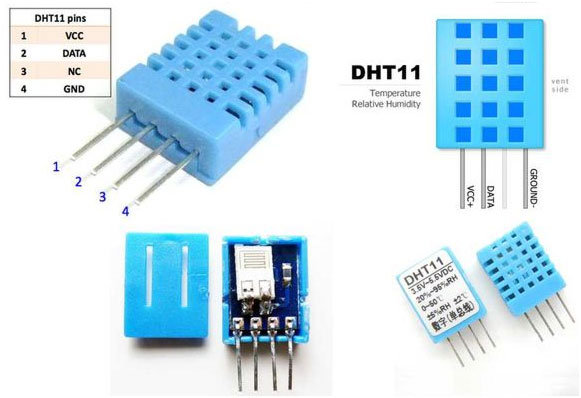
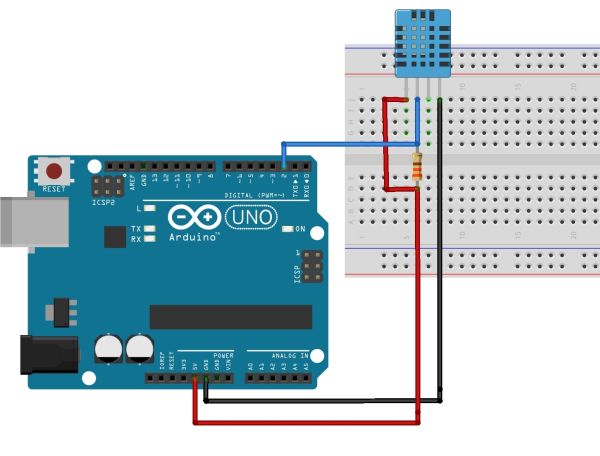
For this project I have used a breadboard, and three wires. For the DHT11 sensor you can use a pulldown resistor (10 kOhm) between the pin VCC and pin out (2). See the figure.
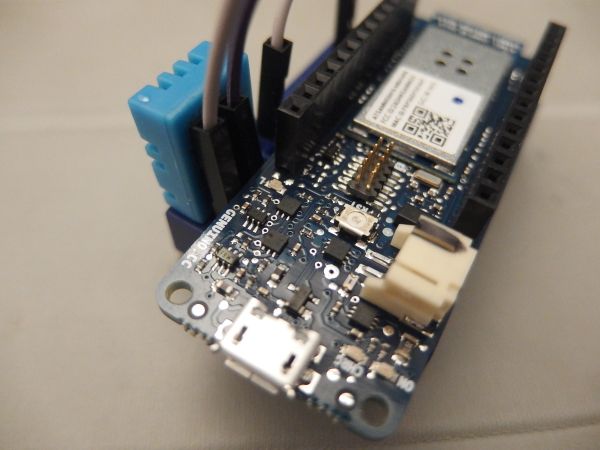
Connect the VCC pin to Arduino MKR1000 5V, and GND to Arduino GND. After connect the DHT11 out (pin number 2) to PIN number 7.
Now you can connect the Arduino to USB and use it like for power supply.
Software
Subscribe, install and upload the code.
Blynk
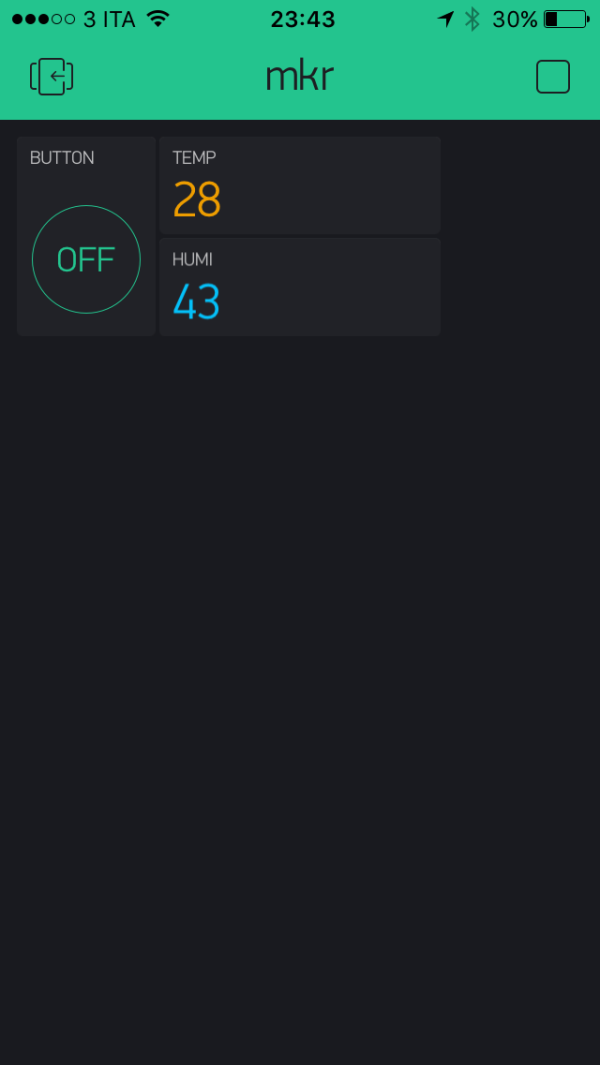
The first step to be made is to subscribe to Blynk site. Blynk is a powerful software that allows users to create interesting projects connected with internet. Once you sign up for Blynk, you need to install the app on your smartphone. We create a new dashboard, see the figure, and after send your personal token by mail. You can use this code on your Arduino code. Blynk is free. Try!
Dashboard
Within the dashboard, you need to enter the widgets you need to the project. Insert two widgets that display screen values. The two widgets read the values of Virtual pion number 2 for Humidity, and number 3 for temperature. Now you can assign the virtual PIN number 2 to the widget that show the values, and the virtual PIN number 3 to the widget that show the Temperature value.
I also added a button connected to pin number 6 Arduino MKR1000. The pin number 6 of our ArduinoMKR1000, is also connected to this LED on the board.
Arduino
Arduino is the “core” of project. Install the libraries, add the board Arduino MKR1000, and after upload the code. You can also use create.arduino.ccwithout add libraries or boards.
Install the libraries
For this code libraries will be necessary:
Blynk
The DHT_11 library
The SPI library
The library called WiFi101
and the SimpleTimer library
to perform the installation of the libraries, you will need open the Arduino IDE and click Sketch -> Library Manager. Add libraries by inserting into the search field italicized names.
Click on the link below, to see the code. Open Github site, and save the code. Within the code should you add the connection data (SSID and password) of the your wifi network, and the token that have recovered from the app by Blynk. After performing these steps, you will need to load the code on our Arduino MKR1000 clicking the upload button.
Now you can see the values of your DHT11 on your smartphone, and share this app with a simple link.
Schematics
DHT11
DHT11 connection
Arduino MKR1000 + DHT 11
Code
- How do I connect the DHT11 sensor to the Arduino?
Connect VCC to 5V, GND to GND, and pin 2 to PIN number 7. - What is the best way to view data remotely?
Use the Blynk app on your smartphone or any internet-connected computer. - Does the project require specific libraries?
Yes, you need Blynk, DHT_11, SPI, WiFi101, and SimpleTimer libraries. - Can I share my monitoring dashboard with others?
Yes, you can share the dashboard by sending a simple link. - What components are needed for the circuit?
You need a breadboard, jumper wires, and a 10 kOhm pulldown resistor between VCC and pin 2. - How do I configure the Blynk dashboard?
Add two display widgets assigned to virtual PIN 2 for humidity and PIN 3 for temperature. - Can I upload code without installing libraries manually?
Yes, you can upload directly from create.arduino.cc without adding libraries or boards. - What is the role of pin number 6?
Pin 6 connects to a button on the dashboard and controls the LED on the board.
