It all started as a weekend project with my kids and soon enough I got sucked into a 4 month project with their school !
The idea was to get a small group of kids aged 6 to 9 to participate to a robotics contest (http://www.eurobot.org/eng/index.php).
It was a fun journey and they did really well as they went all the way to the European finals (and ranked 19th) with their hacked vacuum cleaner.
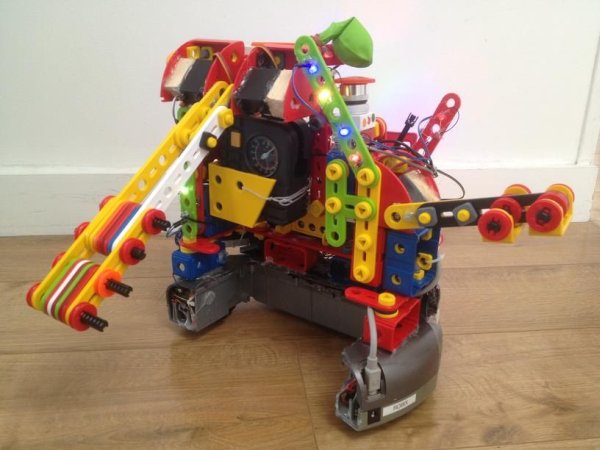
I delivered to the team a set of bricks I am going to detail in this instructable.
Each brick is fairly simple to build and requires no soldering.
I have:
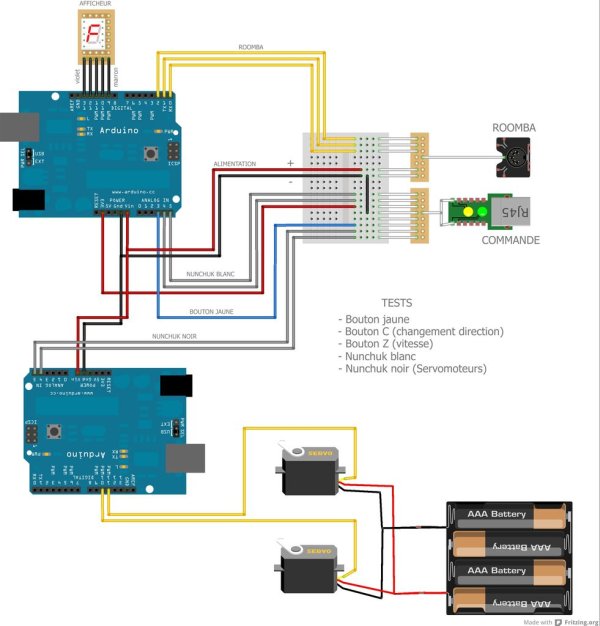
– a nunchuk controlled arduino that drives the roomba.
– a nunchuk controlled arduino which in turn controls up to 6 servos.
– servos integrated into ‘meccano’ pieces for kid-friendly use.
So nothing incredibly new here, just bolting existing stuff together… I tripped over enough difficulties that I thought it would be worthwhile summing everything up here…
Step 2: Mobile base : arduino controlled roomba
This part is in theory made easy by iRobot (the company that builds Roomba) as they have added a serial interface to their Roomba and documented the protocol.
Now, it is just impossible to find a male connector for this interface. There are so many minidin out there ! http://en.wikipedia.org/wiki/Mini-DIN_connector
So, here is the secret that’s going to make this whole instructable worthwhile: the connector is the same as the old Macintosh serial interface one. I have got a bunch of those cables at a used computer parts store for 1 euro each !
5 pins are of interest:
– 2 power pins for your arduino (I plugged them right into the arduino vin pin)
– 1 pin that allows to ‘wake up’ the Roomba
– 2 pins for serial communication (Rx,TX)
I just cut the apple cable and soldered 5 headers so I could plug said cable into a breadboard and the rest of the project would not need any more soldering.
We added a big kill switch (as it was mandatory for the contest) on the +Vcc cable as close as possible to the battery.
We also had to cut the body of the Roomba quite a bit to fit the Contest dimensions (100cm in perimeter), to the point that the untrained eye would not suspect our base is a Roomba !
We were able to disconnect the control panel of the Roomba and most sensors but not the 4 IR sensors in the bumper. Without said sensors, the Roomba is just a fancy brick.
Step 3: Connect a nunchuk over RJ45
A lot a examples of how to connect a nunchuk to an arduino using a WiiChuck adapter out there (Basically 2 pins for power and 2 pins for communication).
WiiChuck adapters work fine at first glance but they just eventually fry your nunchuk. I learned it the hard way and decided to do something about it as I threw away the fourth, and last, dead nunchuk of the household…
Nunchuk are i2c devices and they require 3.3v (not 5v). This means you can not use the analog pins to power your nunchuk, you have to use the 3.3v pin. I got away with not adapting the voltage of the 2 communication pins.
I bought some ‘no-brand’ nunchuks at 5$ a piece instead of the official ones at $20+ a piece. 1 in 5 was DOA, still an ok deal though and they work fine.
I could not get the classic nunchuk library for arduino to work properly and I found a much straight forward one that I customized a little.
The contest was open to wire-controlled robots. Kids in our team had 2 nunchuks in hand connected to a breadboard. Said breadboard has a female RJ45 socket so it is connected to the breadboard that lives on the roomba through a standard RJ45 ethernet cable.
So we have 8 wires between the control box and the robot:
– gnd
– vcc (3.3v)
– pin1 white nunchuk
– pin2 white nunchuk
– pin1 black nunchuk
– pin2 black nunchuk
– push button A
– push button B
The white nunchuk is connected to the arduino board which is connected to the serial port of the Roomba.
The black nunchuk is connected to the arduino board which controls the servomotors. More on this later.
The code is pretty self-explanatory I think.
Collect parts !
For this project I used:
– 2 x ‘generic’ nunchuck
– 1 roomba vacuum cleaner
– 2 x arduino
– 2 x sensor shield
– 6 x servos
– meccano ‘junior’ sets (aka erector in the US ?)
– 2 x female rj45 connector
– a hot glue gun.
References:
http://hackingroomba.com/2006/11/28/new-roomba-prototyping-cable-for-arduino/
http://www.netfluvia.org/layer8/?p=127
http://hackingroomba.com/projects/
For more detail: Hacked roomba and arduino snowballs into a Eurobot 2013 entry