
Summary of Hack a voice changer to add an Arduino input
This article details a DIY project to hack a cheap voice changer into a digital input device for Arduino. By using a 741 op-amp as a voltage comparator, the author detects voice activity (voltage fluctuations) to trigger a binary "Yes/No" signal, enabling projects like animated skulls or light organs without complex analog processing.
Parts used in Hack a Voice Changer for Arduino:
- A voice changer module
- A 741 opamp ic
- An LED of choice
- A resistor for your led (220 ohms - 1 k)
- Some hookup wire
- Soldering iron and solder
- Wire snips
- Screwdriver
Another quick hack. I purchased a voice changer because I was looking for something cheap that could be hacked into an voice input device. Basically I wanted to animate a skull when I spoke. Added bonus, now the skull puppet would also have a scary voice.
I am going to show you how to hack a voice changer to use as a digital input for an Arduino project. I leave the output or reaction up to you.
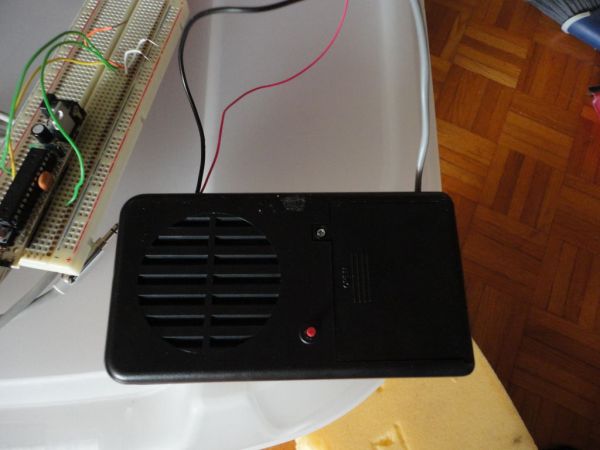
Step 1: What you’ll need
I am assuming that you have a little bit of electronics and soldering experience. I will also assume that you have some familiarity with Arduino.
You will need
- A voice changer module. (8$ at Wallymart)
- A 741 opamp ic.
- an LED of choice (not necessary, but provides a cute little visual input that things are working, and will provide clues as to how to change the circuit into a LED light organ.)
- a resistor for your led (220 ohms – 1 k will work alright, you only need this if you are using the LED)
- some hookup wire.
Tools
- Soldering iron and solder
- wire snips
Step 2: Open ‘er up
First things first, crack the case. Not literally, just figuratively. Open it carefully with a screwdriver, save your screws.
Start by removing the battery cover and batteries as there are two screws hiding under the batteries.
Flip the unit over and remove the other two long screws. You can leave the belt clip intact. The two short screws can be left in even though I didn’t. They hold the switch in position and removing them will only mean that you will need to line it up again later. Learn from my mistakes and leave them in.
There, four screws out (plus one for the battery cover) and you should be able to look inside.
Kind of exciting eh.
Step 3: Poke araound
The first thing you may have noticed about the unit is that it is packing three AA batteries. 4.5 volts, which means it is probably fine at 5 volts, which means there is not much to do in order to interface with an Arduino.
Now by poking around with a multi-meter and talking into the microphone at the same time. I found a few points where the voltage fluctuates, which is great. The fluctuation was tiny however, and I was doubtful that I would be able to get much meaningful from an Analog input pin. I wanted a digital input. Something simple is the voice changer changing a voice? Yes or No?
What I needed was an easy way to spot the drop. Enter 741 op amp. (There was a theme song, but we cut it out…too much gain)
This little wonder (the 741) works great as a comparator, functions at 5 volts, and I had a few on hand to boot. Perfect.
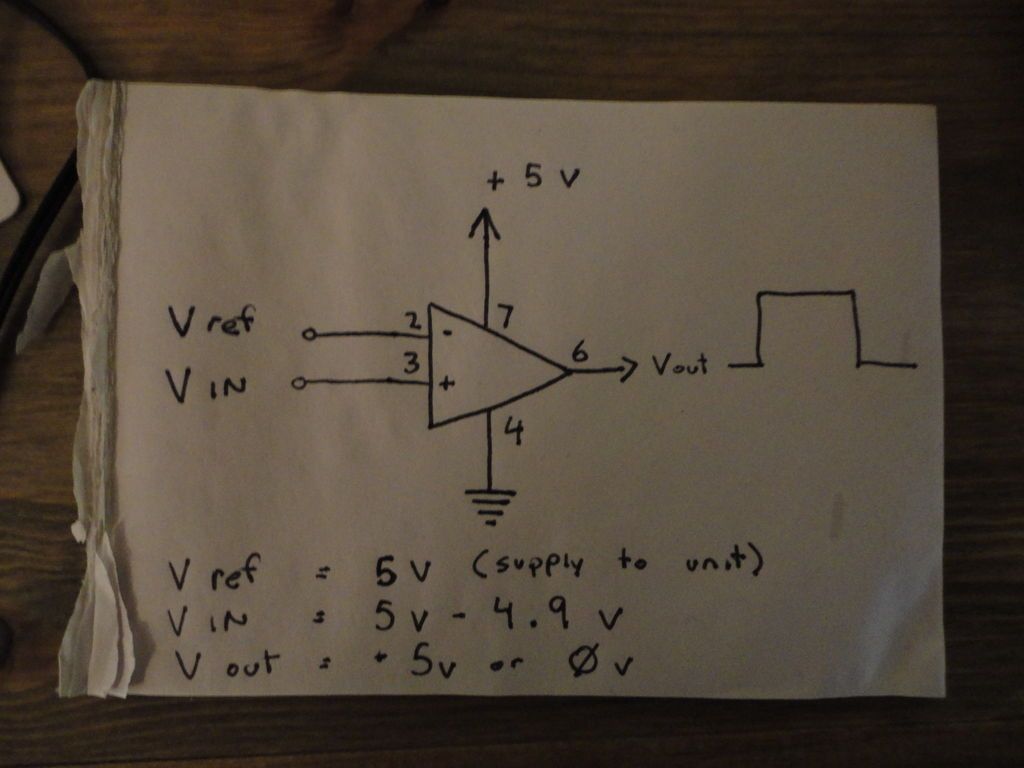
What is a comparator?
A comparator is an analog circuit that monitors two input voltages (in our case the supply voltage and the voltage that drops). One voltage is called the reference (5 volts) and the other is called the input voltage. When the input voltage rises above or drops below the reference voltage, the output of the circuit changes states. Due to the high gain, an op amp with no feedback resistor can function as a comparator.
So we need to find a positive voltage that changes when someone speaks into the microphone. I did the poking for you, and have marked such a point in the photo below.
Major Components in Project
- A voice changer module
- A 741 opamp ic
- an LED of choice
- a resistor for your led
- some hookup wire
- A voice changer module
- A 741 opamp ic
- an LED of choice
- a resistor for your led
- some hookup wire
For more detail: Hack a voice changer to add an Arduino input
-
What is the main purpose of this project?
To hack a cheap voice changer to use as a digital input device for an Arduino project. -
How does the 741 op amp function in this circuit?
It works as a comparator that monitors supply voltage against a dropping voltage to change output states when someone speaks. -
Why was a digital input preferred over an analog input?
The voltage fluctuation from speaking was too tiny for meaningful analog data, so a simple Yes or No signal was needed. -
Can this project interface directly with an Arduino?
Yes, the unit runs on 4.5 volts which is close enough to 5 volts to interface easily with an Arduino. -
Is the LED component required for the circuit to work?
No, the LED is not necessary but provides visual input and can help modify the circuit into a light organ. -
What tools are needed to open the voice changer case?
You need a screwdriver to remove the screws holding the battery cover and the main casing. -
What happens if you remove the short screws holding the switch?
Removing them requires you to line up the switch again later, so it is recommended to leave them in place. -
How do you find the point where voltage changes during speech?
You poke around with a multi-meter while talking into the microphone to spot points where voltage fluctuates.
