Summary of Electronic Voting Machine using Arduino
This article details the construction of an electronic voting machine using an Arduino Uno. The system utilizes four push buttons to cast votes for specific candidates (BJP, INC, AAP, OTH) and a fifth button to display the final tally on a 16x2 LCD. The Arduino controller manages vote counting and result generation, with all components connected via a breadboard and wires.
Parts used in the Electronic Voting Machine:
- Arduino Uno
- 16x2 LCD
- Push buttons
- Bread board
- Power supply
- Connecting wires
We all are quite familiar with voting machines, even we have covered few other electronic voting machine projects previously here and here using RFID and AVR microcontroller. In this project, we have used the arduino controller to create an electronic voting machine.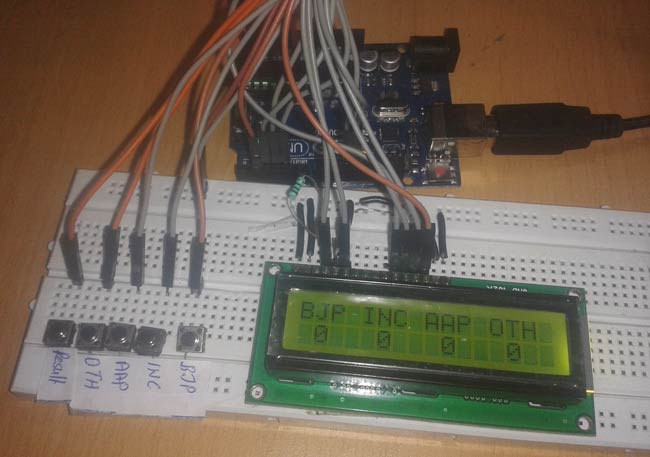
Components
- Arduino Uno
- 16×2 LCD
- Push button
- Bread board
- Power
- Connecting wires
Circuit Diagram and Working Explanation
In this project we have used four push buttons for four different candidates. We can increase the number of candidate but for better understanding we have limited it to four. When any voter press any of four button then respecting voting value will increment by one each time. After whole voting we will press result button to see the results. As the “result” button is pressed, arduino calculates the total votes of each candidate and show it on LCD display.
Circuit of this project is quite easy which contains Arduino, push buttons and LCD. Arduino controls the complete processes like reading button, incrementing vote value, generating result and sending vote and result to LCD. Here we have added five buttons in which first button is for BJP, second for INC, third is for AAP, forth is for OTH means others and last button is used for calculating or displaying results.
The five push buttons are directly connected with pin 15-19(A1-A5) of Arduino with respect to ground. A 16×2 LCD is connected with arduino in 4-bit mode. Control pin RS, RW and En are directly connected to arduino pin 12, GND and 11. And data pin D4-D7 is connected to pins 5, 4, 3 and 2 of arduino.
Read More: Electronic Voting Machine using Arduino
- What components are required for this project?
The project requires an Arduino Uno, 16x2 LCD, push buttons, bread board, power supply, and connecting wires. - How many candidates can the system support initially?
The project limits the number of candidates to four for better understanding, though the number can be increased. - Which pins connect the five push buttons to the Arduino?
The five push buttons connect directly to pin 15-19(A1-A5) of the Arduino with respect to ground. - How is the 16x2 LCD connected to the Arduino?
The LCD connects in 4-bit mode with control pins RS, RW, and En on pins 12, GND, and 11, and data pins D4-D7 on pins 5, 4, 3, and 2. - What happens when a voter presses a candidate button?
Pressing any of the four candidate buttons increments the corresponding voting value by one each time. - How does the user view the election results?
The user must press the result button, after which the Arduino calculates total votes and displays them on the LCD. - Which political parties or groups do the first four buttons represent?
The first four buttons represent BJP, INC, AAP, and OTH (others). - What role does the Arduino play in this circuit?
The Arduino controls reading buttons, incrementing vote values, generating results, and sending data to the LCD.