A long, long time ago, when it was still possible to go to school, we came up with an interesting idea to make a device that works in a fairly simple way – after throwing in the right amount of money, we will issue a specific product. I can’t reveal what this device will appear yet, but you’ll soon find out. What is the basic element of every vending machine? No, they are not sweets or tea. The basic element is the money counter. I have not found any reasonably priced offer to buy, prices are from 100$. Well, I have to do it myself.
Supplies
- Arduino Nano
- PCB (PCBWay)
- Charging Module
- LM358
- 6x IR Diodes
- 6x 1kOhm Resistor
- 6x 220Ohm Resistor
- 10kOhm Resistor
Step 1: Designing
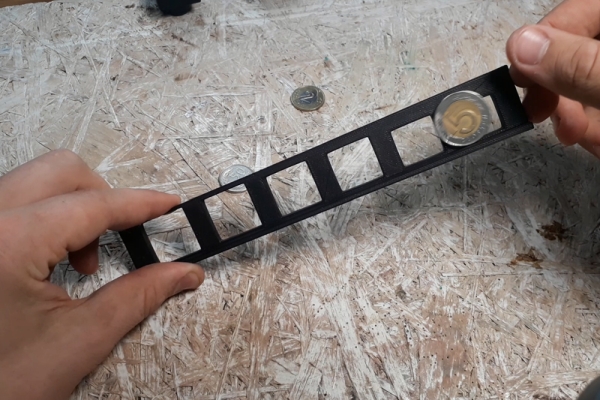
I started by looking for coin sizes that, as it turned out, increase with the value, so … ehhh … There is an exception, but it doesn’t matter. I transferred these dimensions to Fusion 360, added a few elements and printed this project. Was the attempt successful? No. I returned to Fusion and added another item and printed it again. Was the attempt successful? No, but it worked better than before. I returned to Fusion again, added some elements again and printed it again. Was the attempt successful? Yes! Okay, now I had to enlarge the design a little so that it stood alone and had space to store a dozen coins and had holes for the infrared diodes, to detect falling coins. I printed this project, but sometimes the coins stopped, so I made a few more corrections and the main part of this sorting system was ready. It’s time for electronics.
Step 2: Electronics
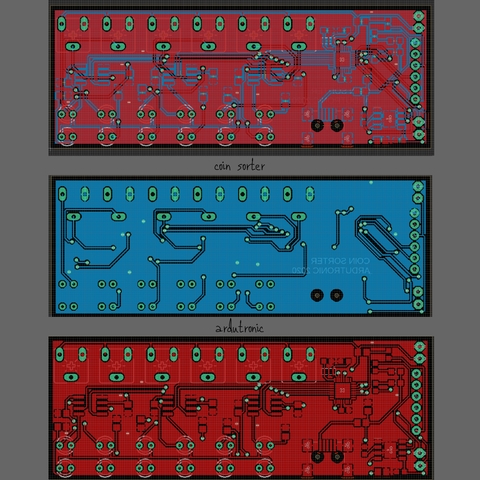
I once created a line follower robot, which using infrared diodes detected whether it had invaded a black line – the diode transmitter sends a beam of light that is reflected from a bright surface or is absorbed by a black one. My coin detection system will work the same way. I have created several circuits responsible for working of the microcontroller, battery charging module, sensors and programming module, as always dividing them into individual blocks. Then I designed the pcb and ordered it.
Step 3: PCB Ordering
I went to PCBWay.com and clicked “Quote Now” and then “Quick Order PCB” and “Online Gerber Viewer“, where I uploaded files for my board, so I could see what it would look like. I went back to the previous tab and clicked “Upload Gerber File“, I chose my file and all parameters were loading themselves, I changed only the soldermask colour to red. Then I clicked “Save To Card“, provided shipping details and paid for the order. After two days the tile was sent, and after another two days, it was already on my desk.
Step 4: Soldering
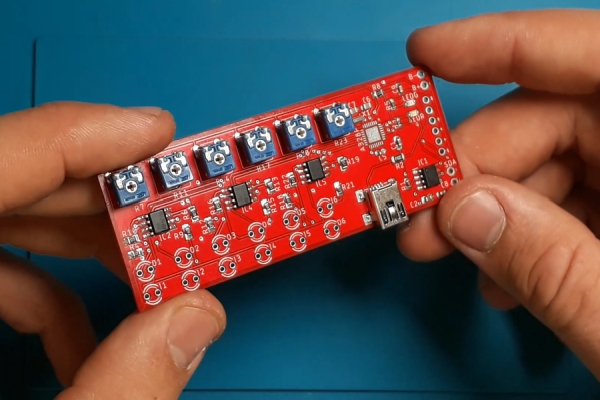
When the couriers brought me shipments with the board and components, I immediately started soldering. This time I used a hot-air station for the first time. I applied solder paste to all pads and put all the elements on it, of course starting from the smallest. I installed the nozzle with the largest diameter, set the temperature to 300 degrees and the air stream to almost the smallest. To be honest, I was surprised how fast is this process because all components were soldered in almost 15 minutes, soldering time with a soldering iron would be 2 or 3 times longer. I also made the programming and i2c outputs to be placed in the device housing. I also was surprised that everything worked as it should on the first try :).
Step 5: Programming
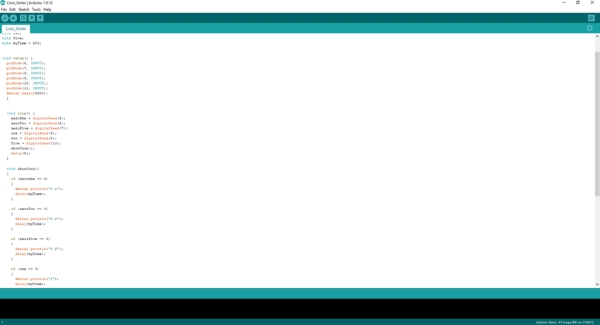
I wrote a program that displays what coin was thrown into the Coin Sorter. The whole is very simple- by default, the diode transmitter sends a beam of light to the receiving diode, and when the coin falls into an individual compartment, it interrupts this beam, i.e. state each of the inputs is high, and when the coin falls into the compartment, it is low. I had to enter the delay after reading the coin value, the best effect was obtained with a half-second delay, i.e. the device is able to read the value of two coins per second.
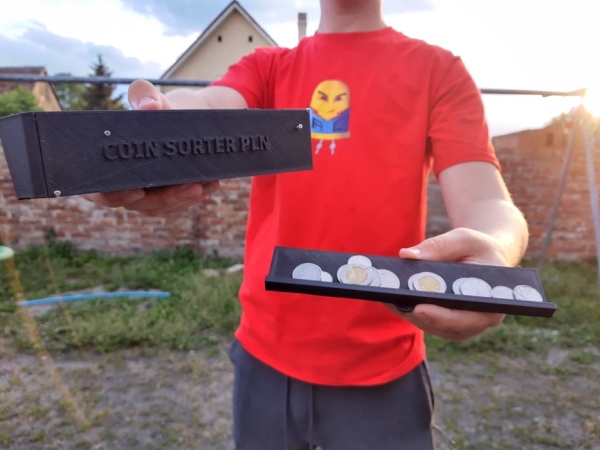
Step 6: Housing
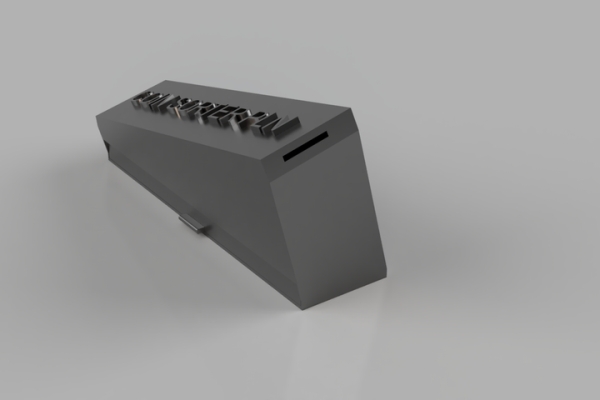
The last step was to make the housing. I returned to the Fusion 360 program, quickly designed it, put it in the Creality Slicer, saved it on an SD card and printed it. All that was left was to fold the casing parts together, put my sorter into it and screw the top part. It is ready!
Step 7: Summary
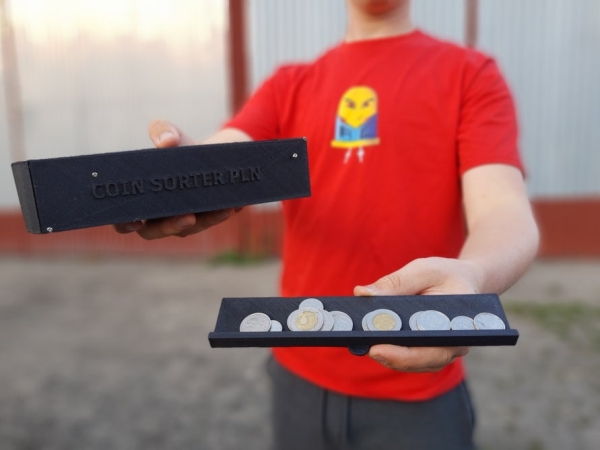
My Coin Sorter works as I wanted, detects coins, sorts, displays the current value. It is ready to be used in my machine with which it will communicate by the I2C connector. You can edit this project for your own needs, add a different currency or connect the battery and display and make it a piggy bank. I will share my vending machine design soon, but the next project will be “Laser Pistol“. You can follow the progress of projects on my Instagram. If you have any questions, write to me:
Source: Electronic Coin Sorter