Ah yes, it’s time for another Instructable involving an Altoids tin… But this time it’s not about what’s inside the Altoids tin, it’s about the Altoids tin
itself. In all its greatness, the Altoids tin we all know and love has one rather major flaw for DIY electronics use: it’s electrically conductive. To combat this, you can do several things. You can isolate your circuit with hot glue, but that’s messy and a bit permanent. You can put electrical tape on the inside of the tin, but after a while that gets gunky and gross, and it doesn’t look the best. Or you can do what I did and
insulate the entire inside with a rubber coating. This is pretty simple and involves just a few materials available from the hardware store, so let’s go!
Step 1: Supplies and Tools
For supplies, you’ll need the following:
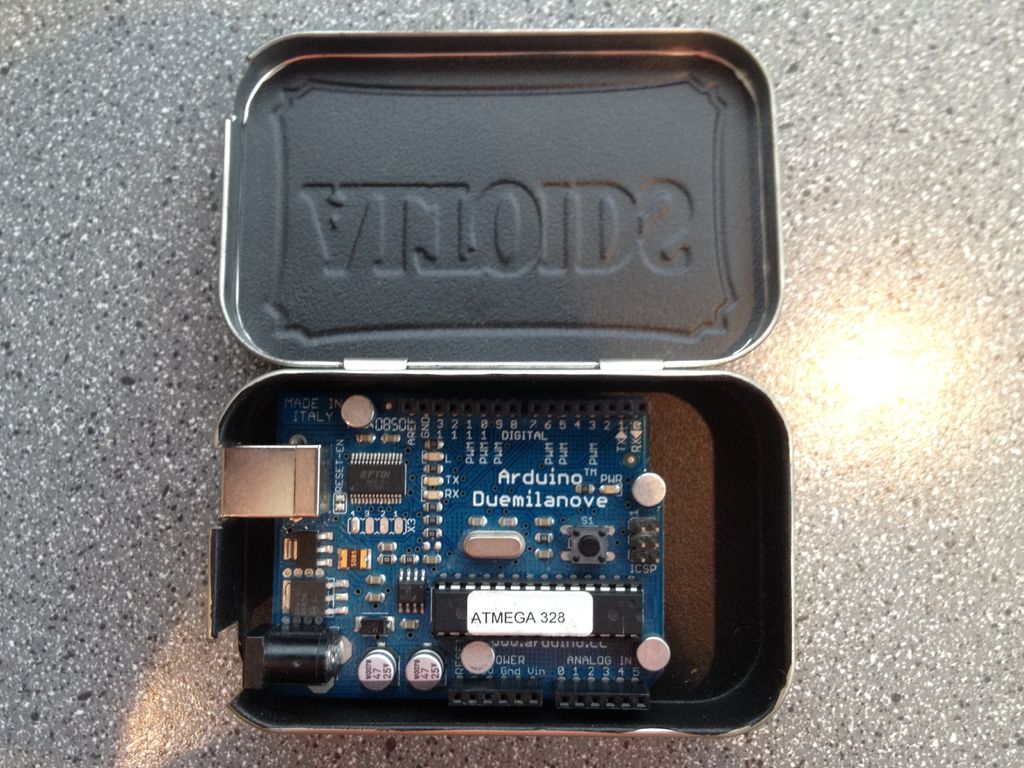
Altoids tin – whatever style you prefer, but my Arduino fits perfectly in the standard size so that’s what I used
Masking tape – to eliminate overspray on the outside of the tin
Paper towel – for cleaning
PlastiDip – this is the good stuff, a “multi-purpose rubber coating” made by Performix
For tools, you’ll need these:
Hands – for doing things
X-Acto knife – for cutting away excess rubber after drying
Small flathead screwdriver – for taking apart the Altoids tin
Step 2: Prep
The first steps necessary to electrically insulate your Altoids tin are prep work. Start by cleaning out the inside of the tin using a damp paper towel to remove that sweet, sweet minty dust. You may also want to wash it with soap and water if it’s really dusty or dirty.
After that, you’ll want to separate the top of the tin from the bottom, as this will make masking and spraying easier. Take a small flathead screwdriver and gently pry the hinges away the lid can be lifted out.
Now it’s time to mask off the two parts of the tin. Using masking tape, cover up the entire outside of the tin up to the curled edge.
Step 3: Rubberizing
After everything’s masked off properly, it’s time to spray on the PlastiDip. I don’t have pictures of the process itself, but it’s roughly the same as spray painting. Just follow the instructions on the can and you should be fine. I did 2-3 coats to make sure everything was sufficiently covered.
After the PlastiDip is dry, go ahead and carefully peel off the masking tape, making sure to not let the coating rip on the edges. Do not close the Altoids tin yet or the edges may rip!
Step 4: Cleaning Up
In its current state, the rubberized coating in the Altoids tin will interfere with the closing of the tin, possibly resulting in ripping. To fix this, we need to strategically cut away parts of the coating. Using an X-Acto knife, cut away the PlastiDip coating at the top of the curled edge in the bottom part of the tin and along the entire inside sides of the top part of the tin (the part that overlaps the bottom portion when the tin is closed). Now you can put the tin back together and press the hinges closed again, and you’re done!