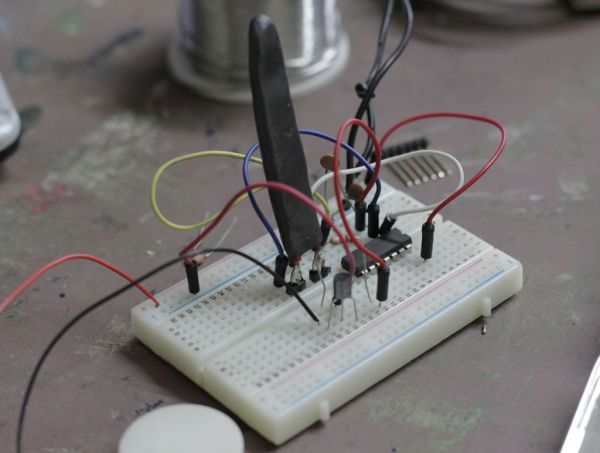
Este es el primero de 5 instructables que surgieron del Instructables & Sugru build night (and day en nuestro caso) que hicimos en el Laboratorio de Juguete, el 20 de julio del 2013: una Resistencia Flexible o Flex Sensor hecha con Sugru y polvo de grafito:
——————————————-

This is the first of 5 instructables from Instructables & Sugru Build Night (and day in our case) in Laboratorio de Juguete (toy laboratory) a makerspace from Buenos Aires, Argentina.
We built a DIY flex sensor using just Sugru and graphite powder.
Step 1: Materiales (materials)
Vas a necesitar:
*un sobrecito de Sugru
*Polvo de Grafito (se usa para lubricar cerraduras y se compra en cerrajerías o ferreterías)
*Un pedazo de cable pequeño (unos 5 cm.)
*ester o multímetro
Para hacer la prueba de funcionamiento del video vas a necesitar:
*Una placa arduino o arduino-compatible
*Un potenciómetro de 1M o 500k
*Un buzzer
*Protoboard y jumpers (o cables unifilares)
——————————————————————-
You will need:
*A sugru package
*Graphite powder (it’s used to lubricate locks)
*A piece of wire (about 2 inches)
*Multimeter
To make the same test as in the video, you will need:
*An arduino or arduino-compatible board
*A 1M or 500k potentiometer
*A piezobuzzer
*Breadboard and jumpers
Step 2: Mixing
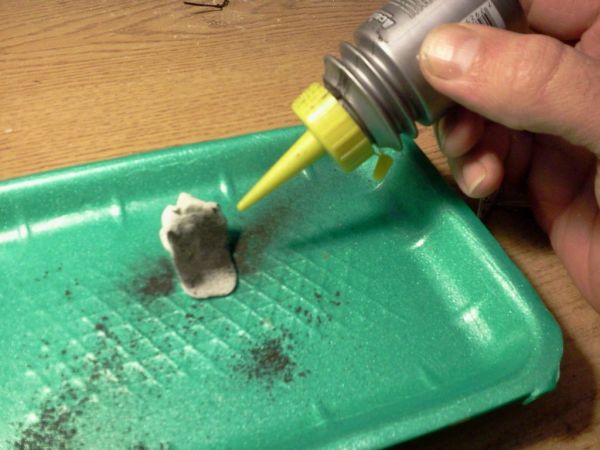
Comenzá a agregar lentamente el polvo de grafito. Tenés que mezclar y agregar y mezclar y agregar así que armate de paciencia! Cada tanto usá tu tester en modo resistencia para ver si empieza a conducir (y resistir). Si no conduce, no te desesperes y seguí agregando grafito…
——————————————————-
Start adding graphite slowly. You ‘ll have to mix and add and mix and add a lot so be patient. From time to time, grab your tester (in resistance mode) and check if it starts conducting (and resisting) If it doesn’t, don’t get anxious and keep on adding graphite…
Step 3: Wiring
Una vez que tu masilla resistiva esté conduciendo (medirá entre 10K y 5M, aproximadamente), estirala, tomá el cable (con sus extremos pelados) e introducilo dentro de la masa, de manera que uno de los extremos quede completamente dentro y el otro completamente fuera. Es muy importante que el extremo que quede fuera no esté en contacto con la masilla porque si no, será un atajo para los electrones. Finalmente, toma un pedazo muy pequeño de cable e introdúcelo en el extremo por el que se asoma el anterior. Estos dos extremos serán tus terminales. Listo! Ahora dejá descansar 24 horas tu sensor de flexibilidad.
————————————————————————————————
Once your resistive putty is conducting (between 10k to 5M of resistance), stretch it. Take your wired (stripped in both sides) and put it inside the putty. One of the sides must be completely inside the putty and the other must be completely outside. This is very important because if the copper from outside side is in contact with the putty, electrons will take this shortcut. Finally, take a very short piece of wire and put it next to the previous one. This will be your terminals. That’s all. Now let your flex sensor rest for 24 hours.
For more detail: DIY Flex sensor using Sugru and graphite powder (Resistencia flexible usando Sugru y polvo de grafito)

