Networking is the one of the most important mean of communication used to communicate with people who are connected to one. Most of the available network communication modules in the market are not affordable by the overall end users. Considering this problem, a prototype has been developed, which can be used as networking module. It is made up of cheap and easily available standard modules.
Working of the system
The overall communication system uses the I2C protocol to send or receive data. Consider the two devices between which the data transfer is going to take place. One of these will connected as master and the other as slave. The master device is going to connect with the slave devices and control communication between them.
Modules Used
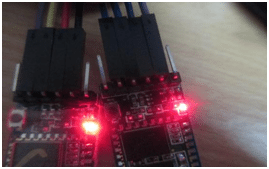
The Bluetooth Module (HC-05) has been used as the communication medium for building the basic prototype. Two such devices are required, since this would be a two way communication in master-slave mode.
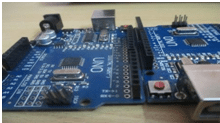
For controlling the data transmission in the prototype, an Arduino microcontroller board has been used.
Arduino
Arduino is open source hardware and software which is used to create the prototype of the idea what is in your mind. The software for the machine is given by the same developer of the hardware.
Bluetooth Module (HC-05)
Bluetooth (HC-05) is an Interactive way for the communication wirelessly around the distance of 9m (30ft)Approx. It is capable to send the discrete data with the Synchronized baudrates.
But now most of the Bluetooth devices (HC-05) which are now available at very cheap cost and low power consumption. And most importantly it is available with the Arduino compatible version.
There are lots of configured types of BT Modules are available in the home market. Which can varies in the configuration according to its version?
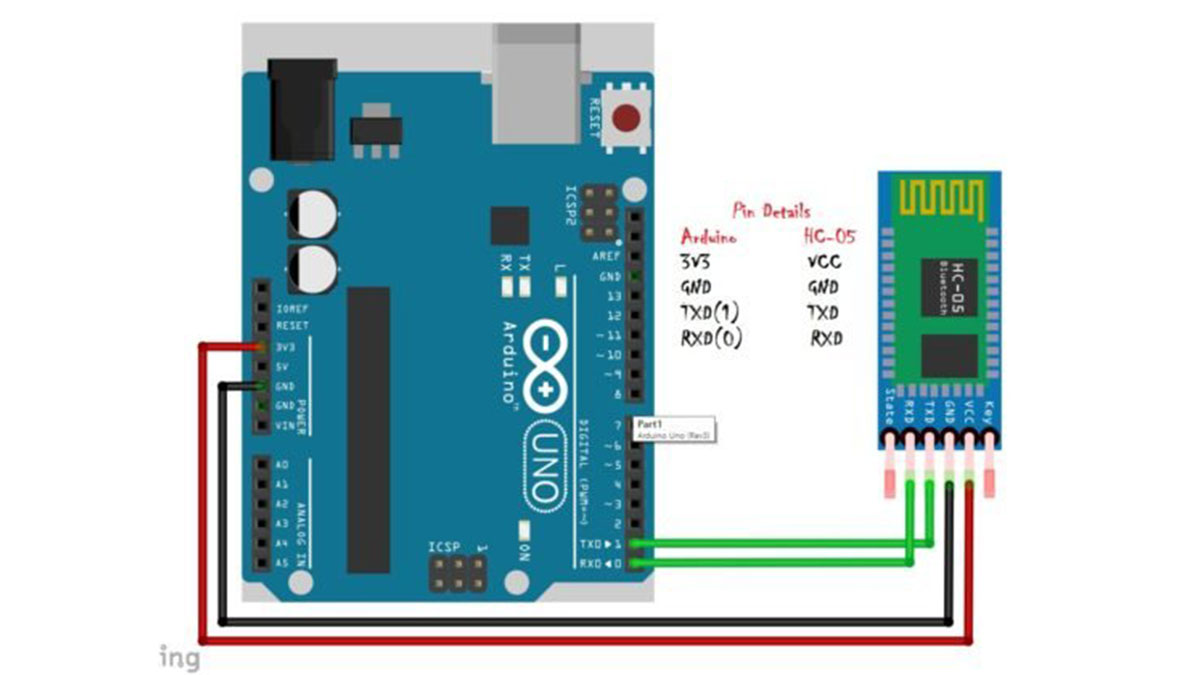
Wiring Diagram
We have to configure the HC-05 module to meet the requirement. For the configuration AT commands for the HC-05 module is used. The wiring and the AT Commands are detailed. Using this AT commands described the configuration of this BT is changed.
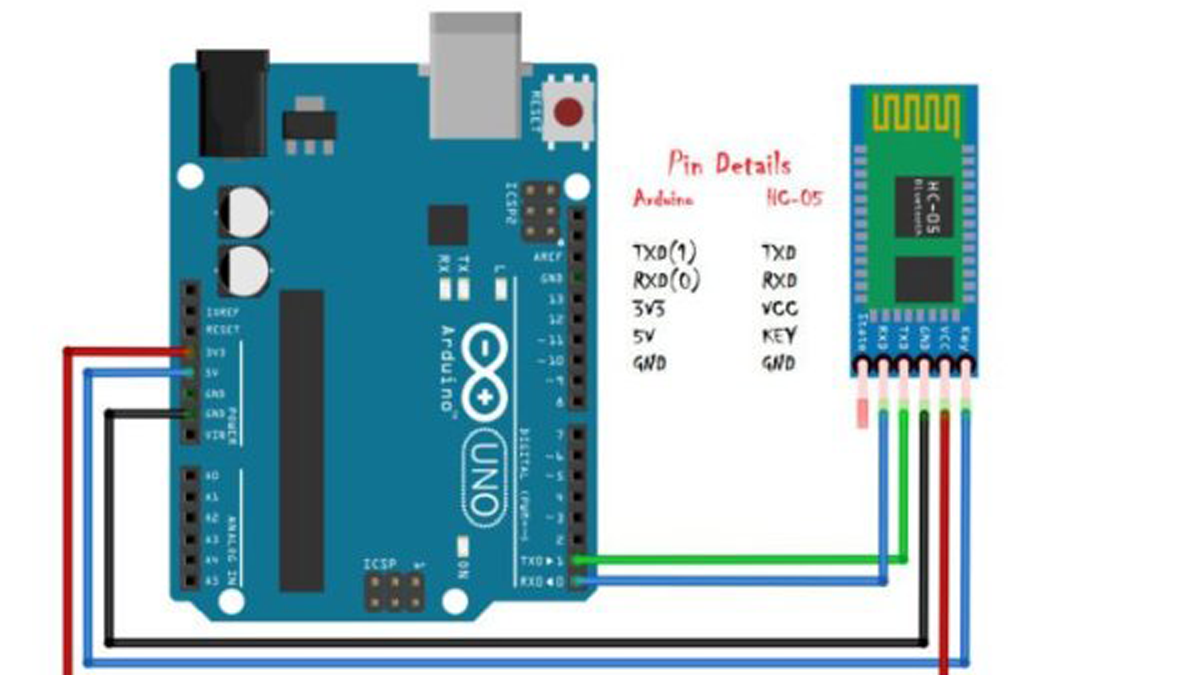
Arduino Chatting Circuit
Slave Role
To configure the HC-05 as the slave role. Do the AT commands after entering your BT into the AT commands.
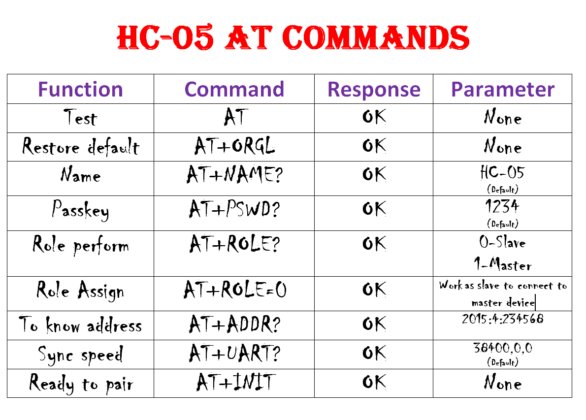
After done this. Remember the address of your slave device.
Time for Master
It’s time to configure the master devices. After following the below steps.
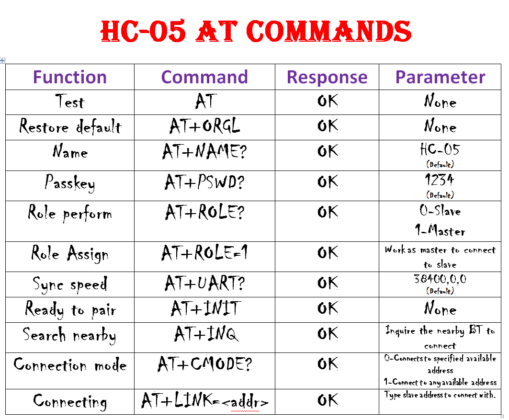
Use AT+LINK <address of the slave> to interconnect the master and the slave device.
After config. Circuit reconnect
After configuring your BT module reconnect the circuit as show.
Programming
The important tool to control the hardware is the software. We have to do the software programming to finish the job.
#include <SoftwareSerial.h>//Serial communication header
SoftwareSerial a(6, 7); // RX | TX
void setup()
{
Serial.begin(9600);//begin serial monitor with 9600 baud
Serial.println(“Type message”);
a.begin(38400); // HC-05 default baud
}
void loop()
{
if (a.available())
Serial.write(a.read());//reads data from BT
if (Serial.available())
a.write(Serial.read());//reads data from serial monitor
}
This is the work we have done to get the prototype of the Intra networking communication. It’s cheap easy to do and reliable.
Read More Detail:DIY: Arduino Chatting