
Summary of DIY Antique Phone Doorbell using Arduino
This article details Bryan Zimmer's DIY project converting a 1940s Swedish Ericsson bakelite phone into a wireless doorbell. The build integrates a battery-operated doorbell, an antique telephone, an Arduino microcontroller, and a Subscriber Line Interface Circuit (SLIC). While reading schematics is required, soldering skills are optional. The guide covers phone restoration, custom transmitter creation, receiver modification, SLIC functionality, and Arduino programming, appealing to those who enjoy repurposing antiques or customizing home electronics.
Parts used in the Antique Phone Doorbell:
- Battery-operated doorbell
- Antique phone (1940s Swedish-made Ericsson bakelite)
- Arduino microcontroller
- Subscriber line interface circuit (SLIC)
Bryan Zimmer emailed us this fantastic retro-themed DIY hack, a most timely submission as we just revisited the noir art deco-science fiction classic Dark City and we think this would have perfectly fit in the world (or in Adama’s quarters on BSG). Bryan gives step-by-step instructions of how he converted a 1940’s Swedish-made Ericsson bakelite original into a wireless doorbell…
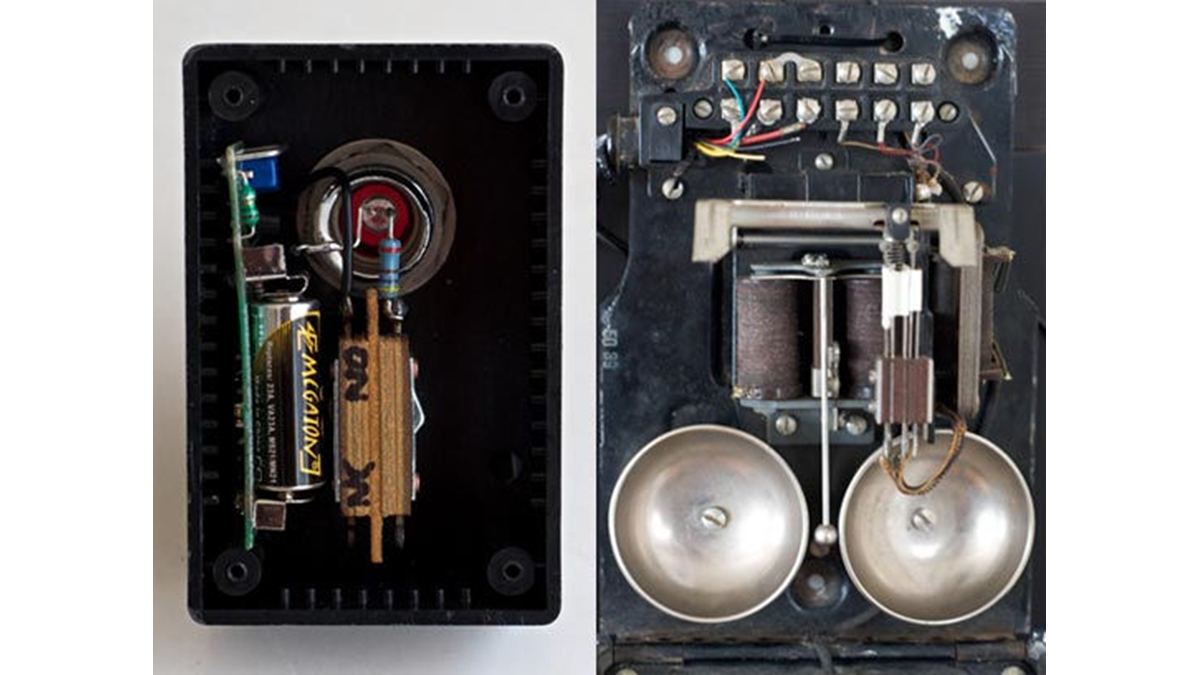
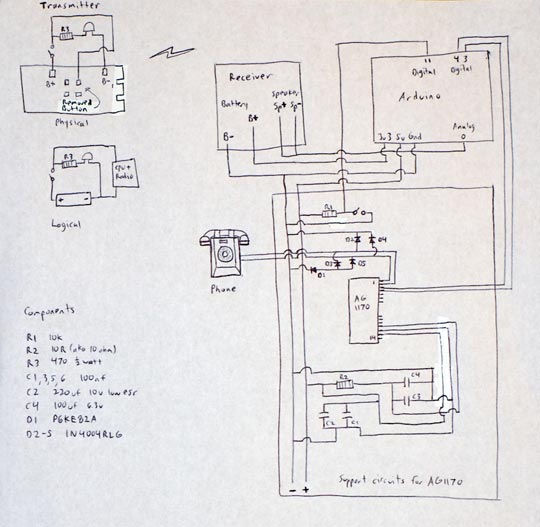
This project combines a battery-operated doorbell, antique phone, Arduino, and subscriber line interface circuit (SLIC) to make a wireless doorbell. Readers are taken through basic phone restoration, creation of a custom doorbell button transmitter, modification of the receiver, workings of the SLIC, and description of the Arduino code. Readers must know how to read a schematic, but soldering and other electronics knowledge are optional. This project will be of interest to those who like to customize their home or office, people who like to repurpose antiques, and those who have been wondering how to ring a phone with an Arduino or other microcontroller.
I’m a sucker for cool looking antiques that are functional and still useful, so I was intrigued. Companies don’t put the same aesthetic design effort or build quality into their products these days, which is part of the reason why I like antiques. And who doesn’t like that hearty, crisp, old-timey sound of an actual bell ringing in a phone? Not this red blooded American, I’ll tell you that. I was just about to buy it when I saw the price. $395! Highway robbery!
Being the Do It Yourselfer and cheap bastard that I am, I headed to eBay to find one I could restore myself. Lucky for me someone was selling one and I picked it up for $10. I’ve only seen one other on eBay in the year since then, at it went for a lot more. I’ve seen websites that deal in antiques with a few for sale, typically for over $150. Suckers.
For more detail: DIY Antique Phone Doorbell using Arduino
- What components are combined to create this wireless doorbell?
The project combines a battery-operated doorbell, an antique phone, an Arduino, and a subscriber line interface circuit. - How much did the author pay for the original phone on eBay?
The author purchased the phone for $10. - Does this project require soldering skills?
Soldering and other electronics knowledge are optional for this project. - What skill is required to follow these instructions?
Readers must know how to read a schematic. - Can this project be used by people who like to repurpose antiques?
Yes, this project is of interest to people who like to repurpose antiques. - What does the article describe regarding the Arduino?
The article describes the workings of the SLIC and the description of the Arduino code. - Is this project suitable for customizing home or office spaces?
Yes, it will be of interest to those who like to customize their home or office. - How rare were similar phones found on eBay according to the text?
The author had only seen one other phone on eBay in the year since then.
