
Summary of DISPLAY CUSTOM BITMAP GRAPHICS ON AN ARDUINO TOUCH SCREEN AND OTHER ARDUINO COMPATIBLE DISPLAYS
This tutorial explains how to display custom bitmap graphics, such as logos or task-related images, on Arduino-compatible LCD displays to enhance user experience. It details the process using Adafruit's GFX and TFTLCD libraries, specifically demonstrating with a 2.8″ ILI9325 TFT Display showing a car image. The guide confirms compatibility with various color OLED and TFT screens commonly used in projects.
Parts used in the Custom Bitmap Graphics Project:
- Color OLED
- 1.44″ TFT
- 1.8″ TFT ST7735
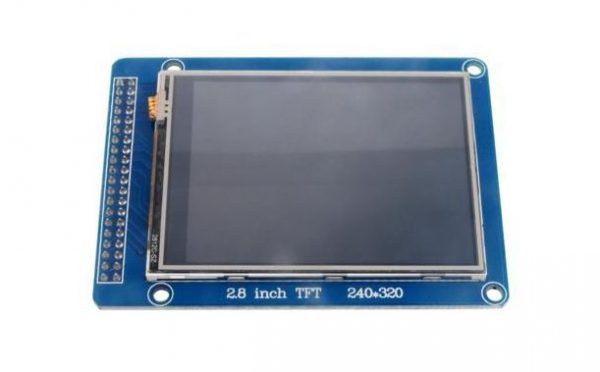
- 2.8″ Touch Screen
- 3.5″ Color TFT
- Arduino Uno
- Adafruit GFX library
- TFTLCD library from Adafruit
Displaying a custom image or graphic on a LCD display is a very useful task as displays are now a premium way of providing feedback to users on any project. With this functionality, we can build projects that display our own logo, or display images that help users better understand a particular task the project is performing, providing an all-round improved User Experience (UX) for your Arduino or ESP8266 based project. Today’s tutorial will focus on how you can display graphics on most Arduino compatible displays.
The procedure described in this tutorial works with all color displays supported by Adafruit’s GFX library and also works for displays supported by the TFTLCD library from Adafruit with little modification. Some of the displays on which this procedure works include:
- 0.95″ Color SSD1331 OLED display
- 1.44″ ILI9163C TFT Display
- 1.8” ST7735 color TFT display
- 2.8” ILI9325 Color Touch Screen
- 3.5” ILI9481 Color TFT display
While these are the displays we have, and on which this tutorial was tested, we are confident it will work perfectly fine with most of the other Arduino compatible displays.
For each of the displays mentioned above, we have covered in past how to program and connect them to Arduino. You should check those tutorials, as they will give you the necessary background knowledge on how each of these displays works.
For this tutorial, we will use the 2.8″ ILI9325 TFT Display which offers a resolution of 320 x 340 pixels and we will display a bitmap image of a car.
REQUIRED COMPONENTS
To demonstrate how this works with different displays, you can use some of the most popular displays:
As usual, each of the components listed above can be bought from the links attached to them. While having all of the displays listed above may be useful, you can use just one of them for this tutorial.
Read more: DISPLAY CUSTOM BITMAP GRAPHICS ON AN ARDUINO TOUCH SCREEN AND OTHER ARDUINO COMPATIBLE DISPLAYS
-
What is the main purpose of displaying custom graphics on an LCD?
To provide feedback to users, display logos, or show images that help users better understand a task, improving User Experience. -
Which libraries are required for this procedure?
The procedure works with Adafruit's GFX library and the TFTLCD library from Adafruit. -
Can this method work with displays other than those tested?
Yes, it is confident that it will work perfectly fine with most other Arduino compatible displays. -
Which specific display was used for the demonstration in this tutorial?
A 2.8″ ILI9325 TFT Display with a resolution of 320 x 340 pixels was used. -
What type of image was displayed during the demonstration?
A bitmap image of a car was displayed on the screen. -
Do I need all the listed displays to complete this project?
No, while having all displays is useful, you can use just one of them for this tutorial. -
Is background knowledge on connecting displays necessary before starting?
Yes, you should check past tutorials to gain the necessary background knowledge on how each display works. -
Does the procedure require modification for different Adafruit supported displays?
The procedure works with little modification for displays supported by the TFTLCD library.
