Your last two Arduino projects of the semester will deal with infrared communications. This lab will prepare you for those projects. In this lab, you will:
- build a circuit and code for sending infrared light,
- build a circuit and code for detecting infrared light, and
- work with a partner to experiment with IR communications.
This lab is self-paced, but your instructor will be happy to help you with any questions you have as you complete the lab.
When you finish this lab, have the TA check your work and mark the roll sheet (to get credit).
Safety:
At the beginning of every hardware lab, please review the safety precautions from lab #2. Remember, please think carefully about your actions.
Find a partner
Students should again work in pairs for this lab and the next two assignments. You may choose any partner for lab, and you can switch later. For the Arduino project assignments, once you choose a partner, you will not be allowed to switch. I recommend choosing a partner whose understanding of the material is equivalent to your own. (Don’t let your partner do all the work.)
Partners on the last two Arduino projects will have to follow the pair programming rules.
Both partners should wire up their boards during this lab.
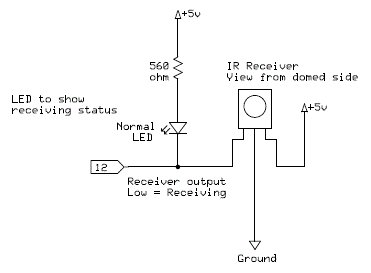
Lab schematic
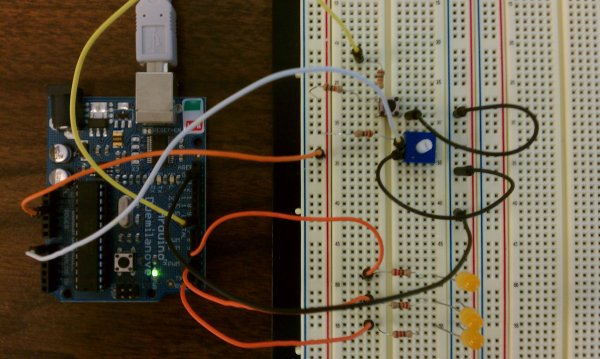
Here is the schematic for today’s lab. You may also see my completed Arduino circuit by clicking on this picture.
Step 1: Get the parts you need
Come up to the front and check out an IR LED (for creating infrared light) and an IR receiver (for detecting IR light). Your TA will mark a list when you pick up the parts. These parts are yours to keep. There are a few things you should note about the parts:
- The IR detector only detects infrared light modulated at 38 kHz. An infrared light source has to be toggled on and off approximately 38,000 times a second or it will be ignored by this detector. This allows the detector to ignore IR signals that are not intentionally sent.
The detector outputs a low signal on its output pin when it detects 38 kHz infrared light.
-
The maximum detection signal length is about 1/2 second. If the detector continues to see a signal after 1/2 second, the detector stops outputting a low signal. This shouldn’t be a problem for us, our signals will all be very short.
For full details, see this datasheet.
- The IR LED is just like any other LED, except that it outputs infrared light. You will not see any light coming from this LED when it is working. The light that it outputs is not modulated – it is just on, or off, based on how you use it.
In my code below, I set up a PWM timer to control output pin 11 on the Arduino board, and then I connected an IR LED to this pin. I set the timer controls to turn the LED on and off 38,000 times each second, thus producing the modulated light that the detector can detect.
Once you have a bit of simple code in place, you can easily send and detect infrared signals using these parts.
For more detail: CS 2000 – Program Design in C