Hello makers!!
For those who already know my Instructable “Space Mouse”
https://www.instructables.com/Space-Mouse-With-Ard…
there is now an extension for it!
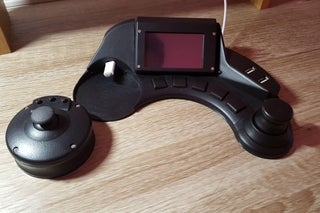
The Creative Console!!
I designed this console to extend the functionalities of the space mouse keeping the prime concept: keep it cheap, customizable and 3D printable!
This project has been challenging, but after all that is the spirit of DIY, isn’t it?
Things to keep in mind before you start:
– you need to know AT LEAST the basics of Arduino
– tollerances on the design are tight, make sure you use a good filament and good settings
– the zip file has everything you need to replicate this project, but keep in mind some pieces might differ a bit in dimension (rotary encoder for example)
– the arduino sketch include a complete set up for Photoshop, but you need to insert the commands for the other softwares according to your needs. Just copy the Photoshop section of the code and modify the keys
– you can use the console with or without the space mouse, I made them totally independent
FILES DOWNLOAD LINK
https://drive.google.com/file/d/1ySL3jQRRBykw5Wbpt…
Supplies
- 3D printer
- Arduino Leonardo, Micro or alternative 32U4 processorhttps://www.ebay.co.uk/itm/Arduino-LEONARDO-R3-Com…
- M2 brass threaded insertshttps://www.ebay.co.uk/itm/THREADED-BRASS-INSERTS-…
- M2 bolts
https://www.ebay.co.uk/itm/1080pc-Assorted-M2-M3-M…
- USB hub
https://www.ebay.co.uk/itm/HIGH-SPEED-4-PORT-USB-H… - USB-micro cables (with data transfer, not only power. I used samsung cables)
- Arduino encoder
https://www.ebay.co.uk/itm/Rotary-Encoder-Module-B… - Nextion screen (3.2 version)
https://www.amazon.co.uk/MakerHawk-Nextion-NX4024K… - Micro SD card (only to upload files)
- X5 tactile switches 6x6x7 size
https://www.ebay.co.uk/itm/Tactile-Switch-PCB-Roun… - X5 10K resistors (optional)
- X1 prototyping board (optional)
- Some wires
- Soldering Iron
- Side cutters
- Paint and brush (if you want a nice finish)
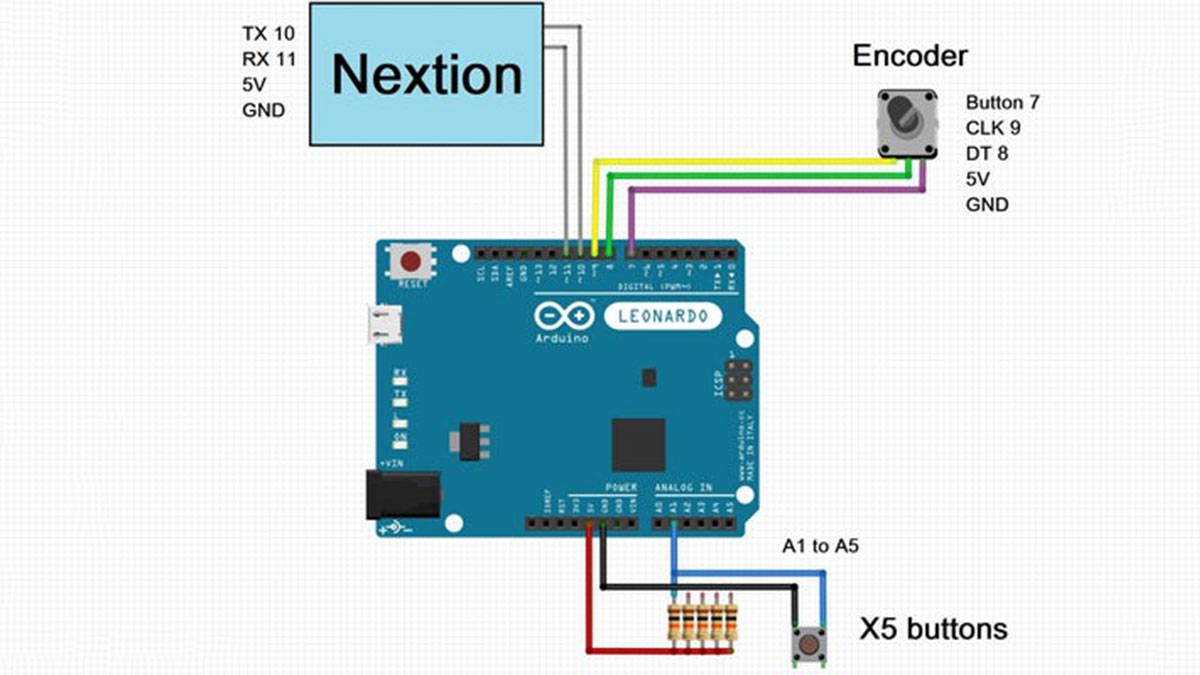
Step 1: Get Your Nextion Screen and Arduino Ready
While your printer is running at full capacity, you will have some time to prepare the Arduino and the screen.
When you compile the Arduino code, make sure you selected the right board (Arduino Leonardo, Micro or a compatible 32U4 one) or you will get errors.
You can avoid the resistors if you use INPUT_PULLUP (make sure you modify the code).
You can also modify the code of the Space Mouse to select a software using the three buttons when you plug it in. For example, I use B1 for Inventor, B2 for Photoshop, B3 for ZBrush and B4 for Blender.
Upload the sketch.
To prepare the screen, you will need only need to open the HMI project file in the Nextion Editor
You can download it for free and get all the info on the website.
Once the project is open in the editor you can modify it or leave it as it is.
To upload the interface, click File -> TFT file output and save it on the micro SD card.
Stick it into the screen and turn it on.
Once the upload has been completed, the screen is ready.
Step 2: Place the Threaded Inserts

Using the soldering iron, maybe with an old tip, heat up the brass inserts and place them into the holes.
Be careful or you will melt the PLA all the way through.
Step 3: USB Wiring
To have only one USB cable to access all functions I used a USB hub.
This way I can have Space Mouse, Console and 2 extra ports in one. It also helps if, like me, your laptop only has one USB port.
With Photoshop for example I can connect a mouse and a grafic tablet with one cable only.
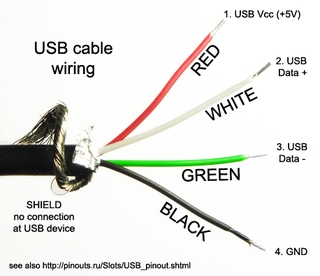
To do this, I desoldered two of the USB sockets on the hub and connected two micro USB cable.
USB is a standard and your cables should always have the same colours.
Step 4: Buttons, Screen and Encoder Wiring
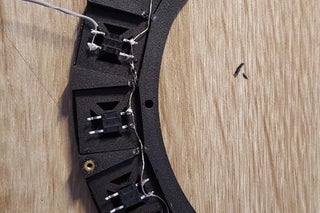
Follow the schematic from Step 1 to wire up all the components.
Step 5: Final Assemble and Test
Once you have all your components wired up, you can place and bolt all parts together.
Be careful not to tighten up the bolts too much or you will make the M2 inserts loose.
Connect the cable, connect the Space Mouse and you are ready to go!
Step 6: Conclusion

Now you are all set and ready to create!
Design, paint or animate at full capacity will not cost you a fortune with the Creative Console!
Happy making!
Source: Creative Console for Space Mouse!