Well, hello there! My name is Manou and this is my very first instructable. This instructable is all about making a mechanic arm with an arduino genuino uno! This all started with this basic idea: I wanted to make a robot that made art and during a conversation with a student, I figured it would be fun to make an arm that would make a tablecloth dirty.
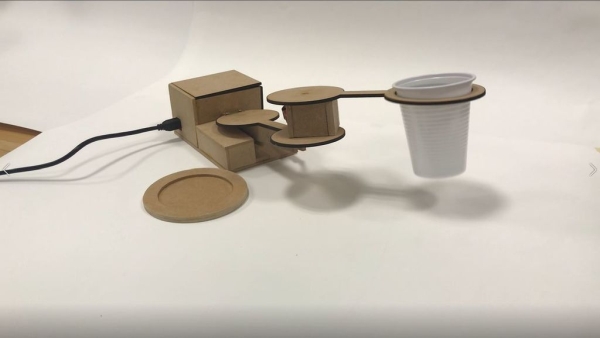
So basically what this project does is, turning an arm at random positions and back to a start point, while holding a cup or something else and tilting it up and down when arrived at a position. The coffee art is made with: a little bowl underneath the starting point where the cup dips itself back and forth.
This project is for you if you are new to arduino and if you want to improve your skills in coding and making something, but also for those who are already a pro, because you can give this project greater heights.
Step 1: What You Need
What you need:
– 1x Arduino genuino uno (https://www.floris.cc/shop/en/search?controller=se…),
– arduino.exe programme (download for free: https://www.arduino.cc/en/main/software)
– 3x servo motors (I used TG9e, you can use others aswell even bigger ones or continuous ones, but these are not covered in my code)
– 11x pinwires (but probably more, wires are fragile!)
– printboard
– MDF 4mm thick wood plate (let’s say 1×1 meter)
– woodglue
– contactglue
– grimlets(different sizes, 4mm 10mm drills are examples)
– woodsaw
– fretsaw
– soldering iron
– 4x cross-screws
– cross screwdriver
– 1x hinge
– wood file
– sanding paper
Finishing touches:
– cup (or more if you want to participate with the robot)
– multiple bowls (for different colors)
– old white tablecloth or A3/A2 paper
– coffee
– different thee flavors (because of the colors)
Step 2: Downloading Arduino
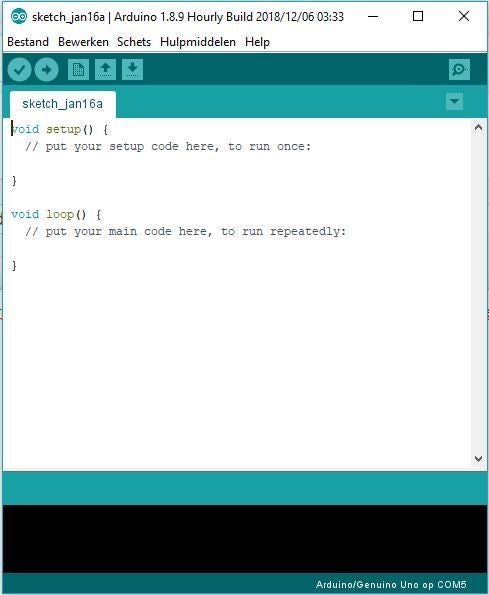
When downloaded arduino.exe on your computer, you can open it up in the file where you saved it and get the following screen.
Delete the excisting code and copy the following code:
The code includes some explaining what it does, if it doesn’t work click on the added file with my code.
// Ensures that the servo function can be used and is imported in the project.
#include <Servo.h>
// Variables to distinguish the different servo’s.
Servo servo;
Servo servo2;
Servo servo3;
// Here is determined which servo is attached to which pin and if they start with a value. in this case it is 0.
void setup() {
Serial.begin(9600);
servo.attach(8);
servo2.attach(9);
servo3.attach(10);
servo.write(0);
servo2.write(0);
servo3.write(0);
}
void loop() {
// Constant variables for the turning of the servo and to place them in random positions in his range(Where the arm can reach).
const int angleIncrement = 1;
const int incrementDelay = 10;
const int randomStop = random(20, 135);
// Angle starts at zero. if the angle is smaller then random movement, the servo wil turn because of adding up the angleIncrement with a small delay (incrementdelay).
for(int angle = 0; angle < randomStop; angle += angleIncrement) {
// slow movement forward.
servo.write(angle);
servo2.write(angle);
delay(incrementDelay);
}
// Ensures a delay, so a transition from left-right to up-down happens flexible and in the right way.
delay (1000);
// Ensures that servo3 moves downwards with a delay.
for (int goingDown = 0; goingDown < 60; goingDown ++) {
servo3.write(goingDown);
delay(incrementDelay);
}
// Ensures that servo3 moves upwards with a delay.
for (int goingUp = 60; goingUp > 0; goingUp –) {
servo3.write(goingUp);
delay(incrementDelay);
}
// Angle starts at randomStop. If the angle is bigger then zero, the angle will move back because of subtracting angleIncrement with a small delay(incrementdelay).
for (int angle = randomStop; angle > 0; angle -= angleIncrement) {
//slow movement backwards
servo.write(angle);
servo2.write(angle);
delay(incrementDelay);
}
// Ensures a delay, so a transition from left-right to up-down happens flexible and in the right way.
delay (1000);
// Ensures that servo3 moves downwards with a delay.
for (int goingDown = 0; goingDown < 60; goingDown ++) {
servo3.write(goingDown);
delay(incrementDelay);
}
// Ensures that servo3 moves upwards with a delay.
for (int goingUp = 60; goingUp > 0; goingUp –) {
servo3.write(goingUp);
delay(incrementDelay);
}
}
Step 3: Putting It Together
Alright now that the code works: you can save it with the check mark in the above left corner and upload it to your arduino with the arrow button next to it.
Next we will make the installation.
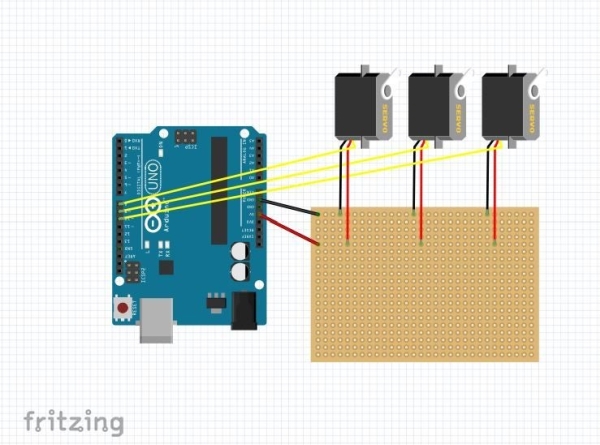
In my picture I used a lot of wires, but it is possible in less, look at my schematic and then solder it together.
The only thing left to do is put the USB2.0 cable in the arduino and in your laptop, powerbank or even use a battery (with the other port).
Right now the project works only thing left to do is make something around it.
Step 4: A Home for Arduino
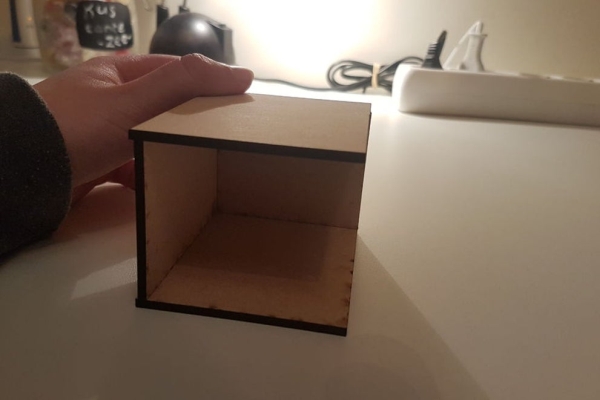
Okay! in this step we are making a shelter for your arduino, printplate and the wires. I used a laser cutter to make perfect rectangles, but you can to this easily with a saw!
Just draw and measure the wood and saw it.
I made mine:
height is 6,5
width is 7cm
length is 9cm
Make sure that the side for the arduino kabel has a hole and that the side where the servo wires need to go in have a hol aswell. I made the holes 1cm and 1 on each corner (the side that is 9cm and 6,5cm).
Put the box together with contactglue, make sure the top is not glued yet!
Step 5: Making the Arms
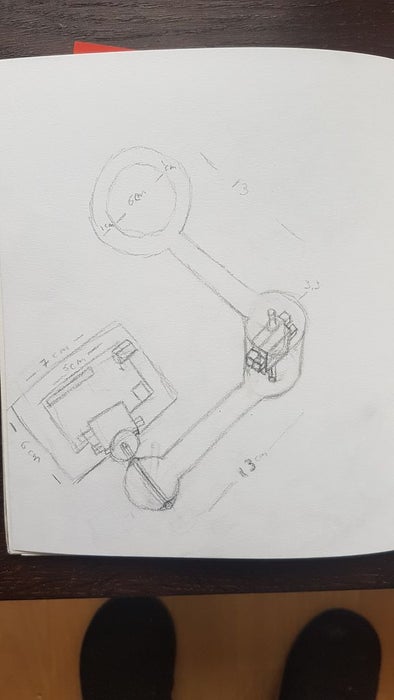
Next up we are making the arms. again I made mine with a lasercutter, but a saw and fretsaw will do a wonderfull job too! My arms are in total 16cm long and the diameter of each circle is 6 to 7cm with a small hole of 5mm, look at the top of your servo’s it can differ!
I also made 2 bars at the bottom of the arm and a little plank in between with woodglue.
Then you can put your two 180 degree servo’s together, one needs to be upside down and the other upright together with both of the wires on the same side. Now we are going to make a little box around them with wood and woodglue. Again make sure that the side with wires has big enough holes. Then contactglue the servo’s on the arms. (make sure the right servo is attached to the arm).
Source: Coffee-Art Project
