WARNING: THE FOLLOWING PROJECT USES LASERS. PLEASE CHECK YOUR LOCAL AREA RULES ABOUT LASER USAGE.
PLEASE BE CAREFUL AS HIGH POWERED LASERS CAN ALSO DAMAGE YOUR EYES.
I CANNOT BE HELD RESPONSIBLE FOR ANY CONSEQUENCES OF USE.
Given the opportunity to use one of the Intel Galileo boards, we wanted to build something that would honour Galileo’s memory and pay tribute to his discoveries. What better way than to do something related to his primary focus – astronomy.
Being an avid astronomer, and loving being able to look up into the night sky and know what star or planet I’m looking at, I thought a cheap, accurate laser pointer would be perfect.
With the right idea in mind, and three weeks in which to do it, my partner and I set off coding and building.
Step 1: BOM
This is what we needed (software side included) to build our model:
TOOLS:
• Soldering iron
• Hot glue gun
• Drill and appropriate bits
• Saw
• Pencil
PARTS:
• Intel Galileo (Any micro will work – you just need serial communications and 4 output pins)
• 2 x Stepper Motors (we used Nema 17s)
• 2 x Stepper motor controllers (we used Easy Driver v4.4)
• Veroboard/Breadboard
• Some headers to mount the motor controllers
• Wires for connecting
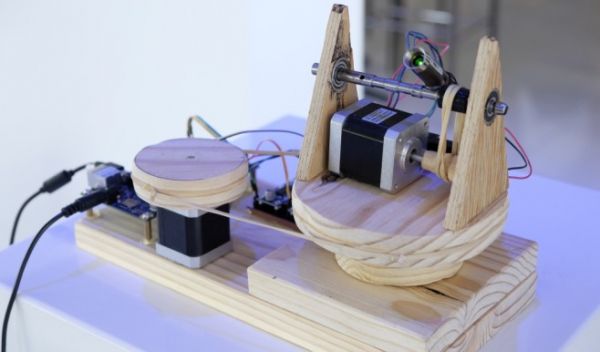
• Ball bearings (we used parts from an old printer and harddrive – see pictures)
• Elastic bands
• Solder
• Laser pointer (please be careful with this)
• AA battery pack(or anything that can provide a steady 3V – NOT the arduino)
• Wood
SOFTWARE:
• Arduino IDE
• Python 3.3
• PySerial
• PyEphem
• Stellarium
Step 2: Create the circuit board
You can use a breadboard, veroboard, or even print a PCB if you have the time and resources. The circuit diagram is below.
- Connect MS1, MS2 and the GROUND (next to step) on both boards to GROUND on the ARDUINO.
- Connect M+ and GND (on the PWR IN) on both boards to the 12V power supply for the motor.
- Connect DIR on easyDriver 1 to Arduino pin 4.
- Connect STEP on easyDriver 1 to Arduino pin 5.
- Connect DIR on easyDriver 2 to Arduino pin 6.
- Connect STEP on easyDriver 2 to Arduino pin 7.
- Connect each motor to its own easyDriver, paying attention to which coil is which.
For More Detail : Build An Open Astronomy Learning Tool With Arduino