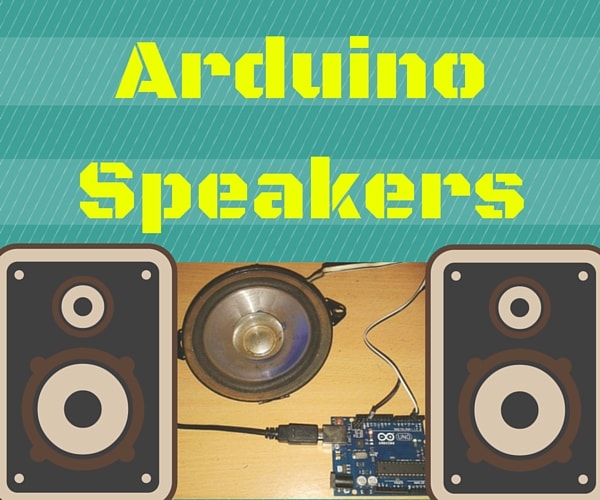
Summary of How to Build an Arduino Speaker That Plays Music in Minutes
This tutorial explains how to build a simple Arduino speaker project that plays music by generating tones of varying frequencies and rhythms. It requires minimal components and uses the `tone()` function with a note table from `pitches.h` to create melodies, similar to old Nokia ringtone programming. Users can easily modify the code to play different songs.
Parts used in the Arduino Speaker Music Project:
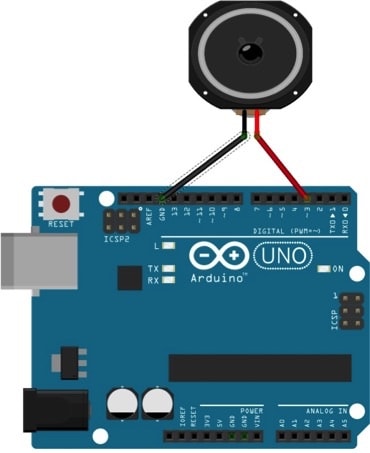
- An Arduino
- A speaker or a piezo buzzer
- 2 connecting wires
The main thing which makes this project super simple is that this project requires only one extra component. If you are new to Arduino, this tutorial will help you get familiar with Arduino and learn the basics of Arduino programming. This musical project has a speaker which plays out a song. If you ever want to add some sound to your existing project, you can do it easily with this Arduino speaker tutorial. You can even make a musical car reverse horn and make it play songs. You can change it easily by uploading a new program.
If you still remember how you made ringtones on those old Nokia cell phones, you pretty much have all the knowledge required to make any song with this project. Let’s get started.
Required Materials
- An Arduino
- A speaker or a piezo buzzer
- 2 connecting wires
How Does it Work?
The Arduino in this circuit creates tones of different frequencies and plays it through the speaker connected to it. The variation of the frequency of the tone(a.k.a. pitch) with correct timings(a.k.a. rhythm) creates music. The Arduino generates a signal and outputs it through the Digital pin 3. This drives the speaker connected to the pin to create sound. This can be used to play different songs by modifying this program. In this tutorial, I have programmed the Arduino speaker to play a song from the Malayalam movie ‘Ennu Ninte Moideen’.
tone()
The program creates tones with a function, ‘tone( )’. It generates a square wave of the specified frequency (and 50% duty cycle) on a pin. A duration can be specified for this. Otherwise, the wave continues until a call to noTone(). The Arduino pin can be connected to a piezo buzzer or other speakers to play the tones.
Syntax:
tone(pin, frequency)
tone(pin, frequency, duration)
Parameters
pin: the pin on which to generate the tone
frequency: the frequency of the tone in hertz – unsigned int
duration: the duration of the tone in milliseconds (optional) – unsigned long
The code below uses an extra file, pitches.h. This file contains all the pitch values for typical notes. For example, NOTE_C4 is middle C. NOTE_FS4 is F sharp, and so forth. So instead of writing the frequency in the tone( ) function, we’ll just have to write the name of the note. This note table was originally written by Brett Hagman, on whose work the tone() command was based. You may find it useful whenever you want to make musical notes for your Arduino speaker.
How I made melody[ ] and noteDurations[ ] of this song:
If you take a look at the program, you can find two int arrays: melody[ ] and noteDurations[ ]. It is similar to how ringtones were written in old Nokia cell phones. The first array contains the notes and the second array contains its corresponding durations.
I found out the notes of this song with my guitar. I wrote down the musical notes of this song first and then wrote the melody[ ] array with that.
Then I wrote noteDurations[ ] according to the length of each music note. Here 8 = quarter note, 4 = 8th note, etc. Higher value gives longer duration notes. The note and its corresponding duration is what is there in melody[ ] and noteDurations[ ] respectively. You can modify those and create any song according to your wish!
Read More: How to Build an Arduino Speaker That Plays Music in Minutes!
- How does the Arduino generate music?
The Arduino creates tones of different frequencies and plays them through a speaker, where frequency variation creates pitch and correct timings create rhythm. - What function is used to create tones?
The program uses the tone() function to generate a square wave of a specified frequency on a pin. - Which pin is used for the output signal?
The Arduino generates a signal and outputs it through Digital pin 3 to drive the speaker. - Can I change the song being played?
Yes, you can easily change the song by uploading a new program or modifying the melody and noteDurations arrays. - What is the purpose of the pitches.h file?
This file contains all the pitch values for typical notes, allowing users to write note names instead of specific frequencies. - How are note durations represented in the code?
Durations are stored in an array where numbers like 8 represent quarter notes and 4 represent eighth notes. - Does the tone continue indefinitely?
The wave continues until a call to noTone() is made if a duration is not specified. - Is this project suitable for beginners?
Yes, this tutorial helps those new to Arduino get familiar with the basics and learn Arduino programming.