Summary of Blink Arduino Sketch
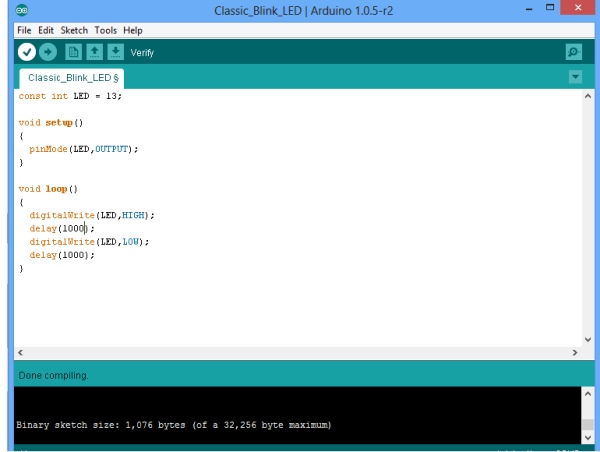
This article presents the standard Arduino "Blink" sketch, a foundational example that toggles an on-board LED connected to digital pin 13. The code initializes the pin as an output in the setup phase and then enters a continuous loop where it turns the LED on for one second and off for another second repeatedly.
Parts used in the Blink Project:
- Arduino board (Uno or Leonardo)
- On-board LED
- Digital pin 13
This is a standard Arduino example sketch, copied here for reference.
Full Source Code
The full code is all in one file Blink.ino.
/*
  Blink
  Turns on an LED on for one second, then off for one second, repeatedly.

  Most Arduinos have an on-board LED you can control. On the Uno and
  Leonardo, it is attached to digital pin 13. If you're unsure what
  pin the on-board LED is connected to on your Arduino model, check
  the documentation at http://www.arduino.cc

  This example code is in the public domain.

  modified 8 May 2014
  by Scott Fitzgerald
 */


// the setup function runs once when you press reset or power the board
void setup() {
  // initialize digital pin 13 as an output.
  pinMode(13, OUTPUT);
}

// the loop function runs over and over again forever
void loop() {
  digitalWrite(13, HIGH);   // turn the LED on (HIGH is the voltage level)
  delay(1000);              // wait for a second
  digitalWrite(13, LOW);    // turn the LED off by making the voltage LOW
  delay(1000);              // wait for a second
}
Source: Blink Arduino Sketch
- Which pin controls the on-board LED on most Arduinos?
The on-board LED is attached to digital pin 13. - How long does the LED stay on in this sketch?
The LED stays on for one second before turning off. - What function runs once when the board is reset?
The setup function runs once when you press reset or power the board. - How is the voltage level set to turn the LED on?
The voltage level is set to HIGH to turn the LED on. - What happens if I am unsure which pin the LED is connected to?
You should check the documentation at http://www.arduino.cc. - Does the loop function run only once?
No, the loop function runs over and over again forever.