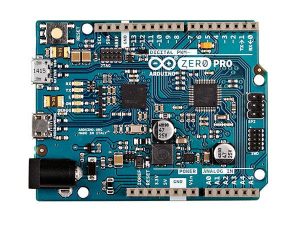
Run a powerful open source Operating System on Arduino Zero to blink an LED on the board and open up a whole world of control capabilities!
- Version: Version: 0.9.0 (latest)
We decided to write an open-source, hardware-agnostic OS for commercial IoT devices that provided low level configuration options to deal with power, memory, and performance constraints across various types of micro-controllers and allow remote device management – all in an easy and scalable way. We also wanted to offer the world’s first open-source Bluetooth Low Energy (BLE) stack! So we wrote the Apache Mynewt OS and included BLE as the first connectivity stack option in it. Others (e.g. WiFi) will follow soon.
We designed the OS to be highly modular where components could be mixed and matched to optimally meet a device vendor’s project requirements. That meant we needed a smart package dependency and build management tool that enables the user to compose images easily and efficiently from only the required utility, networking, and application packages for the chosen hardware target. Hence the birth of the Newt tool which brings some of the ease-of-use of an NPM-like (Node Package Manager) or GPM-like (Go Package Manager) to embedded systems development.
Blinky is the first step in the world of Apache Mynewt. It shows how easy it is to use the Newt tool to build an Apache Mynewt OS image and make an LED blink.
Blinky, your “Hello World!”, on Arduino Zero
Learn how to use packages from a default application repository of Mynewt to build your first Hello World application (Blinky) on a target board. Once built using the newt tool, this application will blink the LED lights on the target board.
This tutorial describes how to run Apache Mynewt OS on Arduino Zero. Follow these simple steps and your board will be blinking in no time!
Prerequisites
Before tackling this tutorial, it’s best to read about Apache Mynewt in the Introduction section of this documentation.
Equipment
You will need the following equipment
- An Arduino Zero board. NOTE: There are many flavors of Arduino. Ensure that you have an Arduino Zero. See below for the versions of Arduino Zero that are compatible with this tutorial
- A computer that can connect to the Arduino Zero over USB
- A USB cable (Type A to micro B) that can connect the computer to the Arduino
- The Apache Mynewt Release
This tutorial has been tested on the following three Arduino Zero boards – Zero, M0 Pro, and Zero-Pro.
Apache Mynewt has not been tested on Arduino M0 which has no internal debugger support.
Install Mynewt and Newt
- If you have not already done so, install Newt as shown in the Newt install tutorial
- If you have not already done so, create a project as shown in the Quick Start guide on how to Create Your First Project. Skip the testing and building the project steps in that tutorial since you will be defining a target for your Arduino board in this tutorial.
Fetch External Packages
Mynewt uses source code provided directly from the chip manufacturer for low level operations. Sometimes this code is licensed only for the specific manufacturer of the chipset and cannot live in the Apache Mynewt repository. That happens to be the case for the Arduino Zero board which uses Atmel SAMD21. Runtime’s github repository hosts such external third-party packages and the Newt tool can fetch them.
To fetch the package with MCU support for Atmel SAMD21 for Arduino Zero from the Runtime git repository, you need to add the repository to the project.yml file in your base project directory.
Here is an example project.yml file with the Arduino Zero repository added. The sections with mynewt_arduino_zero that need to be added to your project file are highlighted.
$ more project.yml
project.name: "my_project"
project.repositories:
 - apache-mynewt-core
 - mynewt_arduino_zero
repository.apache-mynewt-core:
 type: github
 vers: 0-latest
 user: apache
 repo: incubator-mynewt-core
repository.mynewt_arduino_zero:
 type: github
 vers: 0-latest
 user: runtimeinc
 repo: mynewt_arduino_zero
$
Once you’ve edited your project.yml file, the next step is to install the project dependencies, this can be done with the newt install command (to see more output, provide the -v verbose option.):
Read more: Blink An LED On Arduino Zero

