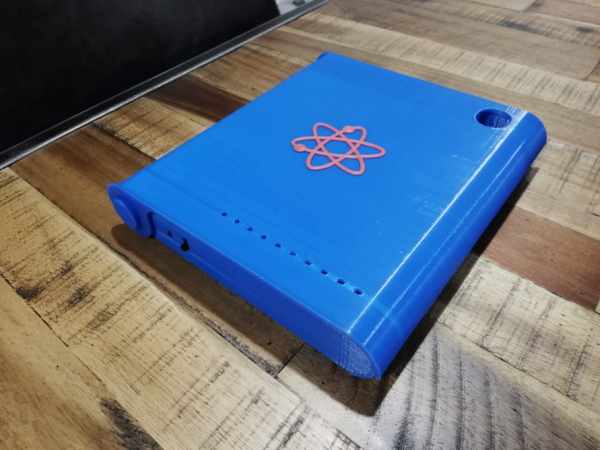
This neat little gadget has a fingerprint sensor so you can secure your cool stuff in a personalised portable case. I use to hold a diary and pen and designs for my new projects. Features a 3d printed case and uses an Arduino nano. Great gift idea.
Step 1: Gather Materials
FPM10A Fingerprint Reader Sensor Module
PCB Mount Tactile Switch Round
Small SPDT Switch ON-Off Miniature Slide Toggle Switch
USB Rechargeable Powerbank 2200ma
Infra Red LED Transmitter GL480
Infra Red Phototransistor PT481F
1k & 2k2 Resistor
Heatshrink
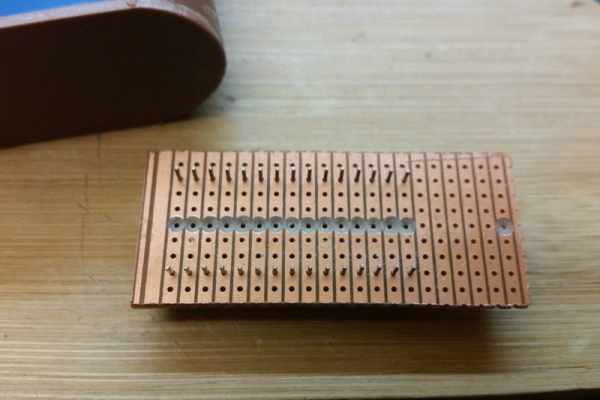
Vero Board
Hookup wire
Epoxy Glue
Hot Glue
Step 2: 3D Print the Case
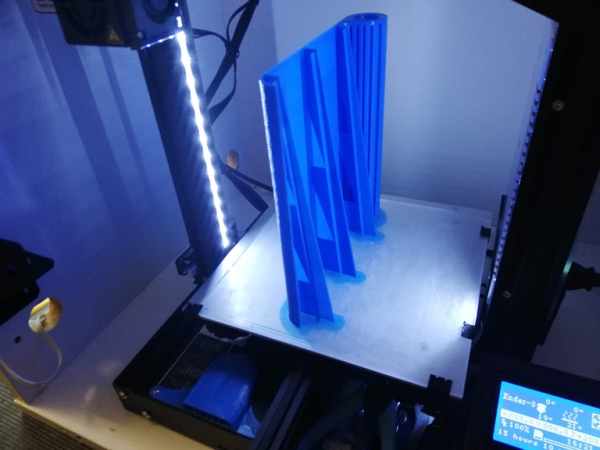
The case was printed on a Creality Ender 3 Printer using three separate prints.
- Base Unit
- Lid
- Internal case components
The print files and instructions for printing can be found here on Thingiverse.
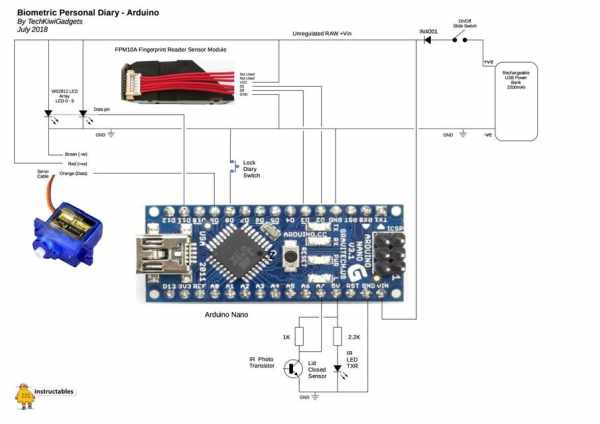
Step 3: Build and Test the Circuit
Step 4: Assemble the Circuit and Base Mechanism
Arduino Nano
Mount the Arduino Nano on a piece of Vero Board cut to size to fit into the base cavity as per the photos. Follow the circuit diagram and photographs to add the resister and power connections using hookup wire.
Finger Print Sensor
Using hookup wire and heat shrink carefully solder additional extension wires on the Finger Print Sensor to ensure the wires can reach the Arduino. Lay the wiring through the base holes neatly as per the photos. Position the Finger Print Sensor in the base unit as per the photos provided.
Infra Red Sensor
Follow the circuit to connect the IR Sensor and LED and ix them into the 3D printed LED sensor mount provided using hot glue. Route the wires to the Arduino to ensure they fit neatly into the base unit and can reach the Arduino. Check that the gap between the Infra Red LED and Sensor will fit the closed door tab provided in the 3D print as per the photos. This is used to break the beam when the Diary door is closed.
Servo Unit
Mount the Servo in the Servo Mount Bracket provided in the 3d Print. Carefully lay the cables inside the base so they can reach the Arduino. Using a paperclip attach the Servo Arm to the lock mechanism and position it in the base unit. Leave the Servo sitting in position so it can be aligned and fixed when final testing and assembly occurs.
Rechargeable Power Bank
Ensure the Powerbank you use will fit into the space provided and also enable access to the USB charging port of the Powerbank. Align the USB port to the front of the case and use a drill to create a suitable hole for charging purposes (See photo)
Switches
Connect the power and push button switches to hookup wire and use epoxy glue to fasten these into the holes provided in the base unit.
Ensure the Arduino board and cables will fit into the cavity by neatly routing wires and trimming lengths before soldering onto the Vero Board.
Testing the unit
Power on the unit using the switch and test the basic operation of the unit.
Step 5: Putting It All Together

Once the unit is tested the final adjustments need to made to ensure smooth operation. Attach the lid to the base unit and check the door opens and closes freely.
Servo Lock Mechanism Alignment
Observe the position of the Servo in the video clip for the closure and opening of the door mechanism. Assemble the door mechanism and adjust the servo arm to ensure the door lock mechanism is not engaged. Place the door lock tab into the base unit to test the alignment of the locking mechanism. Power on the unit and test that the Door Mechanism engages correctly and travels freely. The sensor unit has a guide that assists with ensuring the door lock mechanism does not jam. Once correct then hot glue the Servo and Sensor unit in place.
Mount the Door Lock and Door Closed Tabs
WIth the wiring neatly tucked away place the L shaped cover in place to obscure the Nano, Servo, and wiring. Once satisfied put the Door Lock Tab and the Door Closure Tab into the base unit holes and check the lock mechanism works to open and close.
When aligned and tested put epoxy glue onto the tabs and then gently close the lid and leave for a few hours to dry. Finally test the operation of the unit before adding your Diary, Pen and other items you want secure from prying little fingers and hands.
I hope you enjoy the construction and use of this cool little gadget!!
Source: Biometric Personal Diary