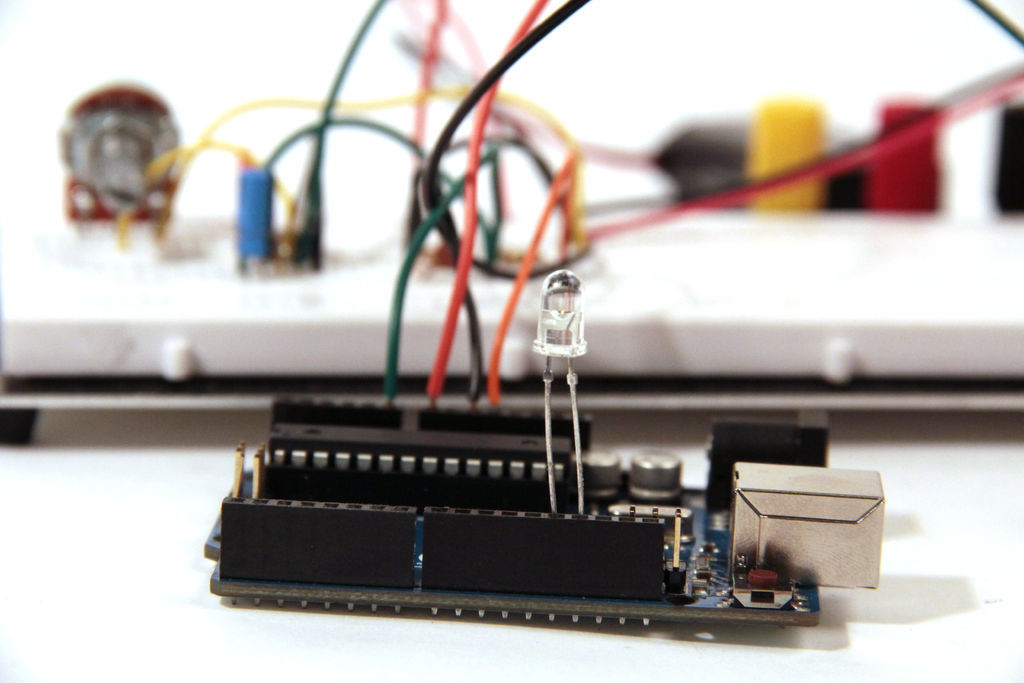
The Arduino is a pocket-sized computer (also called a “microcontroller“) that you can program and use to control circuits. It interacts with the outside word through sensors, leds, motors, speakers… even the internet; this makes it a flexible platform for lots of creative projects. Some popular uses include:
– programmable light displays that respond to music or human interaction
– robots that use information from sensors to navigate or perform other tasks
– unique, customizable controllers and interfaces for music, gaming, and more
– connecting real world objects to the internet (twitter is especially popular)
– anything interactive
– automating and prototyping
There are tons of amazing Arduino Projects posted online, here are some of my favorites:
Twitter Mood Light by RandomMatrix, a light that changes color depending on what kinds of emotional words are trending on Twitter
Nebulophone Synth by Bleep Labs:
Singing Plant by Mads Hobye:
Polargraph Drawing Machine by Sandy Noble:
Flame-Throwing Jack-O-Lantern by Randy Sarafan and Noah Weinstein:
Rain-sensitive light up umbrella by snl017
There are quite a few microcontrollers on the market today, but the Arduino stands apart from the rest becuase of the active online community around it. If you search on google or youtube, you will find tons of great project ideas and information to get you started. Even though you might not have any experience programming or working with a microcontroller, the Arduino is simple to get up and running, and it’s a fun way to learn about electronics through experimentation.
This Instructable was written for an Intro to Arduino class I’m teaching at Women’s Audio Mission this month. I’ll be posting Instructables on more advanced Arduino topics and on building customizable MIDI controllers with Arduino in the next few weeks as the class continues. More info about Arduino can be found on the Arduino reference page.
For this class you will need:
(1x) Arduino Uno Amazon or you can pick one up at a local Radioshack
(1x) usb cable Amazon
(1x) breadboard Amazon
(1x) jumper wires Amazon
(4x) red LEDs Digikey C503B-RCN-CW0Z0AA1-ND
(4x) 220Ohm resistors Digikey CF14JT220RCT-ND
(1x) 10kOhm resistor Digikey CF14JT10K0CT-ND
(1x) tact button Digikey 450-1650-ND
(1x) 10kOhm potentiometer Digikey PDB181-K420K-103B-ND
(1x) RGB LED (common cathode) Digikey WP154A4SUREQBFZGC
Tips on ordering stuff: Digikey is usually the cheapest place you can get components and they ship really fast, but sometimes it’s difficult to find what you’re looking for because they have so much stuff. If Digikey gives you too much trouble try Jameco, you’ll pay a few cents more per component, but it’s a lot easier to navigate their inventory. If you need stuff right away, you can find components, breadboards, cables, and Arduinos at your local Radioshack, but you will usually pay a bit more. Adafruit and Sparkfun are good online store for finding cool sensors or other Arduino accessories and they usually have tutorials and sample code for their more complicated parts. Amazon is also a good place to check, right now they have Arduino Unos for $22, which is the cheapest I’ve ever seen them.
In this Instructable I’ll be using 123D circuits to demonstrate and simulate the circuits, the embedded circuit simulations work best with the Chrome browser.
Step 1: What is Arduino
First we’ll take a look at all the parts of the Arduino. The Arduino is essentially a tiny computer that can connect to electrical circuits. The Arduino Uno is powered by an Atmega 328P chip, it is the biggest chip on the board (see the image note on the image above). This chip is able to execute programs stored in its (very limited) memory.
We can load programs onto the chip via USB using the Arduino IDE (download this if you haven’t already). The USB port also provides power to the Arduino. Alternatively, we could power a programmed board using the power jack, in that case we do not need a USB connection.
The Arduino has a few rows of pins that we can plug wires into. The power pins are labeled in the image above. The Arduino has both a 3.3V or 5V supply; in this class we will use the 5V supply, but you might find some chips or components that require 3.3V to run, in that case the 3.3V supply will be useful. You will also find some pins labeled “GND” on the Arduino, these are ground pins (ground is the same thing as 0V). Electrical current always flows from some positive voltage to ground, so these pins are useful for completing circuits, we will use them often.
The Arduino has 14 digital pins, labeled 0-14, that connect to circuits to turn them on or off, or to measure buttons and other 2-state circuits (a button is two state because it is either pressed or not pressed, as opposed to a dial, which has a range of possible states). These pins can act as either inputs or outputs, meaning they can control a circuit or measure it.
Next to the power connections are the Analog input pins, labeled A0-A5. These pins are used to make analog measurements of sensors or other components. Analog inputs are especially good for measuring things with a range of possible values. For example, an analog input pin will let us measure the amount of flex of a flex sensor, or the amount that a dial has been turned. You can use an analog input to measure a digital component (like a button) or even act like a digital output, they are basically digital pins with extra powers.
Step 2: How to Use a BreadBoard
Breadboards let us make temporary electrical connections between components so that we can test circuits before we permanently solder them together. This whole class will be done on a breadboard so we can reuse components and make quick changes to a circuit.
Breadboards have rows of holes that you can plug wires or other electrical components into. Some of these holes are electrically connected to each other through metal strips on the underside of the breadboard. Here’s how the connections work:
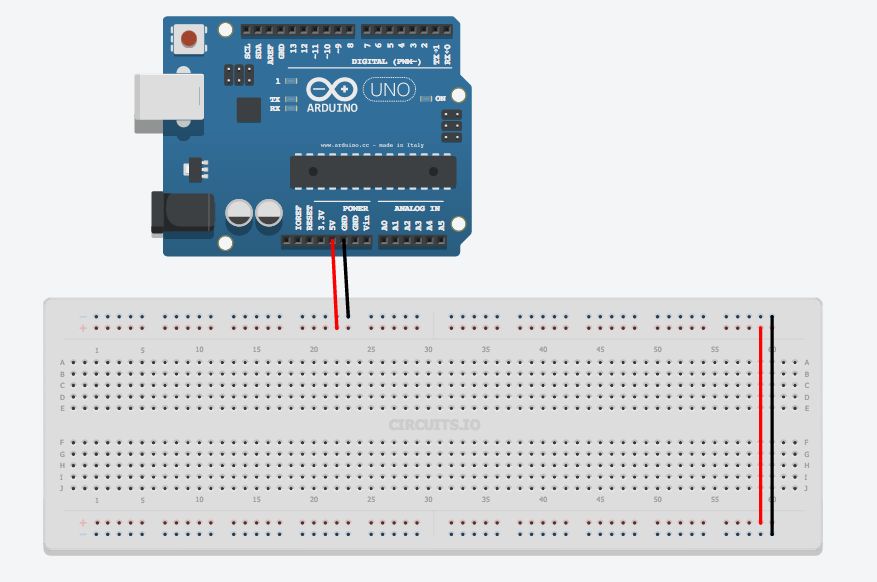
One each side of the breadboard, two rows of holes are connected across the entire length of the board (images 1 and 2 above). Generally, you will connect these long “rails” to 0V (also called “ground”) and whatever voltage you are using for power (in this class we will use 5V from the Arduino), so that those connections are available everywhere on the board. In this case, the first thing you want to do is wire up these connections to your Arduino as shown in image 4, notice how I connected ground to the row labelled “-” and 5V to the row labelled “+”, your breadboard may or may not be labelled. Note: sometimes these side strips will only extend halfway across a longer breadboard, use wires to complete the connection (image 5).
The rest of the holes in the breadboard are grouped into rows of five in the center of the breadboard (image 3). This is where you will connect electrical components to each other to form circuits.
Step 3: Turn on LED with 5V
As I explained before, electrical current flows from high voltage to low voltage. In this class we’ll be powering everything off of 5V from the Arduino, so current will flow from 5V out of the Arduino, through our circuit, and back into the Arduino’s “ground” pin. The first thing we’ll power up is an LED.
The circuit that turns on an LED involves two components: a resistor and an LED. The schematic representation of the circuit is shown in image 4 above. The resistor is represented by a rectangular box (you might also see it represented by a zigzag line). The LED is represented by a triangle with a line, and usually some arrows pointing outward that represent light coming out of the component.
So why do we need the resistor in this circuit? This resistor is called a current limiting resistor, this means the resistor limits the amount of electrical current that flows through the LED. Every LED is rated for a certain amount of current, if you go over that amount you will probably damage the LED. Using Ohms Law, we can calculate the value of the current limiting resistor we should use with our LED.
Ohms Law is very simple, it says that there is a linear relationship between current and voltage in a resistor: increasing the voltage across a resistor will increase the current that flows through it. Specifically it says:
V = I * R
where
V = voltage across the resistor
I = current through the resistor
R = resistance – this is what we want to calculate
so if we know the values of V and I, we can calculate the correct R for our circuit
First we need to calculate the voltage across the resistor. In the circuit shown in image 4, a total of 5V is applied to the circuit. Most of the 3mm or 5mm LEDs you will use require 3V to light up, so the remaining 2V (5V – 3V = 2V) is applied across the resistor.
Next we calculate the current going through the resistor. Most 3mm or 5mm LEDs run at full brightness at about 20mA of current; going over this could damage the LED, and going under this will make the LED glow dimmer (but does no harm). Assuming we want to run our LED at 20mA, we know that the same amount of current must run through the resistor since the components are wired together in series. This leaves us with:
2V = 20mA * R
2V = 0.02A * R
R = 100 Ohms
So 100 Ohms is the absolute minimum resistance we need to make sure that we do not damage the LED. To be safe, it’s a good idea to use something a little higher, just in case your LED has slightly different ratings that what I’ve used here. I like to use 220Ohms because I always seems to have a lot of those around. If you know the ratings of your LED (you can find it on the LED’s datasheet) and you want to do this calculation yourself, you can also try using an online calculator.
Next we’ll wire up the LED on the breadboard. Plug the resistor and the LED into the central part of the breadboard so that the longer lead of the LED is electrically connected to one of the resistor’s leads (image 3). Then connect the remaining end of the resistor to 5V and the remaining end of the LED to ground. You should see the LED light up.
Some things to try:
Notice how the LED’s leads are not the same length, this is because LEDs need to be in a circuit in a specific orientation in a circuit. Current always flows through LEDS from the long lead to the short lead (in the schematic representation, current flows in the same direction that the triangle points, here is a nice graphic of that). Try flipping the orientation of your LED – you should find that the LED will not light if it is placed in the circuit backwards.
Resistors, on the other hand, do not have an orientation, you’ll notice that their leads are the same length (their schematic representation shows this symmetry as well). Flipping the orientation of a resistor in a circuit will have no effect on the circuit – try it.
Now try swapping the position of the LED and the resistor in the circuit (image 5). You should find that this also does not effect the circuit. It does not matter if the current limiting resistor is on one side of the LED or the other, it will still be effective in protecting the LED against excess current
For more detail: Beginner Arduino


