in the Coffee’s era, the current era is called the third wave coffee era. In previous eras, coffee quality was not as much attention as it is today by connoisseurs. Specialty coffee offers quality preserved from farm to coffee in the cup. One of the measurable variables that play an important role in brewing coffee is the yield weight or weight of the brewed coffee and the brewing time. Unfortunately, not all espresso machines have the ability to measure yield weight, so additional scales are needed.
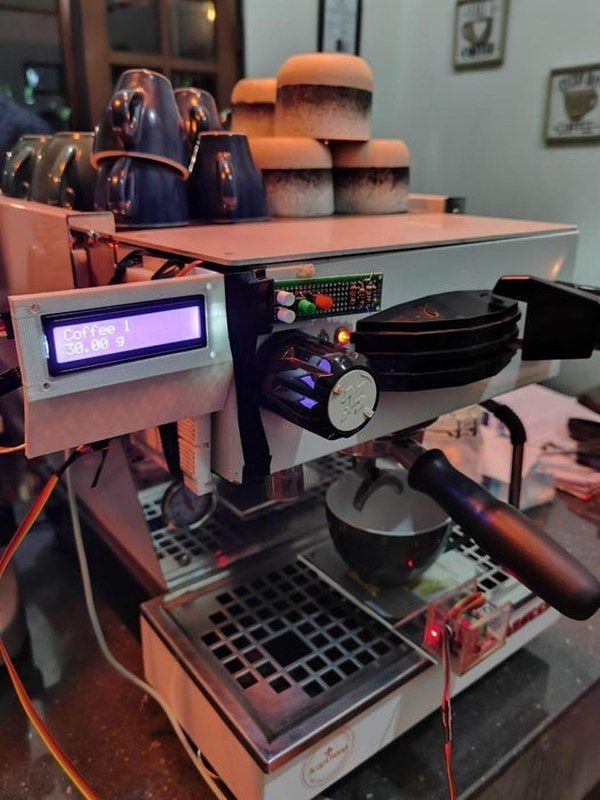
In a shop that I own, there is an espresso machine with the La Marzocco Linea Mini brand. The coffee produced by this machine is very good, but to maintain consistency of taste, baristas must have good enough skills to get the same yield weight every time they brew coffee. That’s why we both plan to create an automatic system that allows the machine to stop brewing automatically when it reaches the desired target yield weight, and in addition, the barista can also see the total brewing time.
This tools are gonna help barista brewing with the consistency of coffee’s weight. with tolerancy 0.2 gram.
Step 1: Prepare the Tools
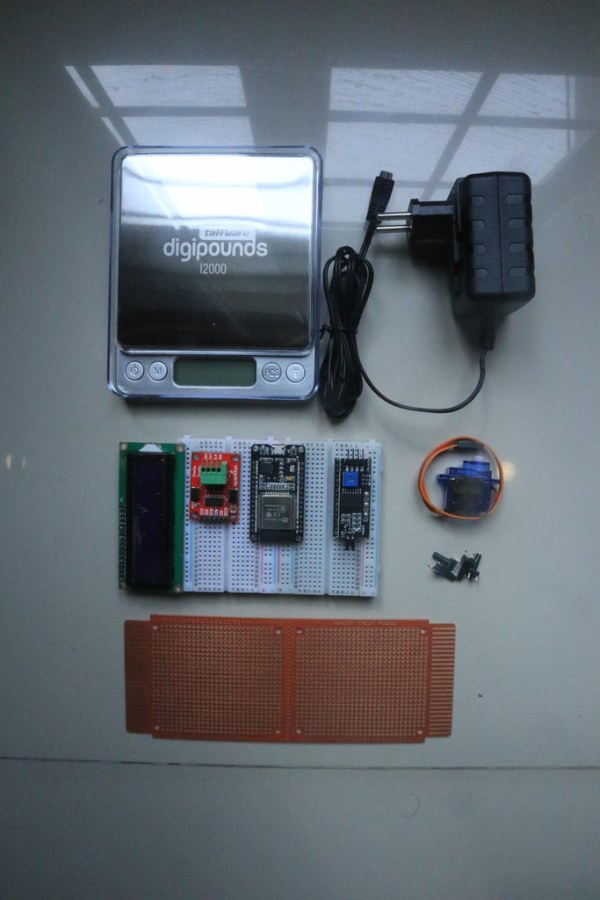
Terdapat beberapa alat dan komponen yang harus dipersiapkan. yaitu:
1. ESP32 WROOM Devkit V1
2. Load Cell dari timbangan 0.1 gr
3. Amplifier Sparkfun NAU7802 Qwiic Scale
4. LCD 16X4
5. Module I2C
6. Servo 9g
7. Push Button
8. Bread Board
9. Adaptor 5v
10. Custom Acrylic
Step 2: Take the Old Common Weight Scale
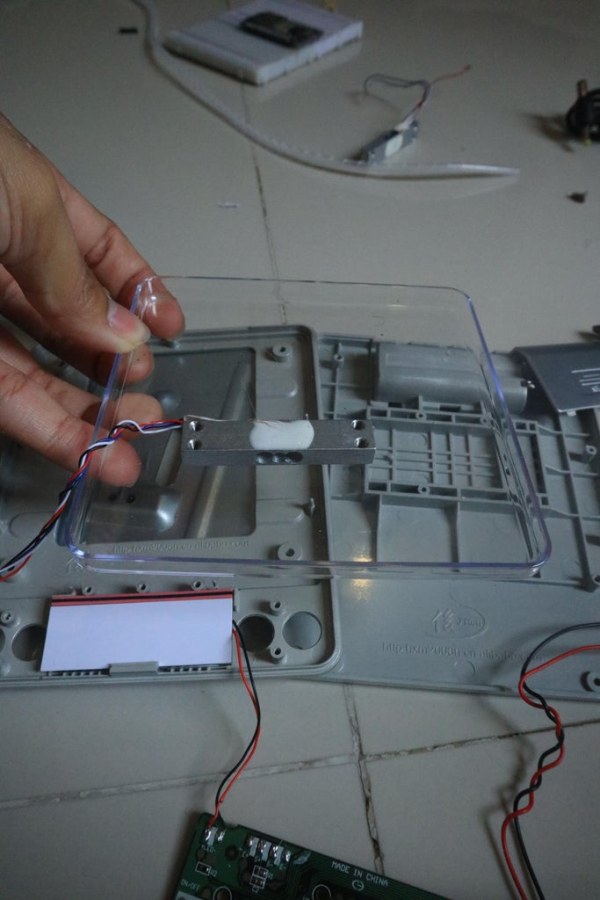
Choose the Old Common Weight Scale that have spec 0.01 gram. Disamble the old Common Weight Scale. Take the Load Cell. Becarefull of the Rainbows Load Cell Wire
There are White, Red, Blue, And Black. On the Load Cell, Carefull for the Protector Glue, becuase it can effect to the quality of Load Cell, The Precision.
Step 3: Connect the 4 Rainbow Wires to the NAU7802 Qwiic Scale
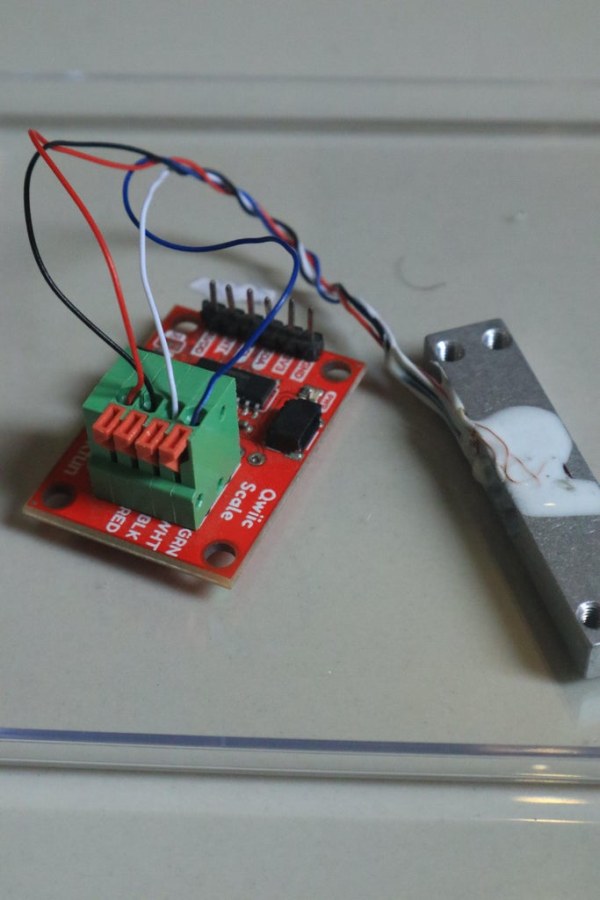
Take the Amplifier Component, Spark Fun NAU7802 Qwiic Scale. And then Connect the Wires. There are 6 pins, but we only use 4 pins (Ground, 3V3, SDA, and SCL). The Amplifier should Connect to the Microcontroller (ESP32 DEVKITV1).
Step 4: Reassembling the Load Cell
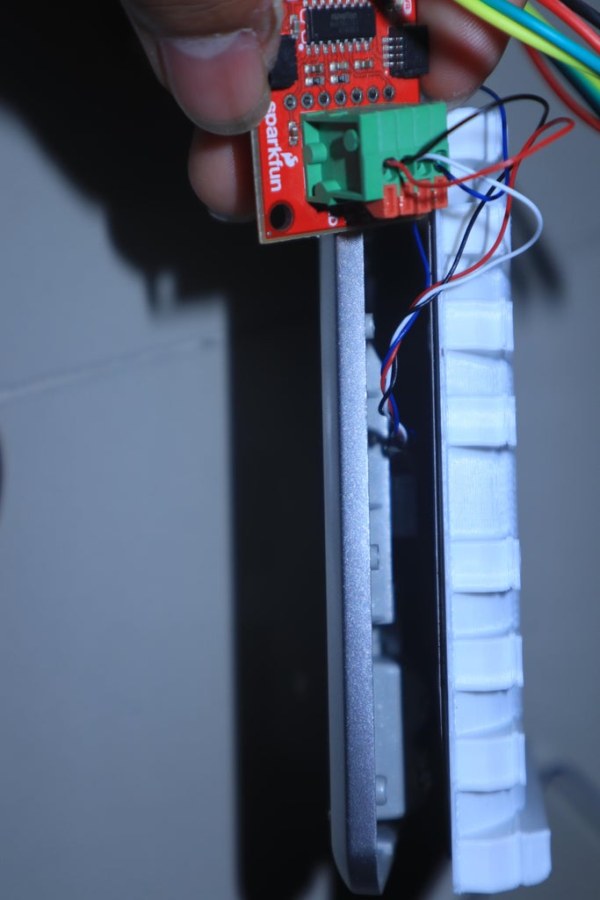
Reassemble the Old Load Cell with Custom Acrylic (if you want it, we’re gonna give you the DXF File of the Custom Acrylic. but if you dont want it, you can use the Old Casing Weight Scale, the first picture is using 3d print)
Download Down Here for DXF and DWG file.
Step 5: Connect the Amplifier to the Microcontroller
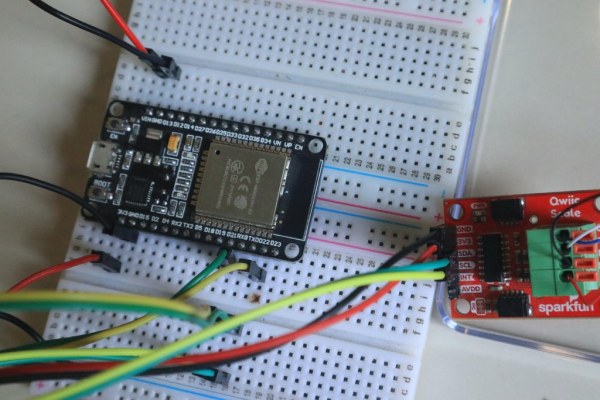
There are 6 pins:
1. SDA
2. SCL
3. 3V3
4. GND
5. INT
6. AVDO
but we need 4 pins, there are :
1. 3V3 as a power
2. GND as a Ground
3. SDA as a serial Data
4. SCL as a serial Clock
Step 6: Setting LCD I2C
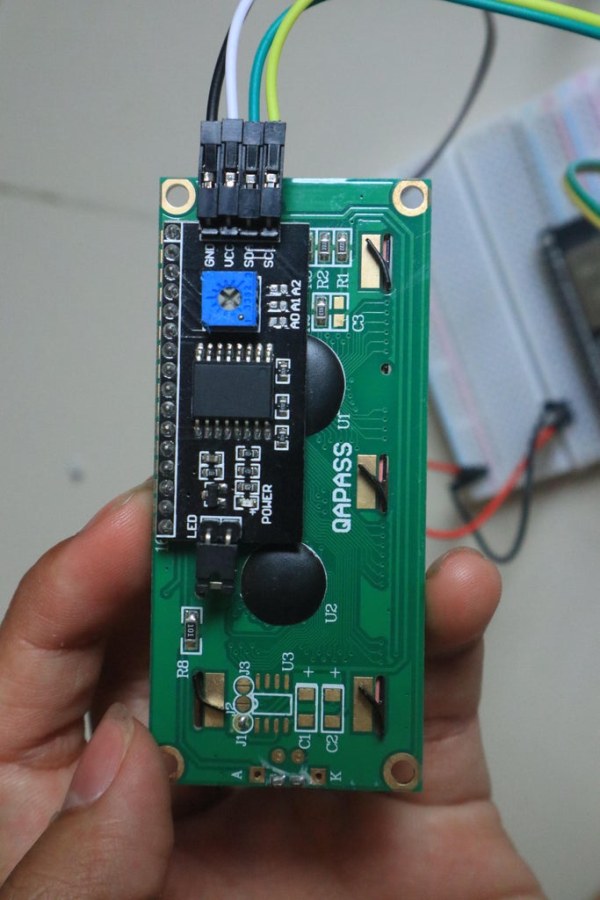
The function of LCD I2C is a user interface for this tools. we are going to use the I2C Module to save on pin usage. if we dont use I2C Module, we’re gona connect 14 – 16 pin to the Microcontroller.
Connect LCD 16 X 2 With Module I2C. Then setting pin I2C Like Amplifier Sparkfun to the ESP32. Pin Module I2C also has a:
1. VCC as a power
2. GND as a ground
3. SDA as a Serial Data
4. SCL as a Serial Clock
to mount the lcd on the machine, I use 3d printed lcd mount. You can download the stl file and print it by your self, or create more fancyful lcd mount on your own
Step 7: Connect the Micro Servo
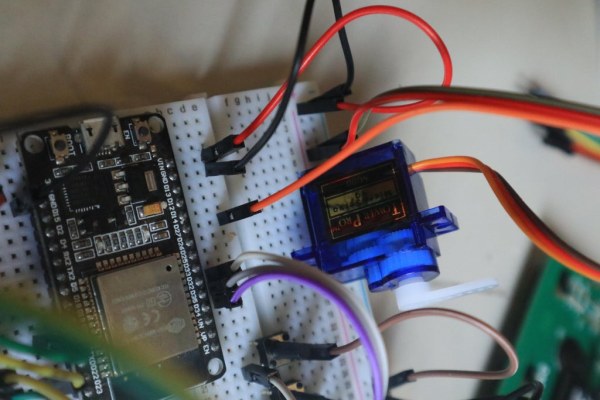
Micro Servo as an Output. Inside the Espresso Machine, there is a Switch Button to active the brew. Using Micro Servo as an Output to click the Switch. when the target yields are ready, the tools are ready to set the Micro Servo to write some move that can click the switch button.
Connect the Micro Servo to ESP32 DEVKITV1. Have a 3 pins :
1. Brown = Ground
2. Red = VCC
3. Orange = Output
Step 8: Multiple Push Button With 1 Analog Pin and 1 Interrupt Pin.
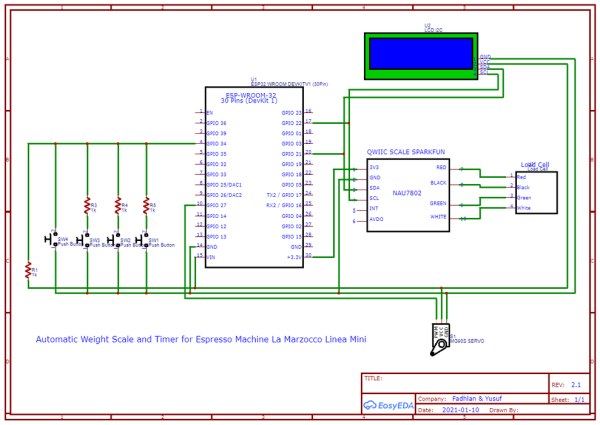
Every push button are connect to Microcontroller through different resistor value. Connect to Analog pin and interrupt pin. Look at the Left side of Schematic.
Step 9: Coding
Here’s the Coding in Arduino’s File. you can download it for free and you can develop for the future.
Step 10: La Marzocco Line Machine
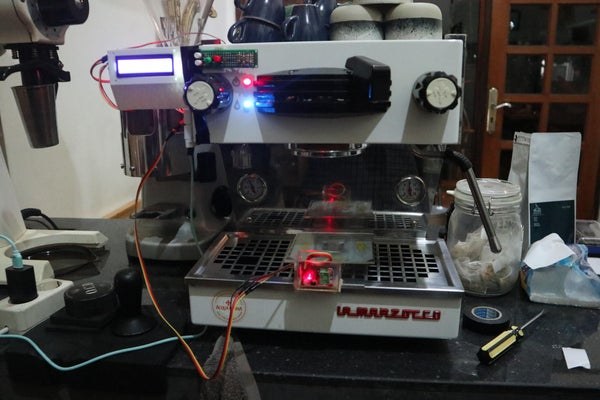
Set up the Espresso Machine. open the top cover of machine. remember this machine is an additional for La Marzocco Line mini. so, we’re open the machine just for adding Micro Servo. Micro Servo will write some move and click the Switch Button for Automatic Brewing.
Step 11: Switch Button
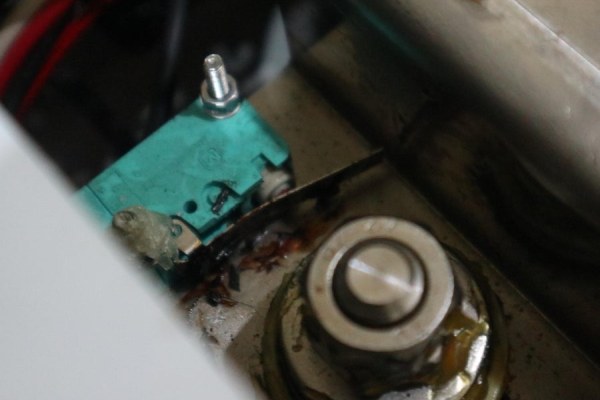
First Picture. There is Switch Button. We’re gonna Manipulate the Switch Button with Micro Servo. you will need unting for Micro Servo like Second Picture. you can to download the stl file and print it with your 3d printer
Mount the Micro Servo. and put it in the machine.
Step 12: Ready for Brew !
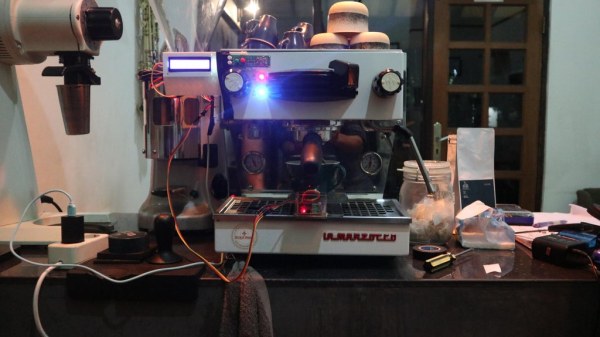
After all step. the machine already to brew. you will need calibrate the weight for the first time. we’re gonna show you the demonstration video.
Step 13: The Demonstration
Here’s our Demonstration for Automatic Weight Scale and Timer for Machine Espresso La Marzocco Linea Mini
Source: Automatic Weight Scale and Timer for Machine La Marzocco Linea Mini