Summary of Automated LED stairs using arduino
Summary: I built an open-source LED stair lighting system based on interactivefurniture.de, using an Arduino Pro Mini, M5451 LED driver chips, and NorthStar 12V LEDs. The project supports up to 34 LEDs per controller, uses a PING sensor for activation, and includes schematics, perfboard wiring with screw terminals, and Arduino/Processing code (which relies on Lightuino code). The author recommends NewPing instead of an outdated Ping library and notes the Eagle schematic may need edits for PCB use.
Parts used in the LED stairs project:
- Arduino Pro Mini (Arduino Mini Pro)
- M5451 LED driver chip
- NorthStar 12V LED lights
- PING sensor (ultrasonic sensor)
- Bell wire rated for indoor use
- Screw terminals
- Perfboard
- Power supply (12V for LEDs — implied by use of 12V LEDs)
After seeing the lovely LED stairs at interactivefurniture.de, I decided to make my own, open-source version. Here is a video of them in action. I am not an expert videographer and cannot do the stairs full justice, but they came out exactly as I wanted.
In this clip I use a very simple lighting sequence without any dimming. However it is easy to program the stairs to do any light sequence desired, with up to 34 LEDs per controller.
My build was featured in Make: Online.
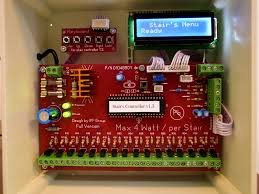
This is the schematic. I wired it up with perfboard and used screw terminals to connect to the external LEDs and PING sensor. The Eagle schematic file is here and should have the correct footprint for the chips; if you plan to make a PCB version it would need to be edited and checked, as I did not use it for that.
My code for the Arduino Processing environment can be found here. You can edit this to add more lights, or to use a different lighting sequence. This code uses the Lightuino source code to drive the M5451 and I am very grateful to have it, as it saved me writing hardware-level code. NOTE: The Ping library here is outdated and uses the BYTE keyword that is no longer supported by recent Arduino releases. I recommend using the NewPing library instead.

Materials:
- Arduino Mini Pro. Any Arduino should work; this was the right size and price for me.
- M5451 (available at multiple suppliers; use Octopart.)
- NorthStar 12V LED lights
- Bell wire rated for indoor use. Get more than you think you need.
For more detail: Automated LED stairs
- What Arduino was used in the project?
An Arduino Pro Mini (Arduino Mini Pro) was used, though any Arduino should work. - Which LED driver chip is used?
The project uses the M5451 LED driver chip. - How many LEDs can each controller drive?
Each controller can drive up to 34 LEDs. - Which LED lights were used?
NorthStar 12V LED lights were used. - What sensor is used to activate the stairs?
A PING ultrasonic sensor is used for activation. - What wiring and mounting method was used?
The builder wired on perfboard and used screw terminals to connect external LEDs and the PING sensor. - Is the provided Eagle schematic ready for PCB manufacturing?
The Eagle schematic file exists but would need editing and checking for PCB use since it was not used for PCB fabrication. - What code/library is recommended for the ultrasonic sensor?
The author recommends using the NewPing library instead of the outdated Ping library used originally.