Summary of Arduino Weathercloud Weather Station
This school project details a DIY internet-connected weather station built in Bratislava, Slovakia, for approximately 140€. The system measures temperature, humidity, pressure, rainfall, wind speed, and UV index, calculating additional meteorological values. Data is transmitted to the Weathercloud platform via GET calls every ten minutes using an Arduino. The build includes custom-made components like a solar radiation shield and specific sensor boxes for UV monitoring, all housed within IP65 junction boxes.
Parts used in the Internet-Connected Weather Station:
- Arduino microcontroller
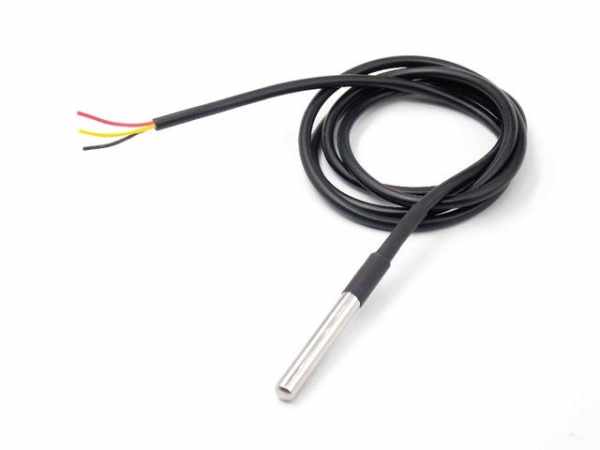
- DS18B20 temperature sensor
- Solar radiation shield (custom-built)
- Terminal box (IP65 plastic junction box)
- UV sensor box with transparent cover
- UVM-30A UV sensor
- Rain gauge
- Anemometer (wind gauge)
- Humidity and pressure sensor
- 14-core cable
- Battery drill
- Soldering iron
- Multimeter
I made a weather station connected to internet. It measures temperature, humidity, pressure, rainfall, wind speed, UV index and it calculates few more important meteorological values. It then sends this data to weathercloud.net, which has nice graphics and UX. It also has a weather webcamera. It cost me around 140€. I made this station as my school project. The station is mounted at my school in Bratislava, Slovakia. Here is the current data.
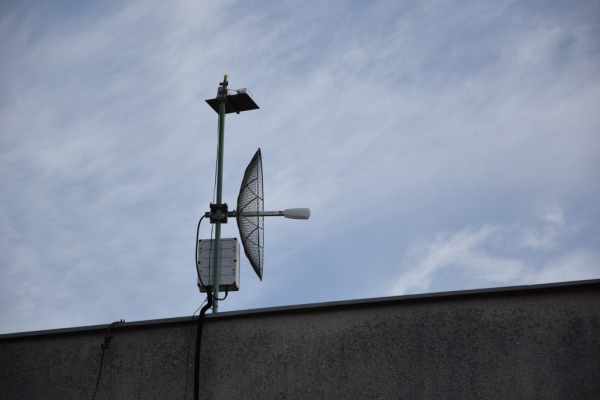
Photo credit: Mimo magazín. Used with permission.
Note: I’ve been working on this project for over two years now. This instructable is bassicaly just a reupload of an instructable that I published one year earlier, but there have been so many changes that I decided to make a new instructable. Also, no one ever looks at one-year-old instructables.
UPDATE 14.12.2018: Hey there! I added an annemometer (wind gauge) to my station. There is some new text and photos so be sure to check that out.
Step 1: Weathercloud

First of all, what is Weatherclud? Weathercloud is a large network of weather stations reporting data in real time from all over the world. It’s free and there are more than 10 000 weather stations connected to it. Firstly, I had my own HTML website where all the data were sent but making your own website and graphics is hard and it’s much easier to just send all the data to a big cloud platform which has nice graphics and stable servers. I searched how to send data to weathercloud and I found that you can accomplish that easily by a simple GET call. The only problem with Weathercloud is that with a free account it lets you send data only every ten minutes but that shouldn’t be a problem for most uses. You’ll need to make an Weathercloud account in order to make it work. Then you’ll need to create a station profile on their website. When you create your weather station profile on Weathercloud, you are given the a Weathercloud ID and a Weathercloud KEY. Keep these because the Arduino will need them to know where to send data.
Step 2: Parts List
ESTIMATED PRICE: 140€/150$
Step 3: Tools
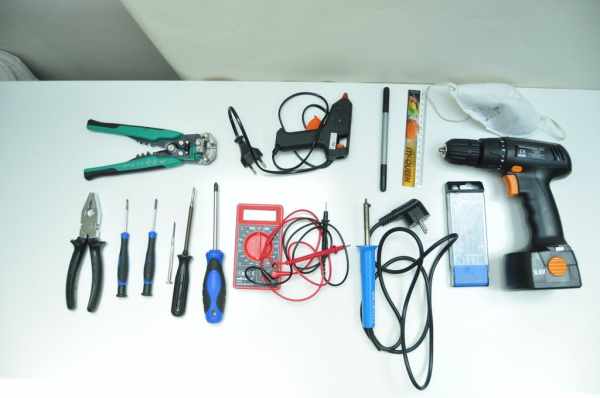
These tools could come in handy:
wire stripper
battery drill
soldering iron
pliers
screwdrivers
glue gun
multimeter
saw
tree drill bit
file
Step 4: DS18B20 Solar Radiation Shield
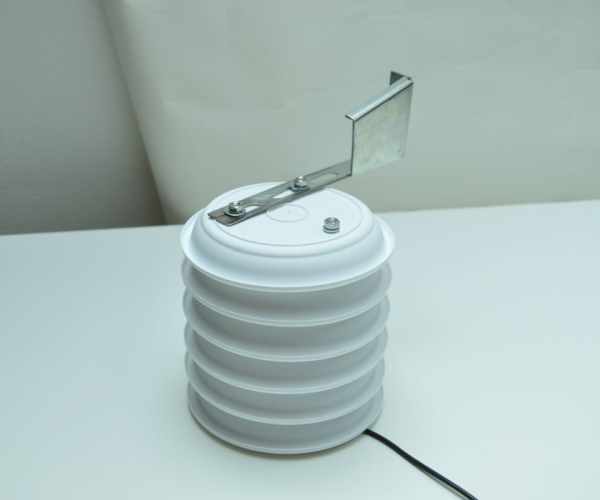
A solar radiation shield is a very common thing used in meteorologic stations to block direct solar radiation and therefore reduce errors in the measured temperature. It also acts as a holder for the temperature sensor. Radiation shields are very useful but are usually made from steel and they are expensive so I decided to build a shield of my own. I made an instructable that shows how to make a radiation shield like this. Here is the instructable.
I also found a video thats shows the exact same procces so you can use that:
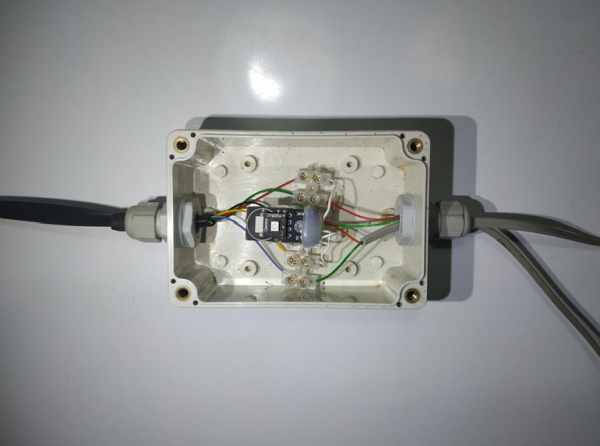
Step 5: Terminal Box
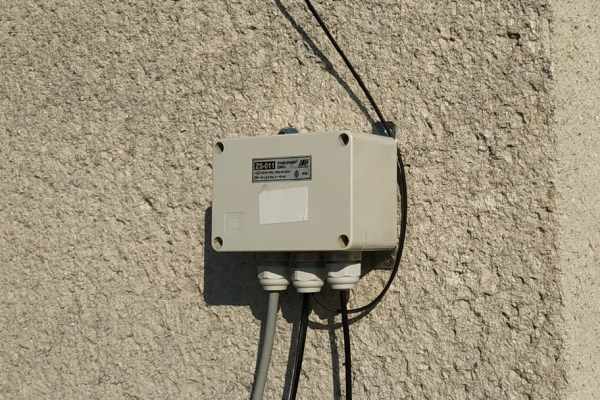
The terminal box is the center of the station. The main 14-core cable connects it to the server box. The cable from DS18B20 goes into it. The cable from the UV box goes into it. It also hosts the humidity and pressure sensor. When you’re selecting a terminal box, you can use any IP65 plastic junction box that has over 10x5x5cm (4″x2″x2″).
Step 6: UV Sensor Box
The UV sensor box hosts the UVM-30A UV sensor and it’s also a middle point between the main terminal box and the rain and wind gauges. The UV sensor box can be any plastic IP65 box with a fully transparent cover.
Source: Arduino Weathercloud Weather Station
- How does the station send data to the cloud?
The station sends data to the Weathercloud platform using a simple GET call. - Can I use a free account on Weathercloud?
Yes, but a free account only allows you to send data every ten minutes. - What credentials are needed for the Arduino?
You need a Weathercloud ID and a Weathercloud KEY generated when creating a station profile. - Why is a solar radiation shield necessary?
It blocks direct solar radiation to reduce errors in measured temperature and acts as a holder for the sensor. - What specifications should the terminal box meet?
It should be any IP65 plastic junction box larger than 10x5x5cm (4"x2"x2"). - Does the UV sensor box require a specific material?
It must be a plastic IP65 box with a fully transparent cover. - What tools are recommended for this project?
Recommended tools include a wire stripper, battery drill, soldering iron, pliers, screwdrivers, glue gun, multimeter, saw, tree drill bit, and file. - Is the cost of the project high?
The total estimated cost is around 140€ or 150$.